Introduction to Python and JupyterLab
This lesson introduces Python and JupyterLab for beginners, which covers how to install Anaconda, launch JupyterLab, create notebooks and run your first Python code in an interactive environment.
Python tutorial, Beginner Python, JupyterLab notebooks, Install Anaconda, Python setup
Approximate time: 30 minutes
Learning objectives
In this lesson, we will:
- Describe what Python and JupyterLab are and do
- Familiarize ourselves with the JupyterLab interface
- Interact with Python within JupyterLab
Overview of lesson
This lesson includes instructions on how to install Python, open a JupyterLab notebook and run Python code on your own. We will be using Anaconda and JupyterLab so that you can work within the notebook ecosystem, which allows you to see the results of your code immediately. These same tools are widely used across fields for research and data scientists to explore datasets, document code and share results with collaborators.
By the end, you will have a working Python environment that you can reuse for future projects, whether you are automating a task or starting a larger analysis!
What is Python?
Python is a programming language that allows the user to write code to execute tasks. Python is a great language for beginners due to its simplicity and readability! It is also powerful enough to be used by experts to answer complex, real world questions. Therefore many fields, such as data science, machine learning, artificial intelligence, bioinformatics and many more have adopted Python as a tool for their work.
The Python environment allows:
- Efficient handling of large datasets
- Extensive libraries for a multitude of tasks
- Graphical interface
- Simplistic syntax and memory management
- Visualization methods
Why use Python?
Python has a large ecosystem of libraries that can be used for a wide range of applications, from cleaning dataframes (data wrangling) to building machine learning models.
Among its many capabilities, Python is particularly well-suited for:
- Data handling, wrangling and storage
- Statistical analyses with many graphical techniques
- Accessibility as it can be installed on any computer and it’s free!
In addition, Python has a large and active community, which means there are many resources available for learning and troubleshooting.
Anaconda
Anaconda is a popular distribution of Python. When you install Anaconda, you get a Python environment as well as many useful libraries and tools for data science and scientific computing. It also provides an easy way to manage Python environments and packages.
You should already have installed Anaconda onto your computer prior to today’s lesson. You should now have an application called “Anaconda Navigator”.
Python is installed along with Anaconda, so you do not need to install Python separately.
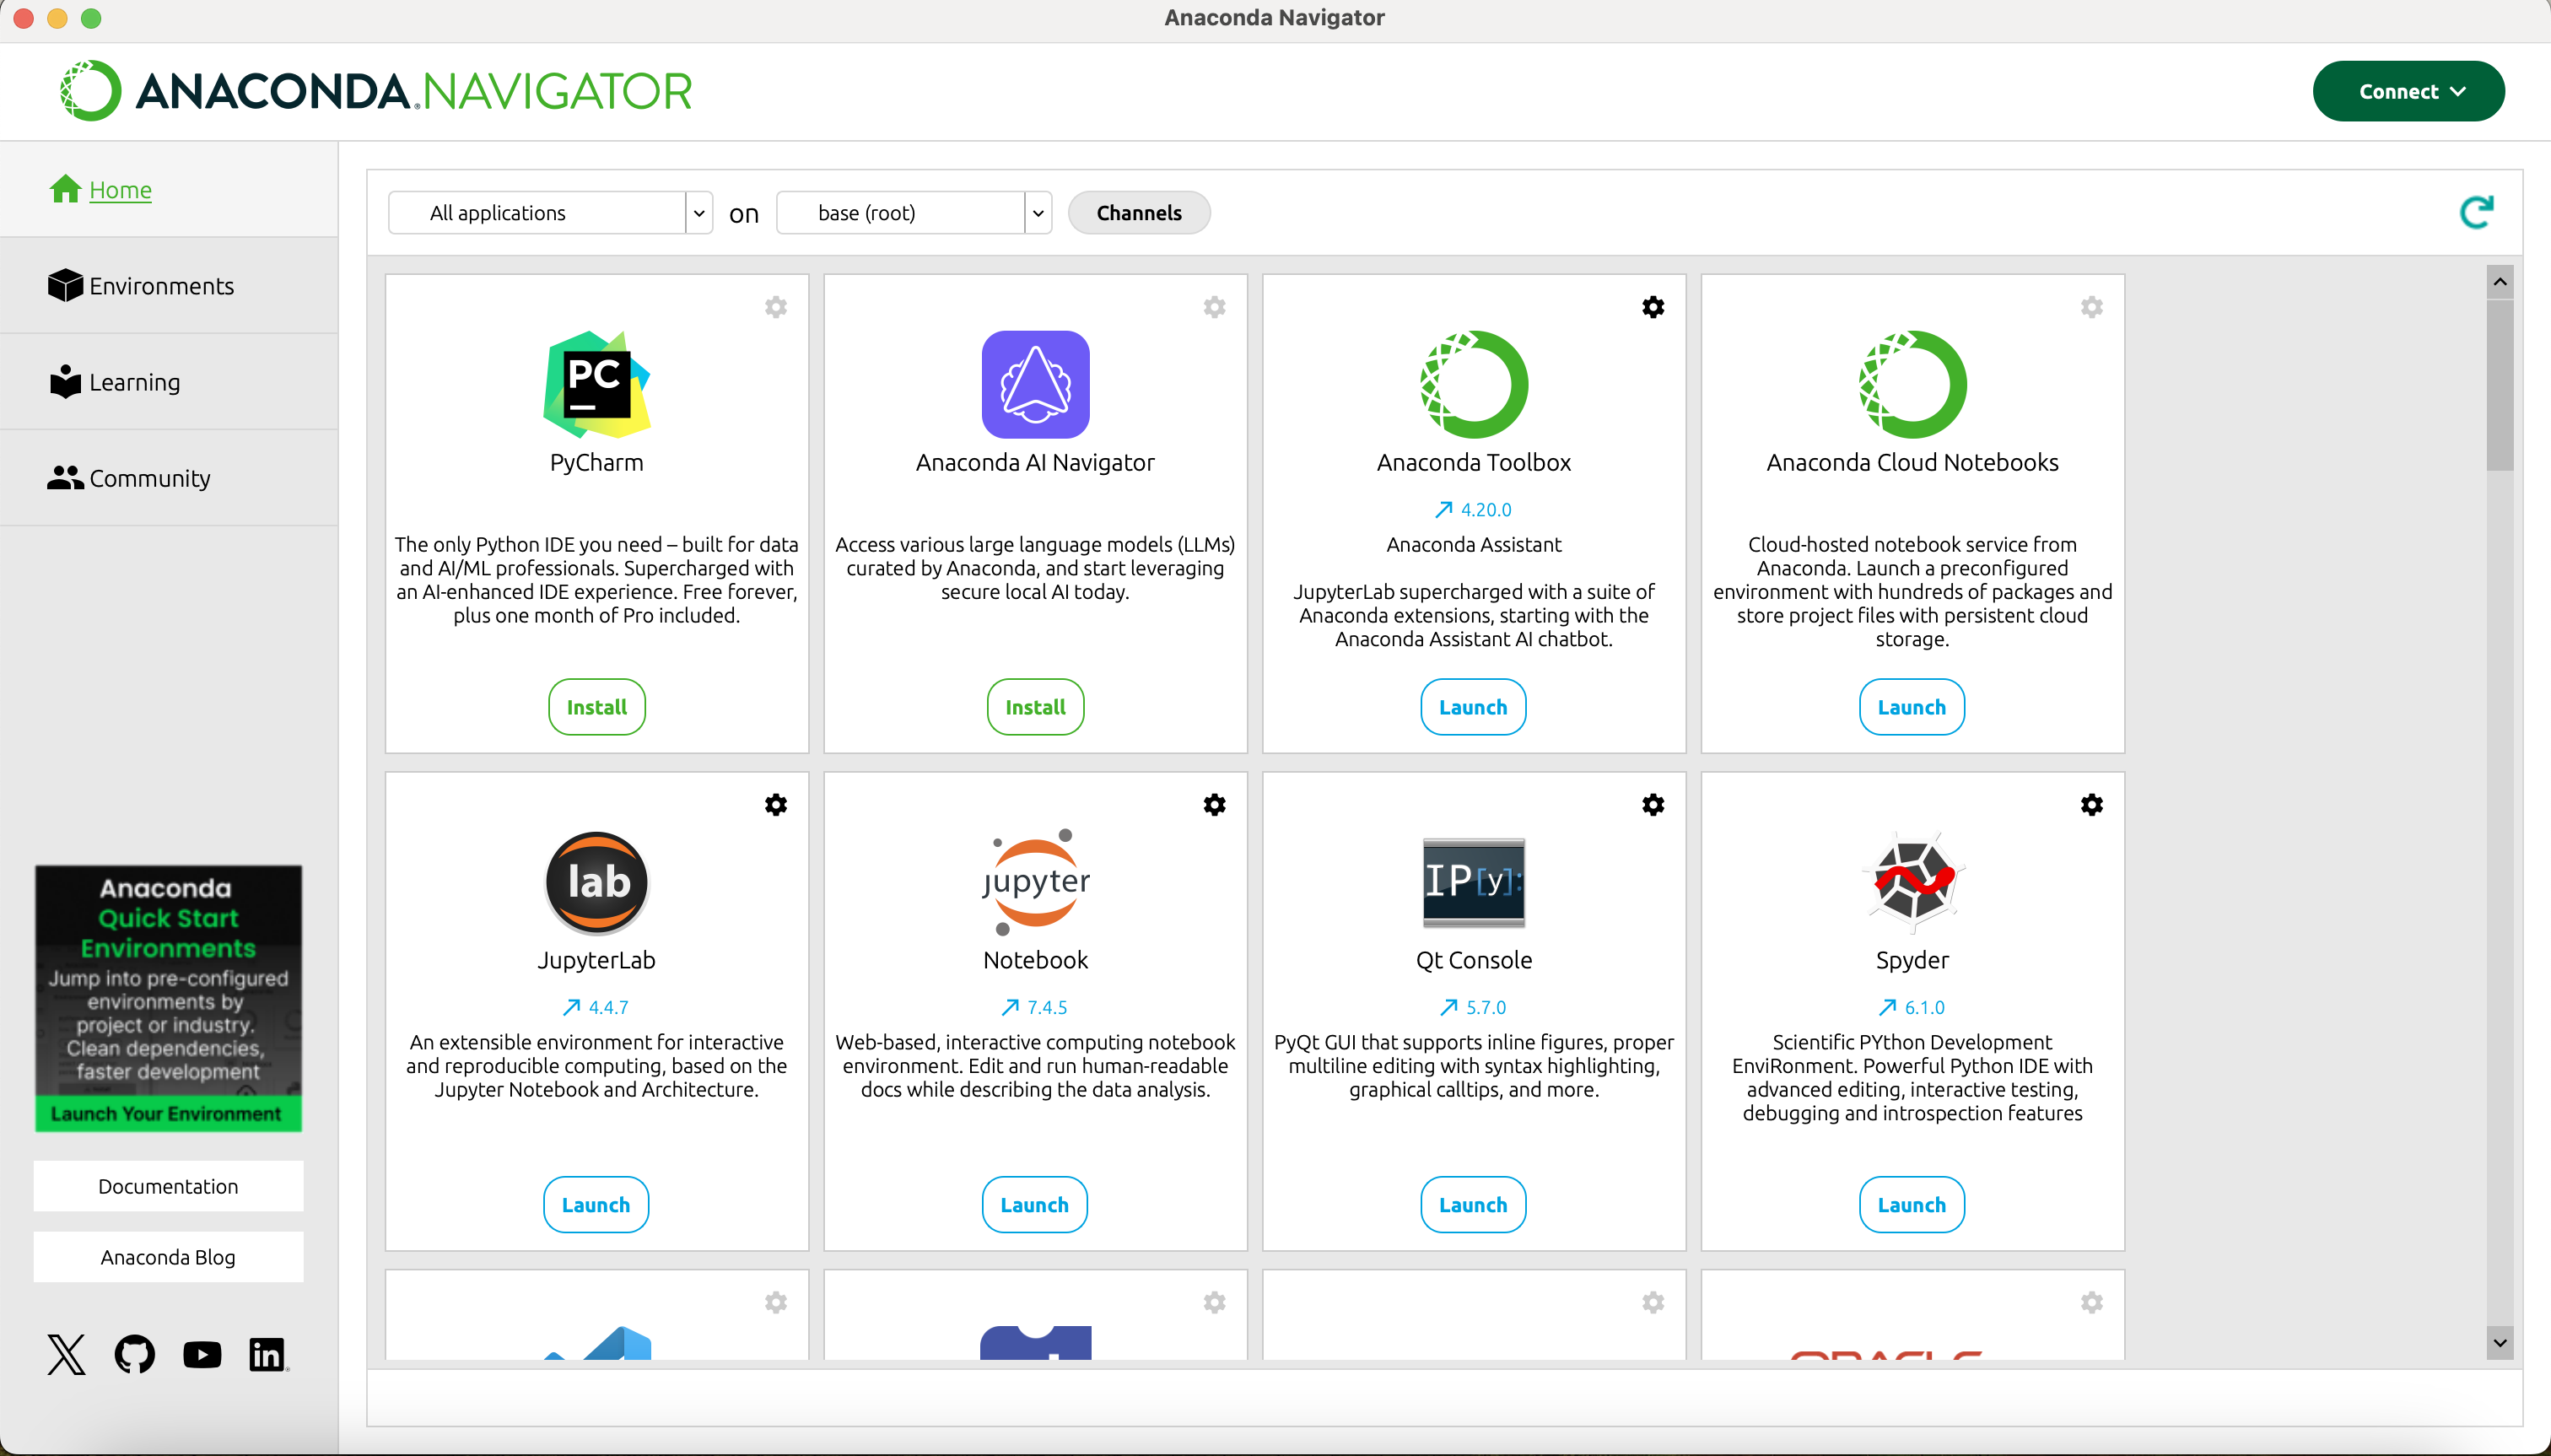
Anaconda Navigator
We can get started by opening the application Anaconda Navigator. This program allows us to interface with Python environments and programs.
When opening the application, the screen should look something like this:
JupyterLab
One of the applications downloaded with Anaconda is JupyterLab. JupyterLab allows users to create interactive environments (notebooks) that allow you to create and share your Python code and visualizations. JupyterLab is widely used for sharing results and running analyses since you can see intermediate results from code chunks through the notebook.
JupyterLab allows you to write and execute code in a more interactive way than just running scripts in a terminal. You can write code in cells, run those cells and immediately see the output. This makes it easier to experiment and test your code as you go.
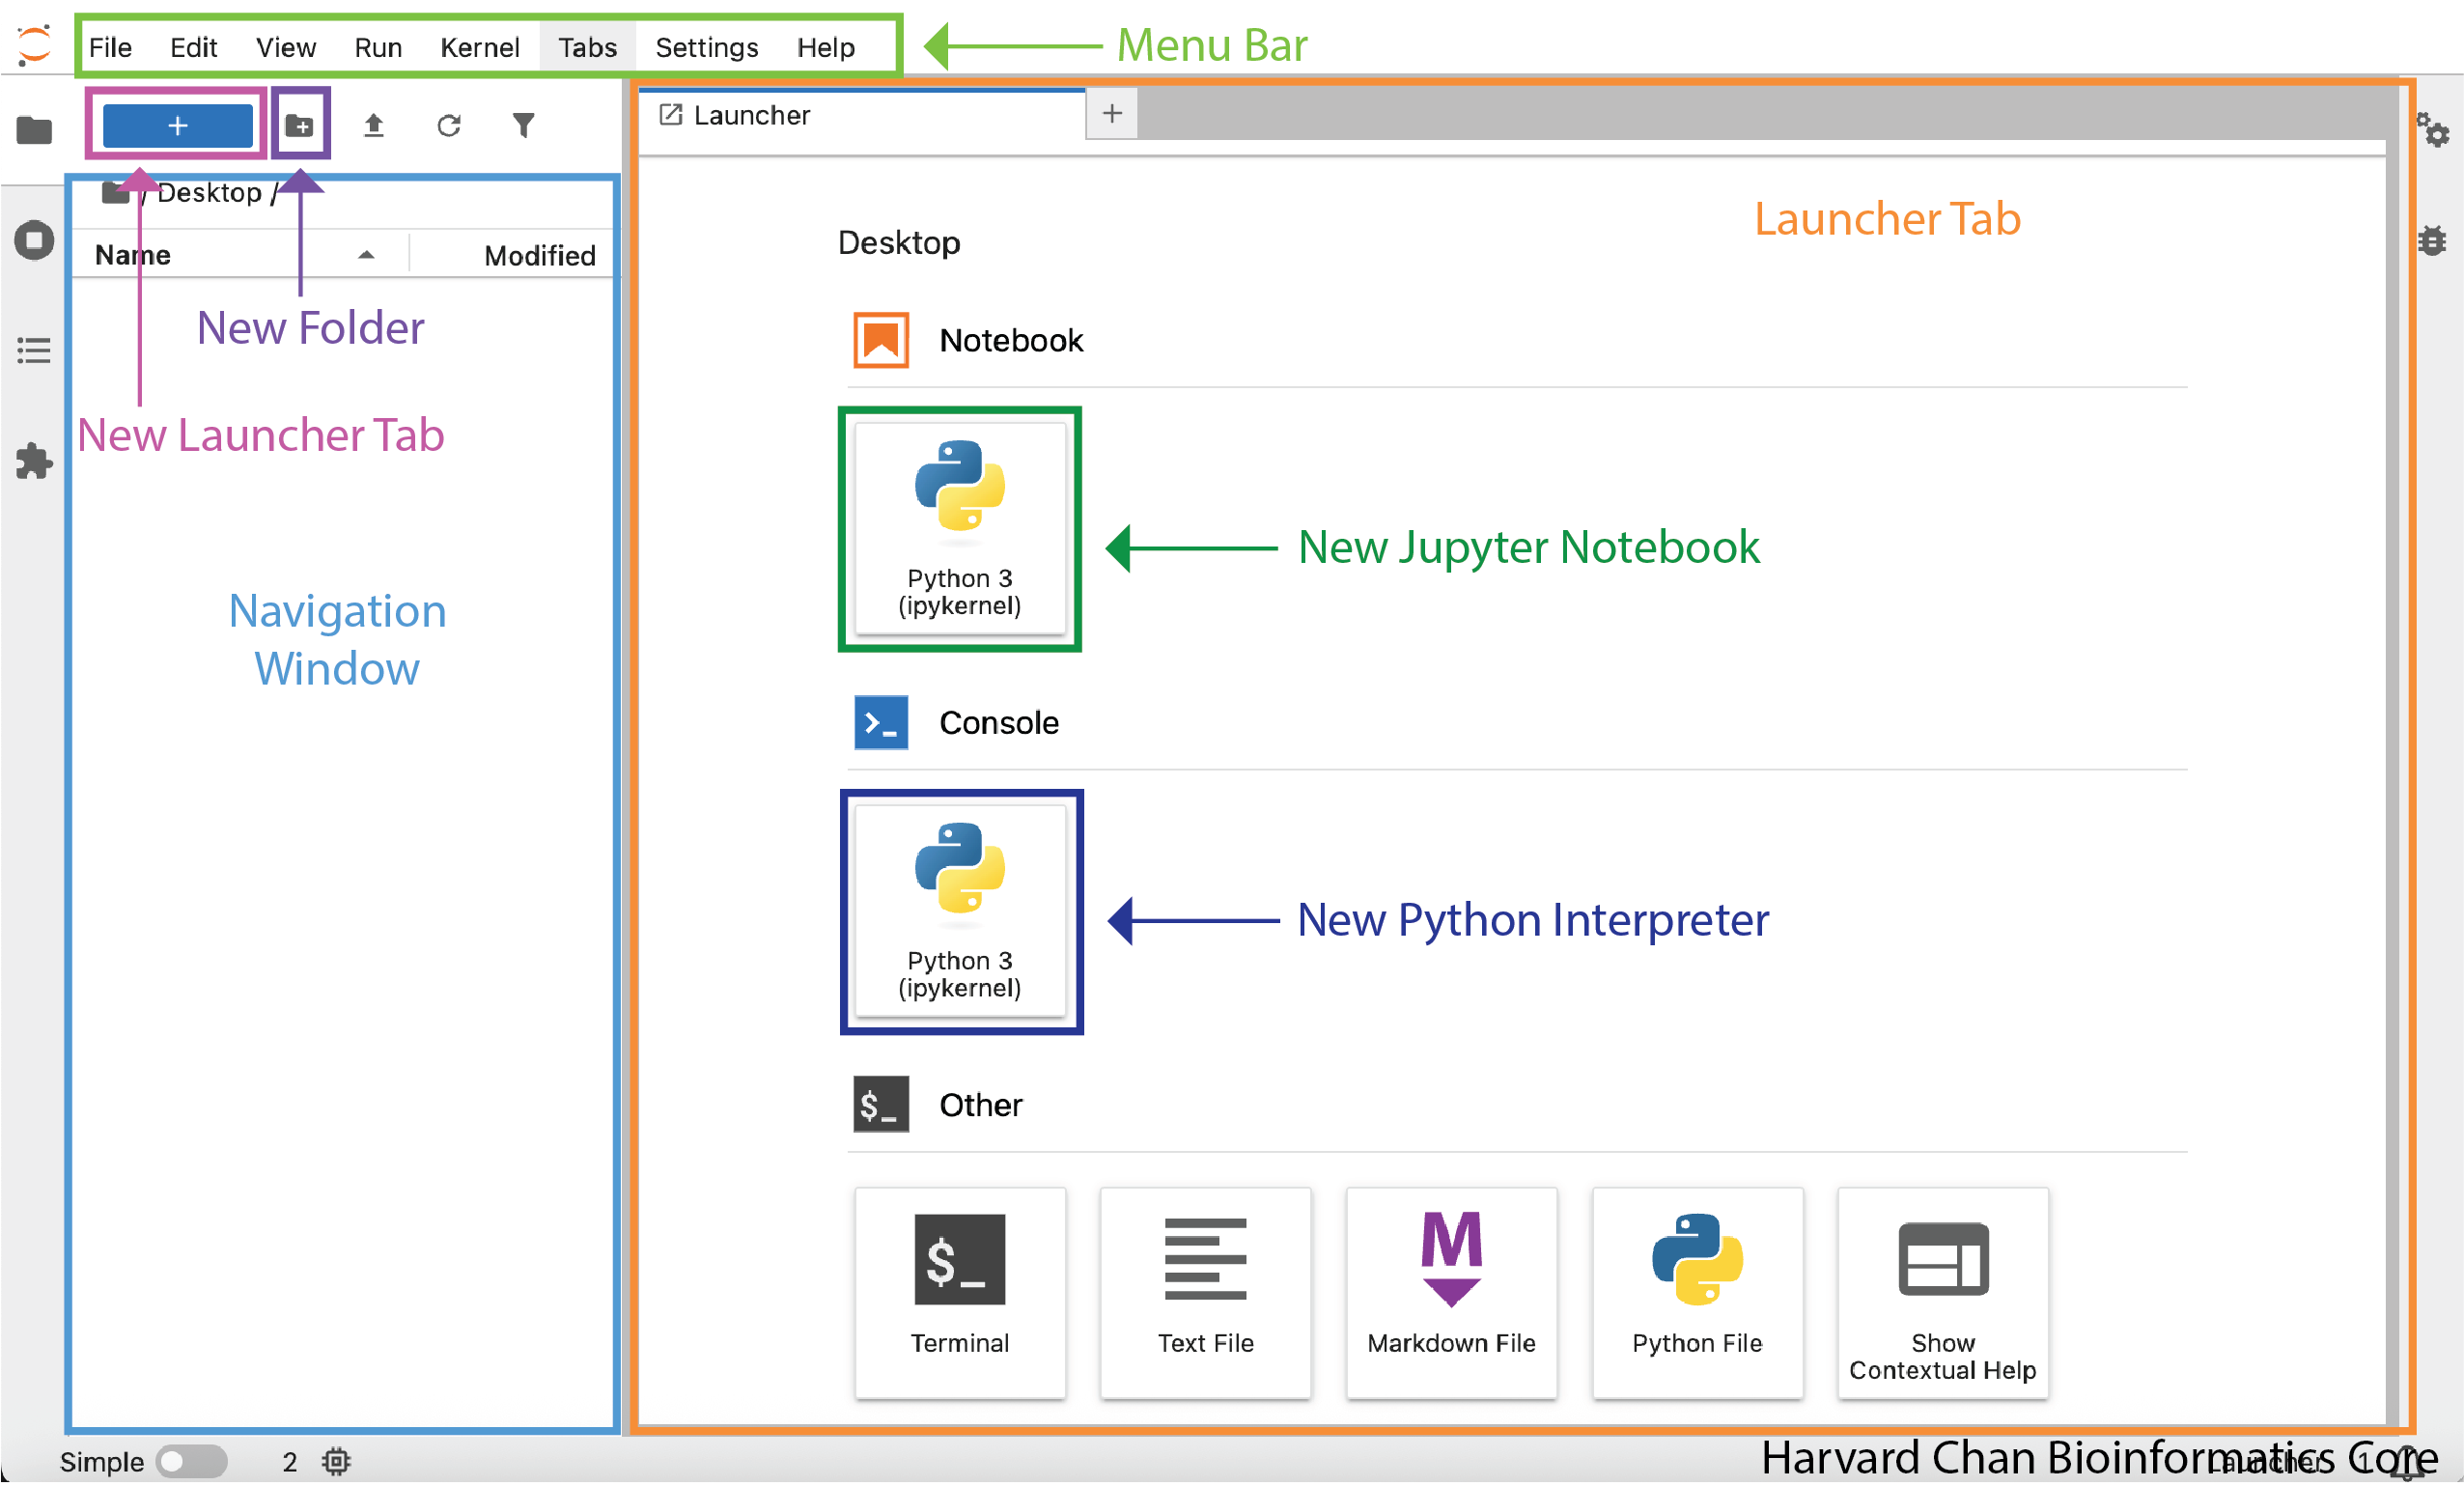
We will open JupyterLab by clicking the “Launch” button under the JupyterLab application in Anaconda Navigator. This will open a new tab in your web browser with the JupyterLab interface.
Even though JupyterLab opens your web browser, it is not actually accessing the internet. It is running on your local computer at the port http://localhost:8888, which is only hosted on your computer and is not accessible to anyone else.
File navigator
The navigation panel on the left-hand side allows us to access the file navigator, which allows us to navigate through the files on our computer and open them in JupyterLab. To begin, let us make a new folder for this workshop in our Desktop folder. To create a new folder, first navigate to your Desktop in the naviation panel, then click the “New Folder” button above the file navigator and title it intro_python.