Learning objectives
In this lesson you will:
- Define what a branch is and what they are useful for
- Create a branch and switch between branches in GitHub Desktop
- Make changes to branches in GitHub Desktop
- Merge branches in GitHub Desktop
- Explore branch management on GitHub
What is a branch?
So far we’ve demonstrated how Git captures a history of your repository in a series of snapshots, made every time you commit a new change to your repository. But what if we want to make some more experimental changes to our repository? Perhaps there is a bug that needs to be fixed, or a new feature we want to add to a pipeline, but we’re not quite sure if these changes will work or mesh properly with our main code. Or, maybe we have a collaborator or team of colleagues that are making contributions to the same project, but we want to make sure that we preserve our original repository as-is as a backup before reviewing and incorporating their contributions. For these types of experimental fixes or changes, we can create a new branch independent from main to make changes to while keeping our main safe from any unstable code. This new branch will have its own history of commits separate from main.
The illustration below shows a repository where each commit is represented by a circle and the edges show their linear relationship. Someone has made a new branch, Some Feature, independent from main. Some Feature has some of its own commits, but that history of commits is separate from main:
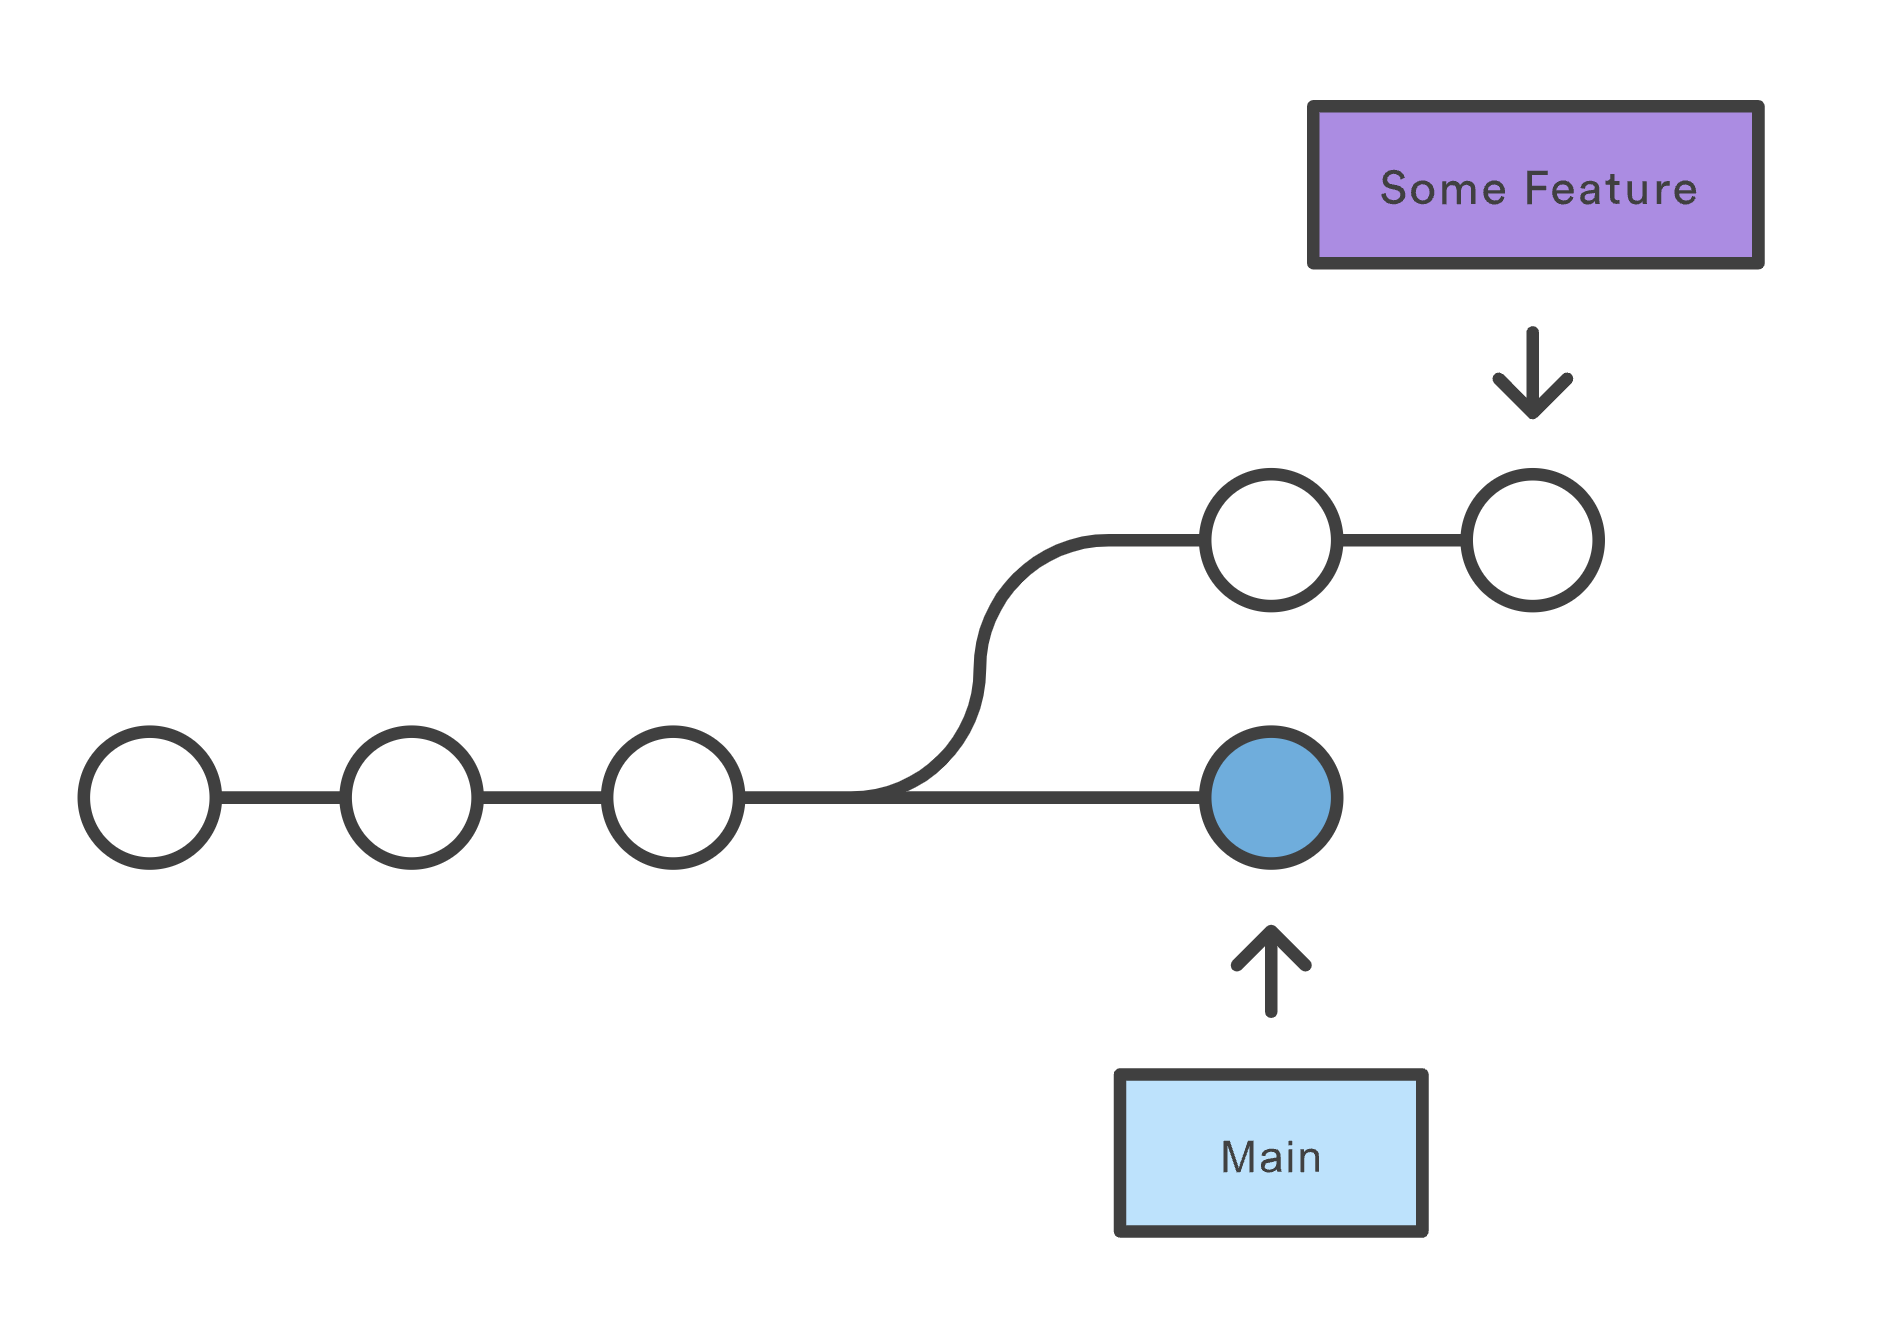
Image source: https://www.atlassian.com/git/tutorials/using-branches/git-merge
Once you are done perfecting the changes made to the new branch, if you decide you want to keep and incorporate your changes into your main repository, you can merge the new branch back into main. This creates a single, unified repository again:
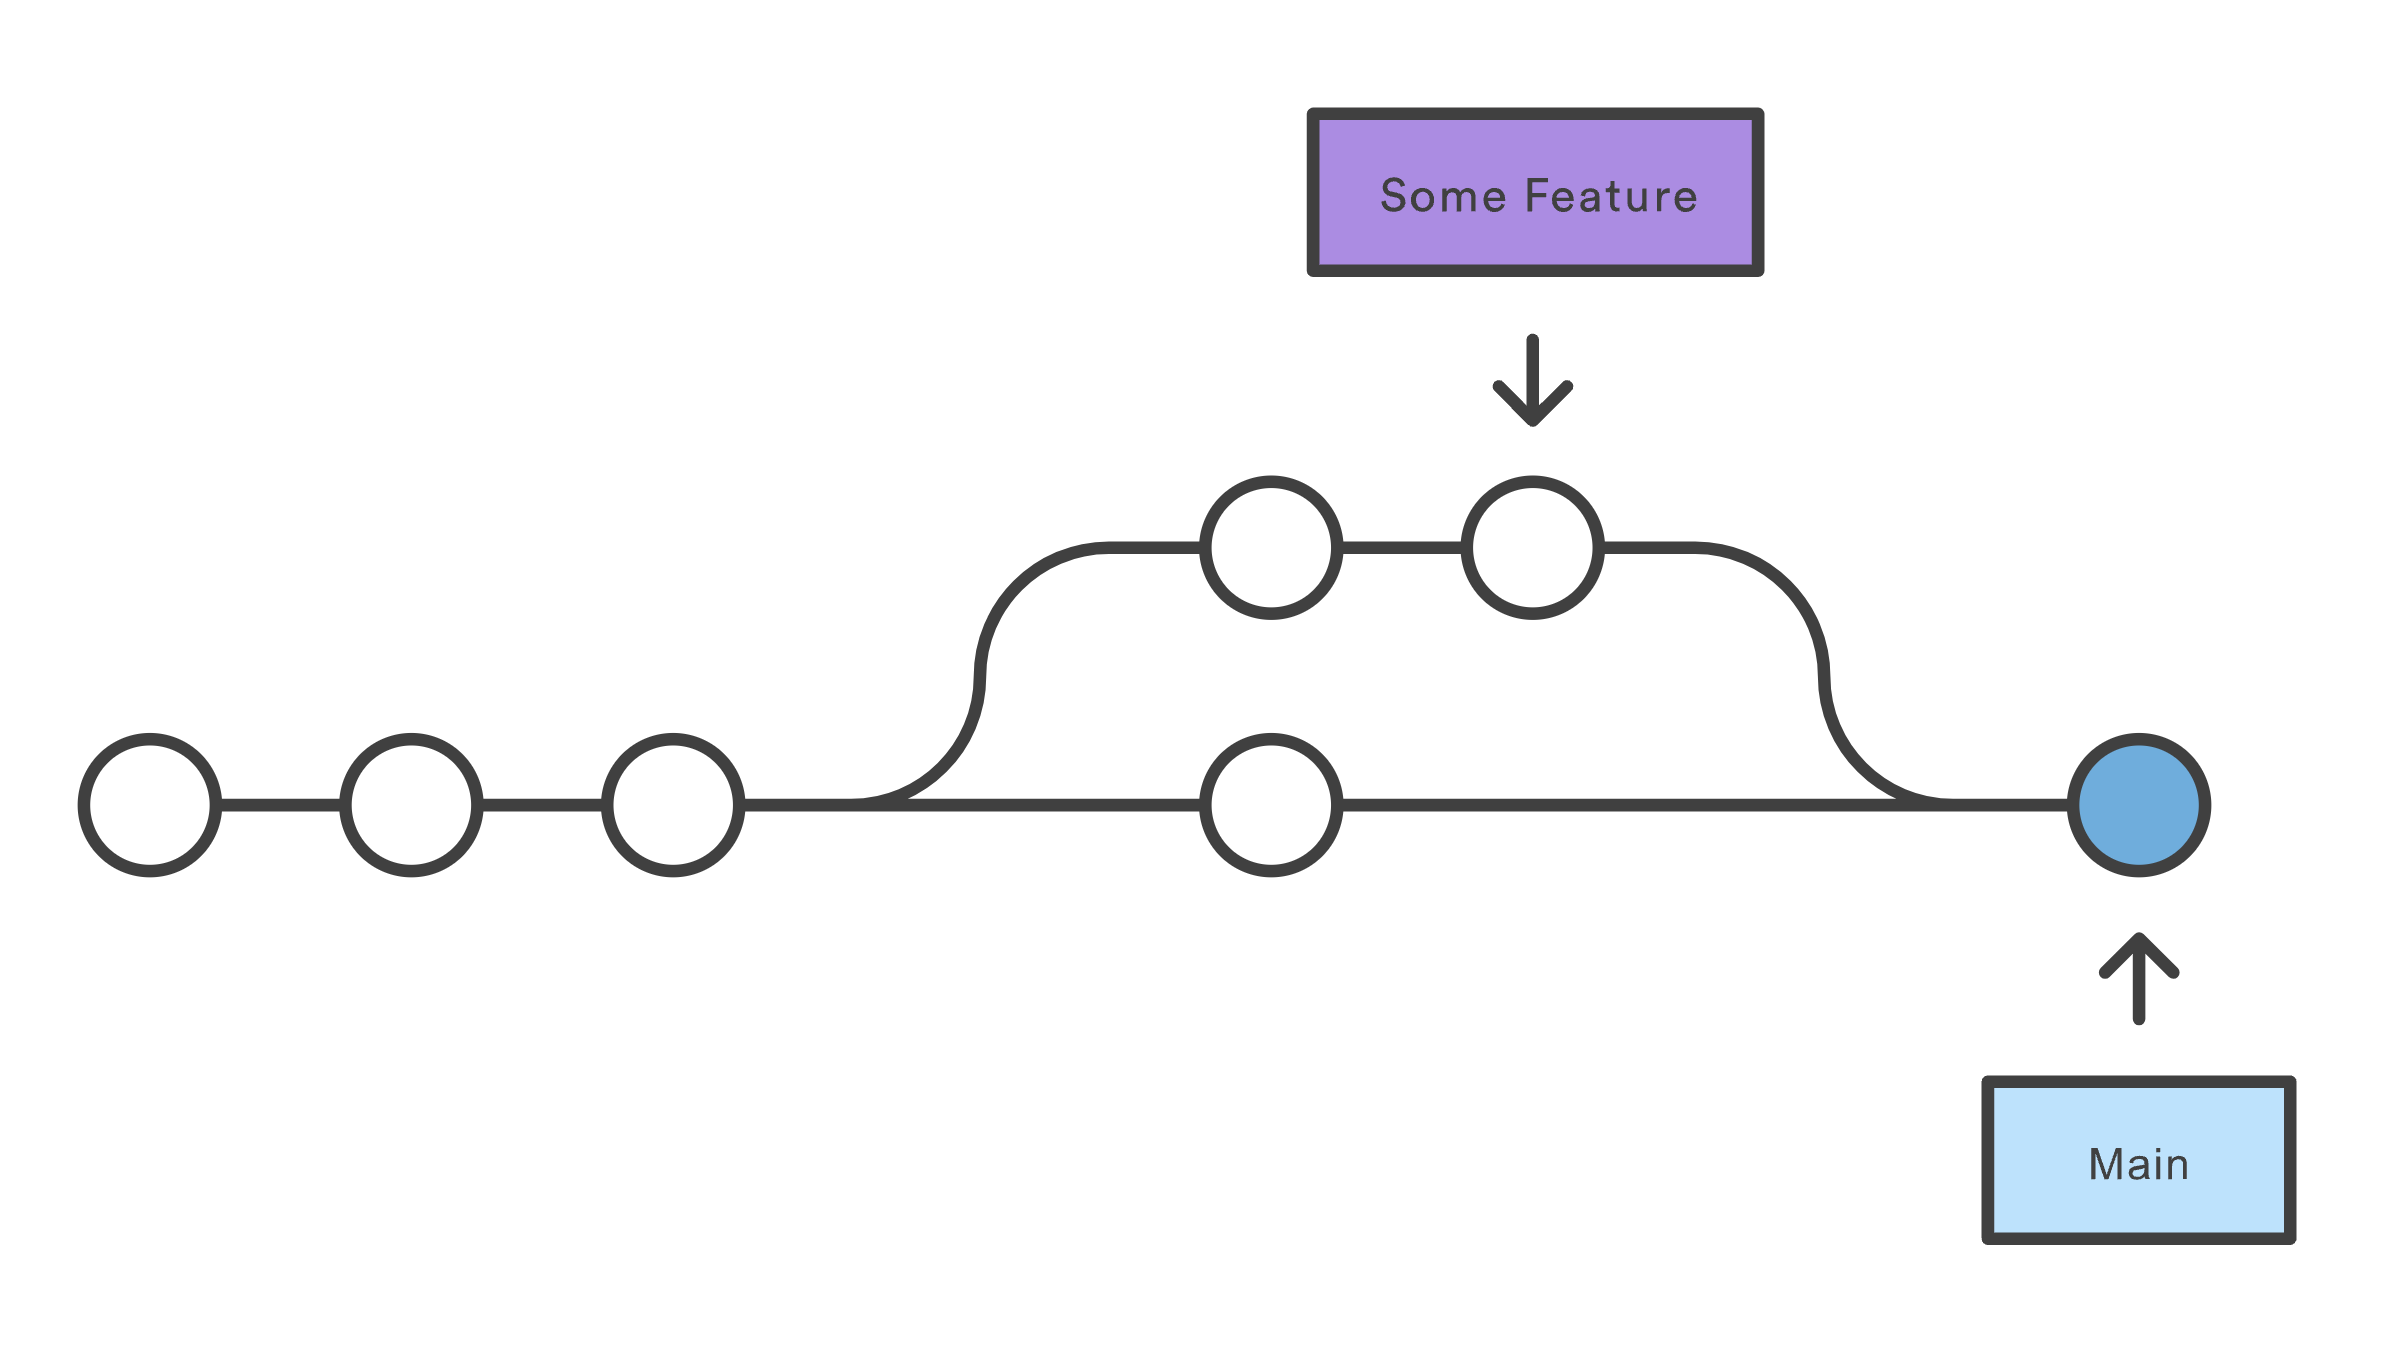
Image source: https://www.atlassian.com/git/tutorials/using-branches/git-merge
Or, if you only want to incorporate some of the changes, you can cherry-pick those commits to main. Or, if your experimenting didn’t work, you can keep the whole branch separate and continue working on it or ignore it altogether, without jeopardizing main.
How to create a branch in GitHub Desktop
To create a new branch in GitHub Desktop, click the arrow next to Current Branch in the middle tab of your repository bar. From the dropdown menu’s Branches tab, you’ll see a button that says New Branch:
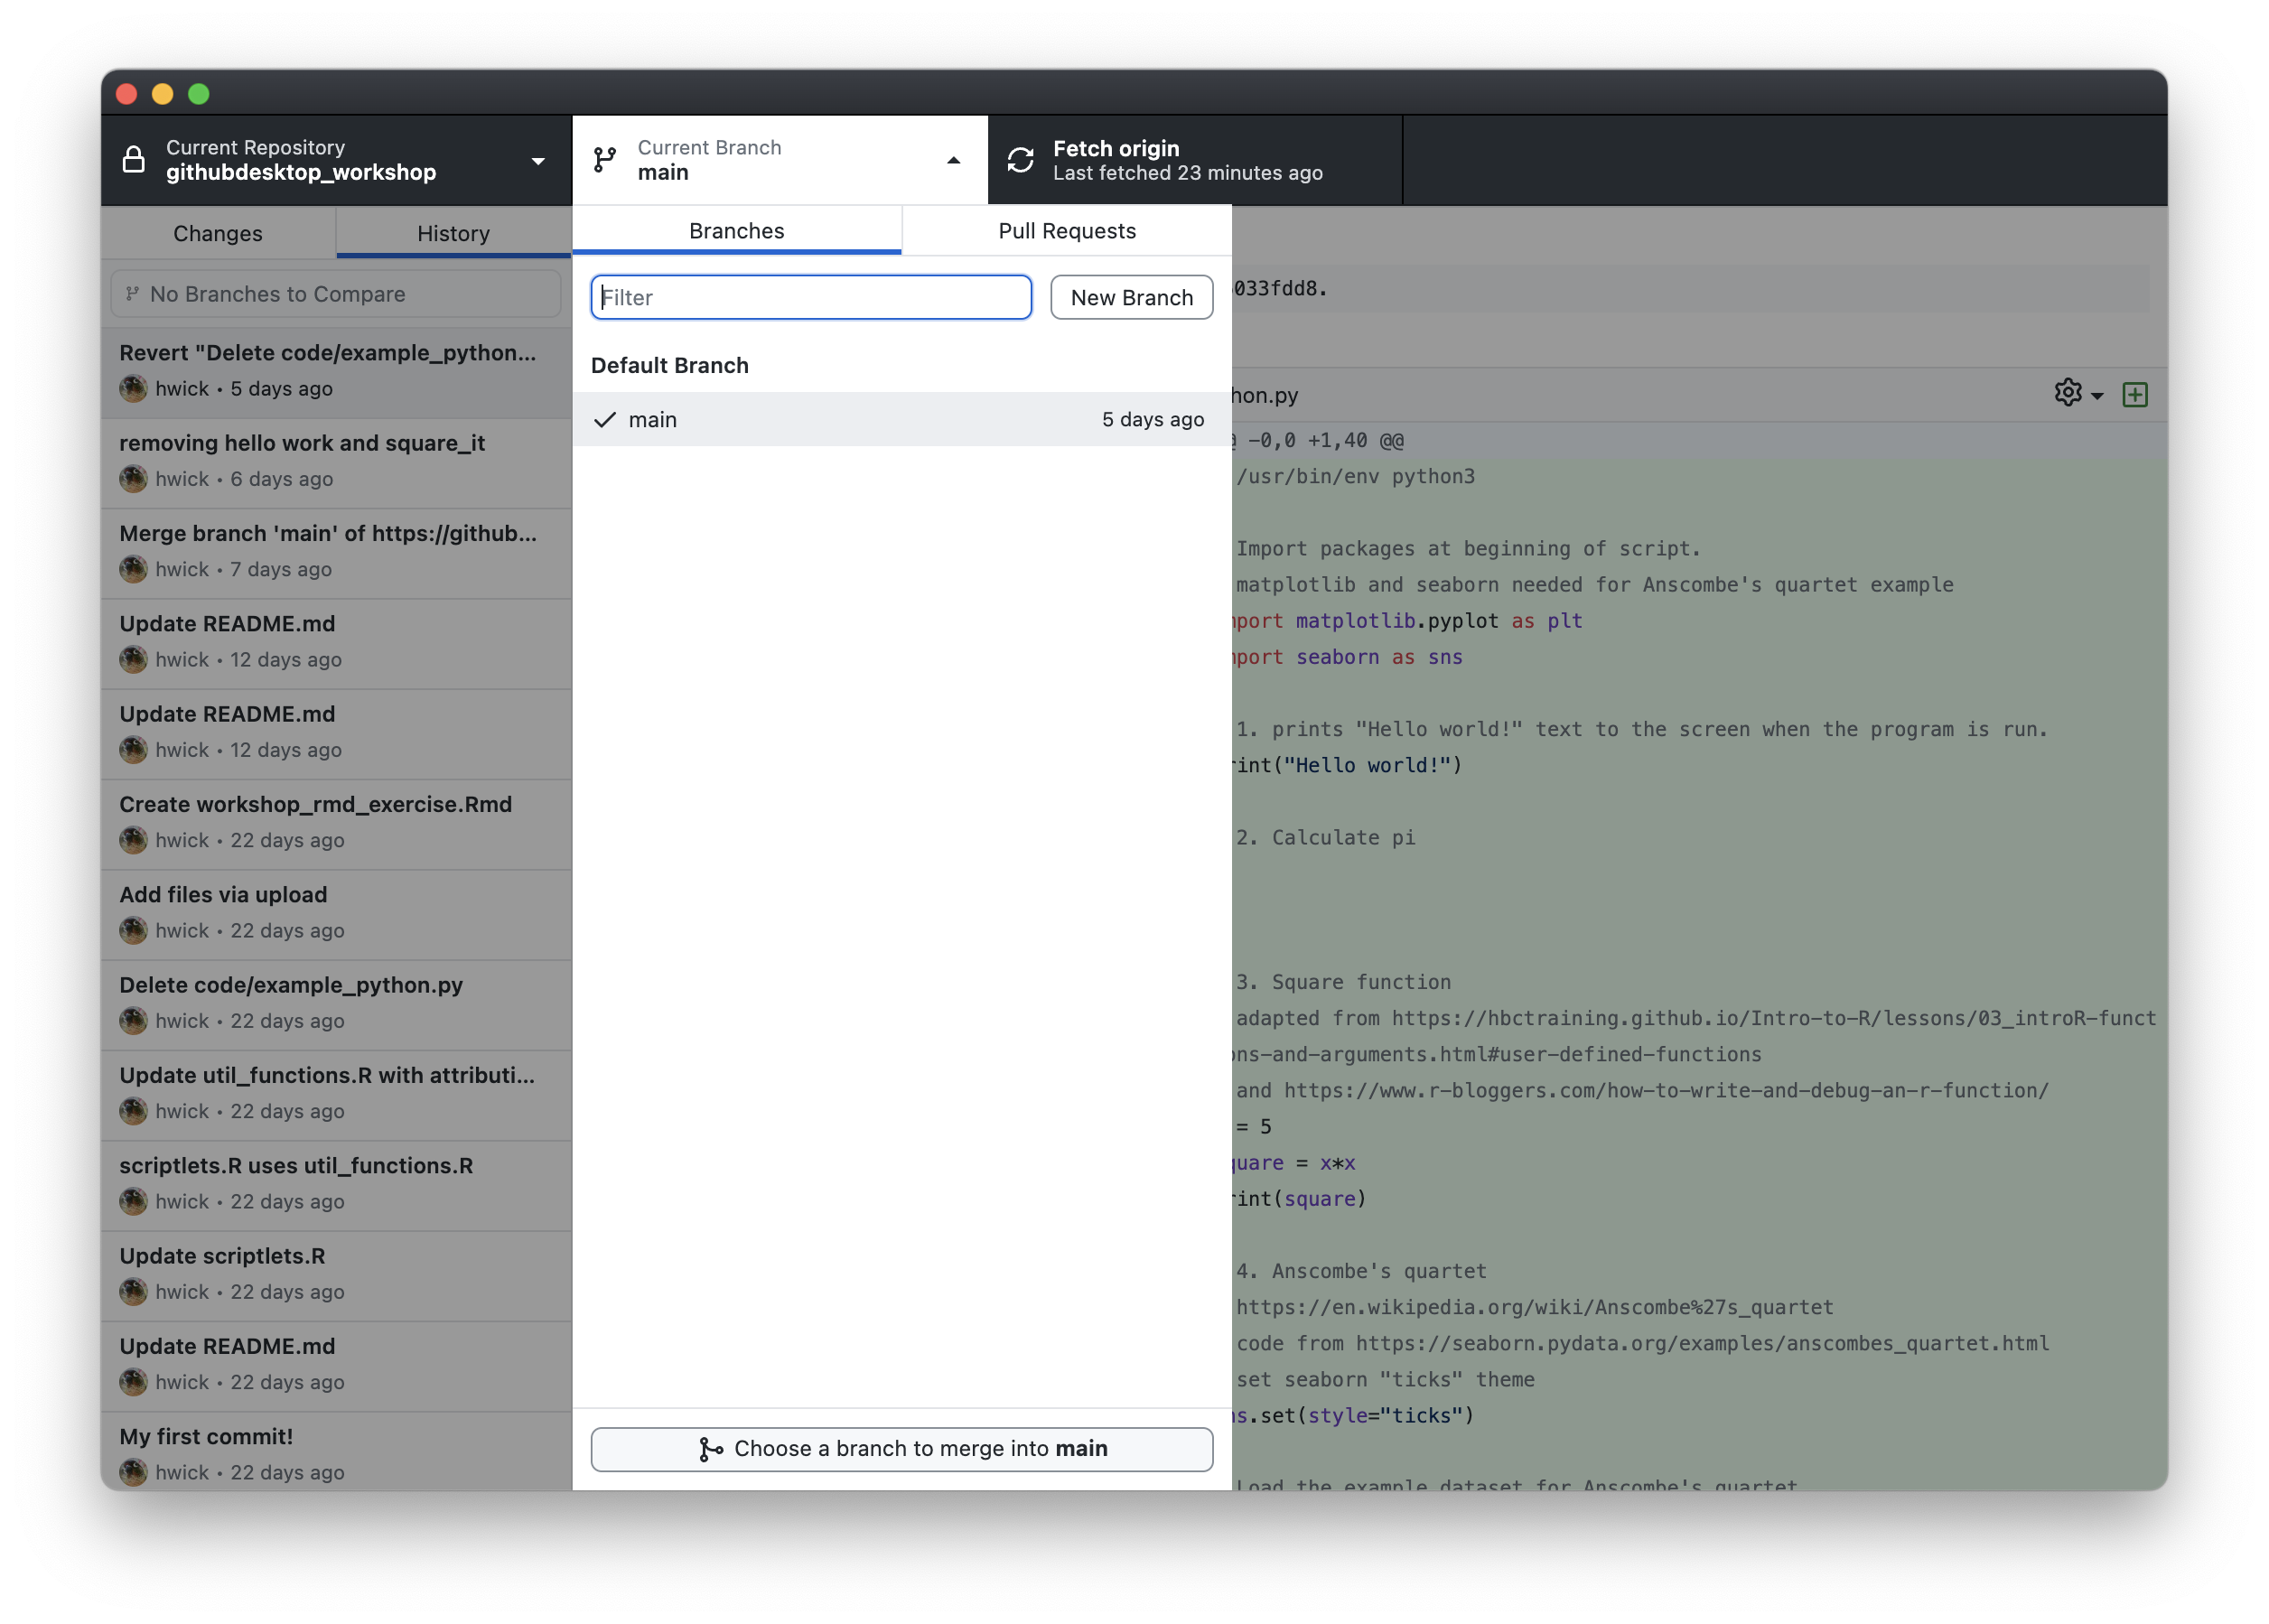
Click New Branch, and you’ll get a popup asking you to name the branch. There is also a reminder that your new branch will be based off of main, meaning that it will contain the same history of commits as main up until the point that the two branches diverged. If you had multiple branches, GitHub Desktop would let you choose which branch you would like to base the new branch from. Give your new branch an appropriate name (we chose test_branch), then click Create Branch:
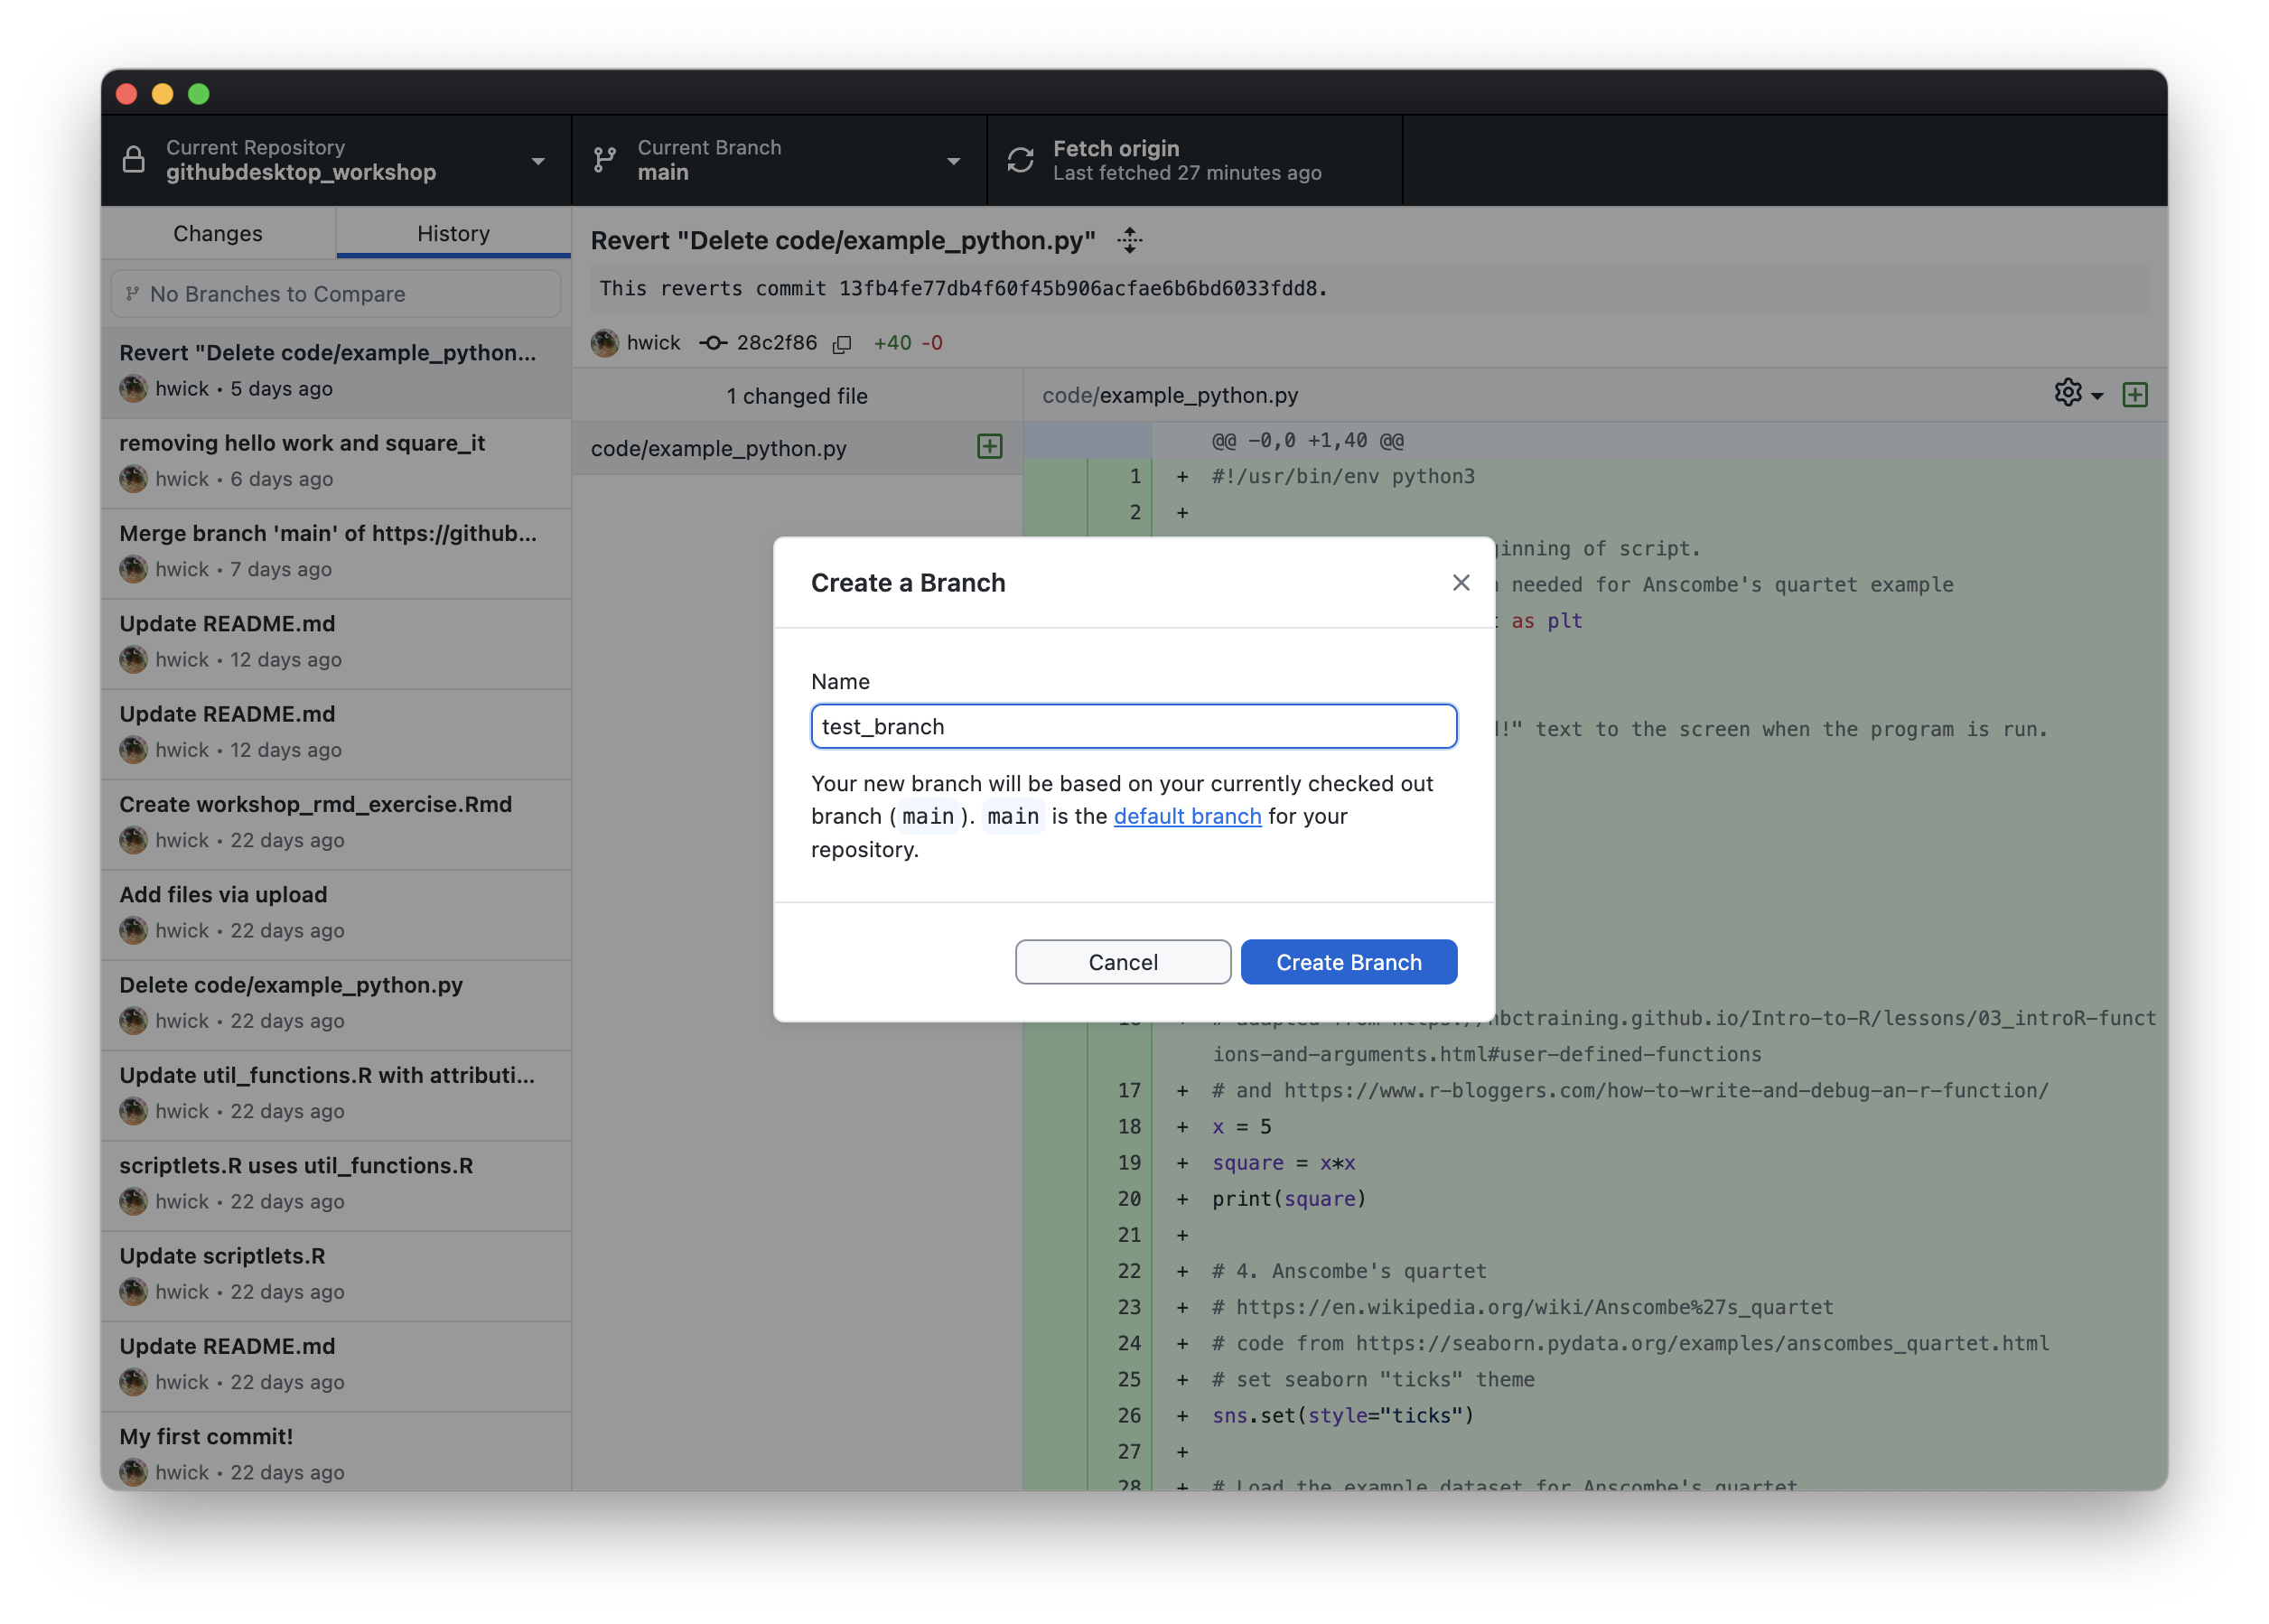
You’ll notice that the middle tab of your repository bar now indicates that your Current Branch is now test_branch.
Switching between branches
Earlier, we mentioned that branch histories are independent. That means that you can continue making changes to main even though you are working in a new branch. You can switch back and forth between branches easily. Simply click the arrow next to Current Branch in the middle tab of your repository bar. Now your drop down menu will display all available branches for your current repository in the Branches tab. The branch you’re currently in will have a check mark next to the name. Simply select whichever branch you would like to navigate to:
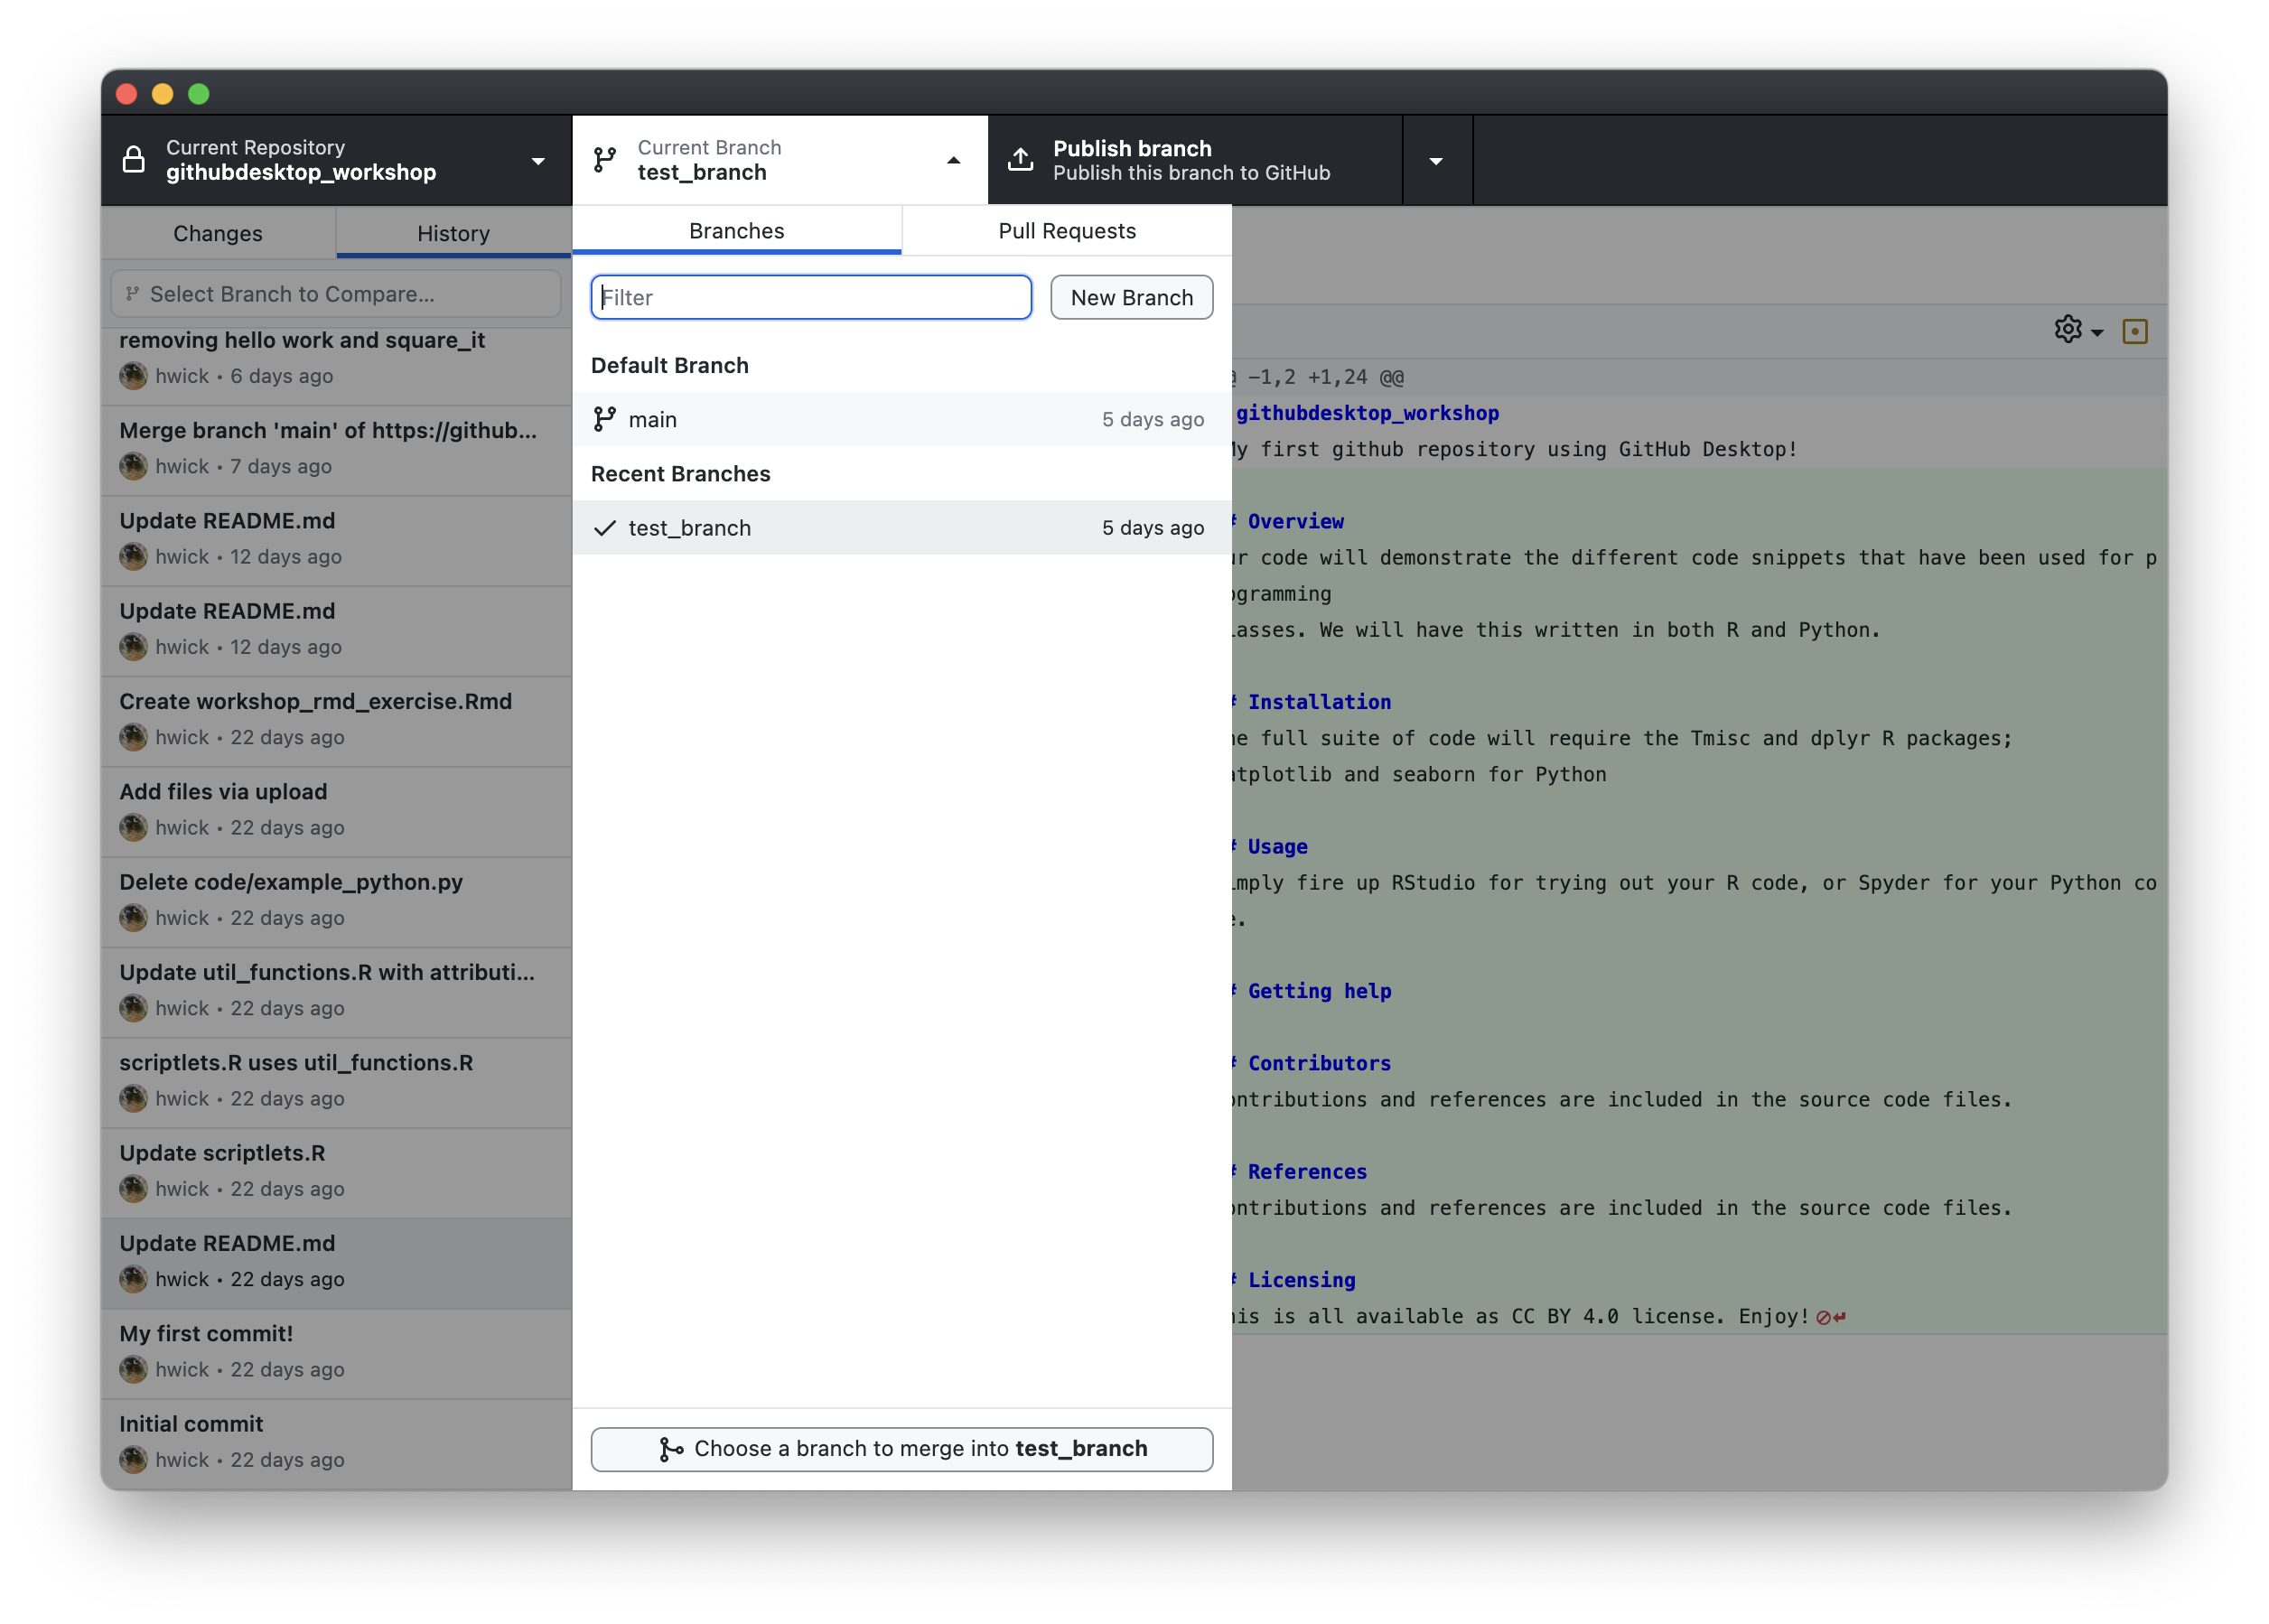
For now though, let’s stay in test_branch
What if I decide I want to delete a branch? Maybe you have abandoned your experimental code and want to clean up the clutter. To delete a branch, make sure your
Current Branchis set to the branch you would like to delete. Then, selectBranchfrom the menu bar, and selectDelete Branchfrom the drop down menu. GitHub Desktop will produce a pop up to confirm before you delete your branch, but be careful: Deleting a branch is permanent!
Making changes (commits) to your new branch
Making a change to a branch is just like making a change to main. Let’s give it a try. Navigate to the Changes tab on the left and then click the button to Open the repository in your external editor. Go to your README.md and add this line under the first header and save the readme file:
This line of code was introduced in the lesson on branches!
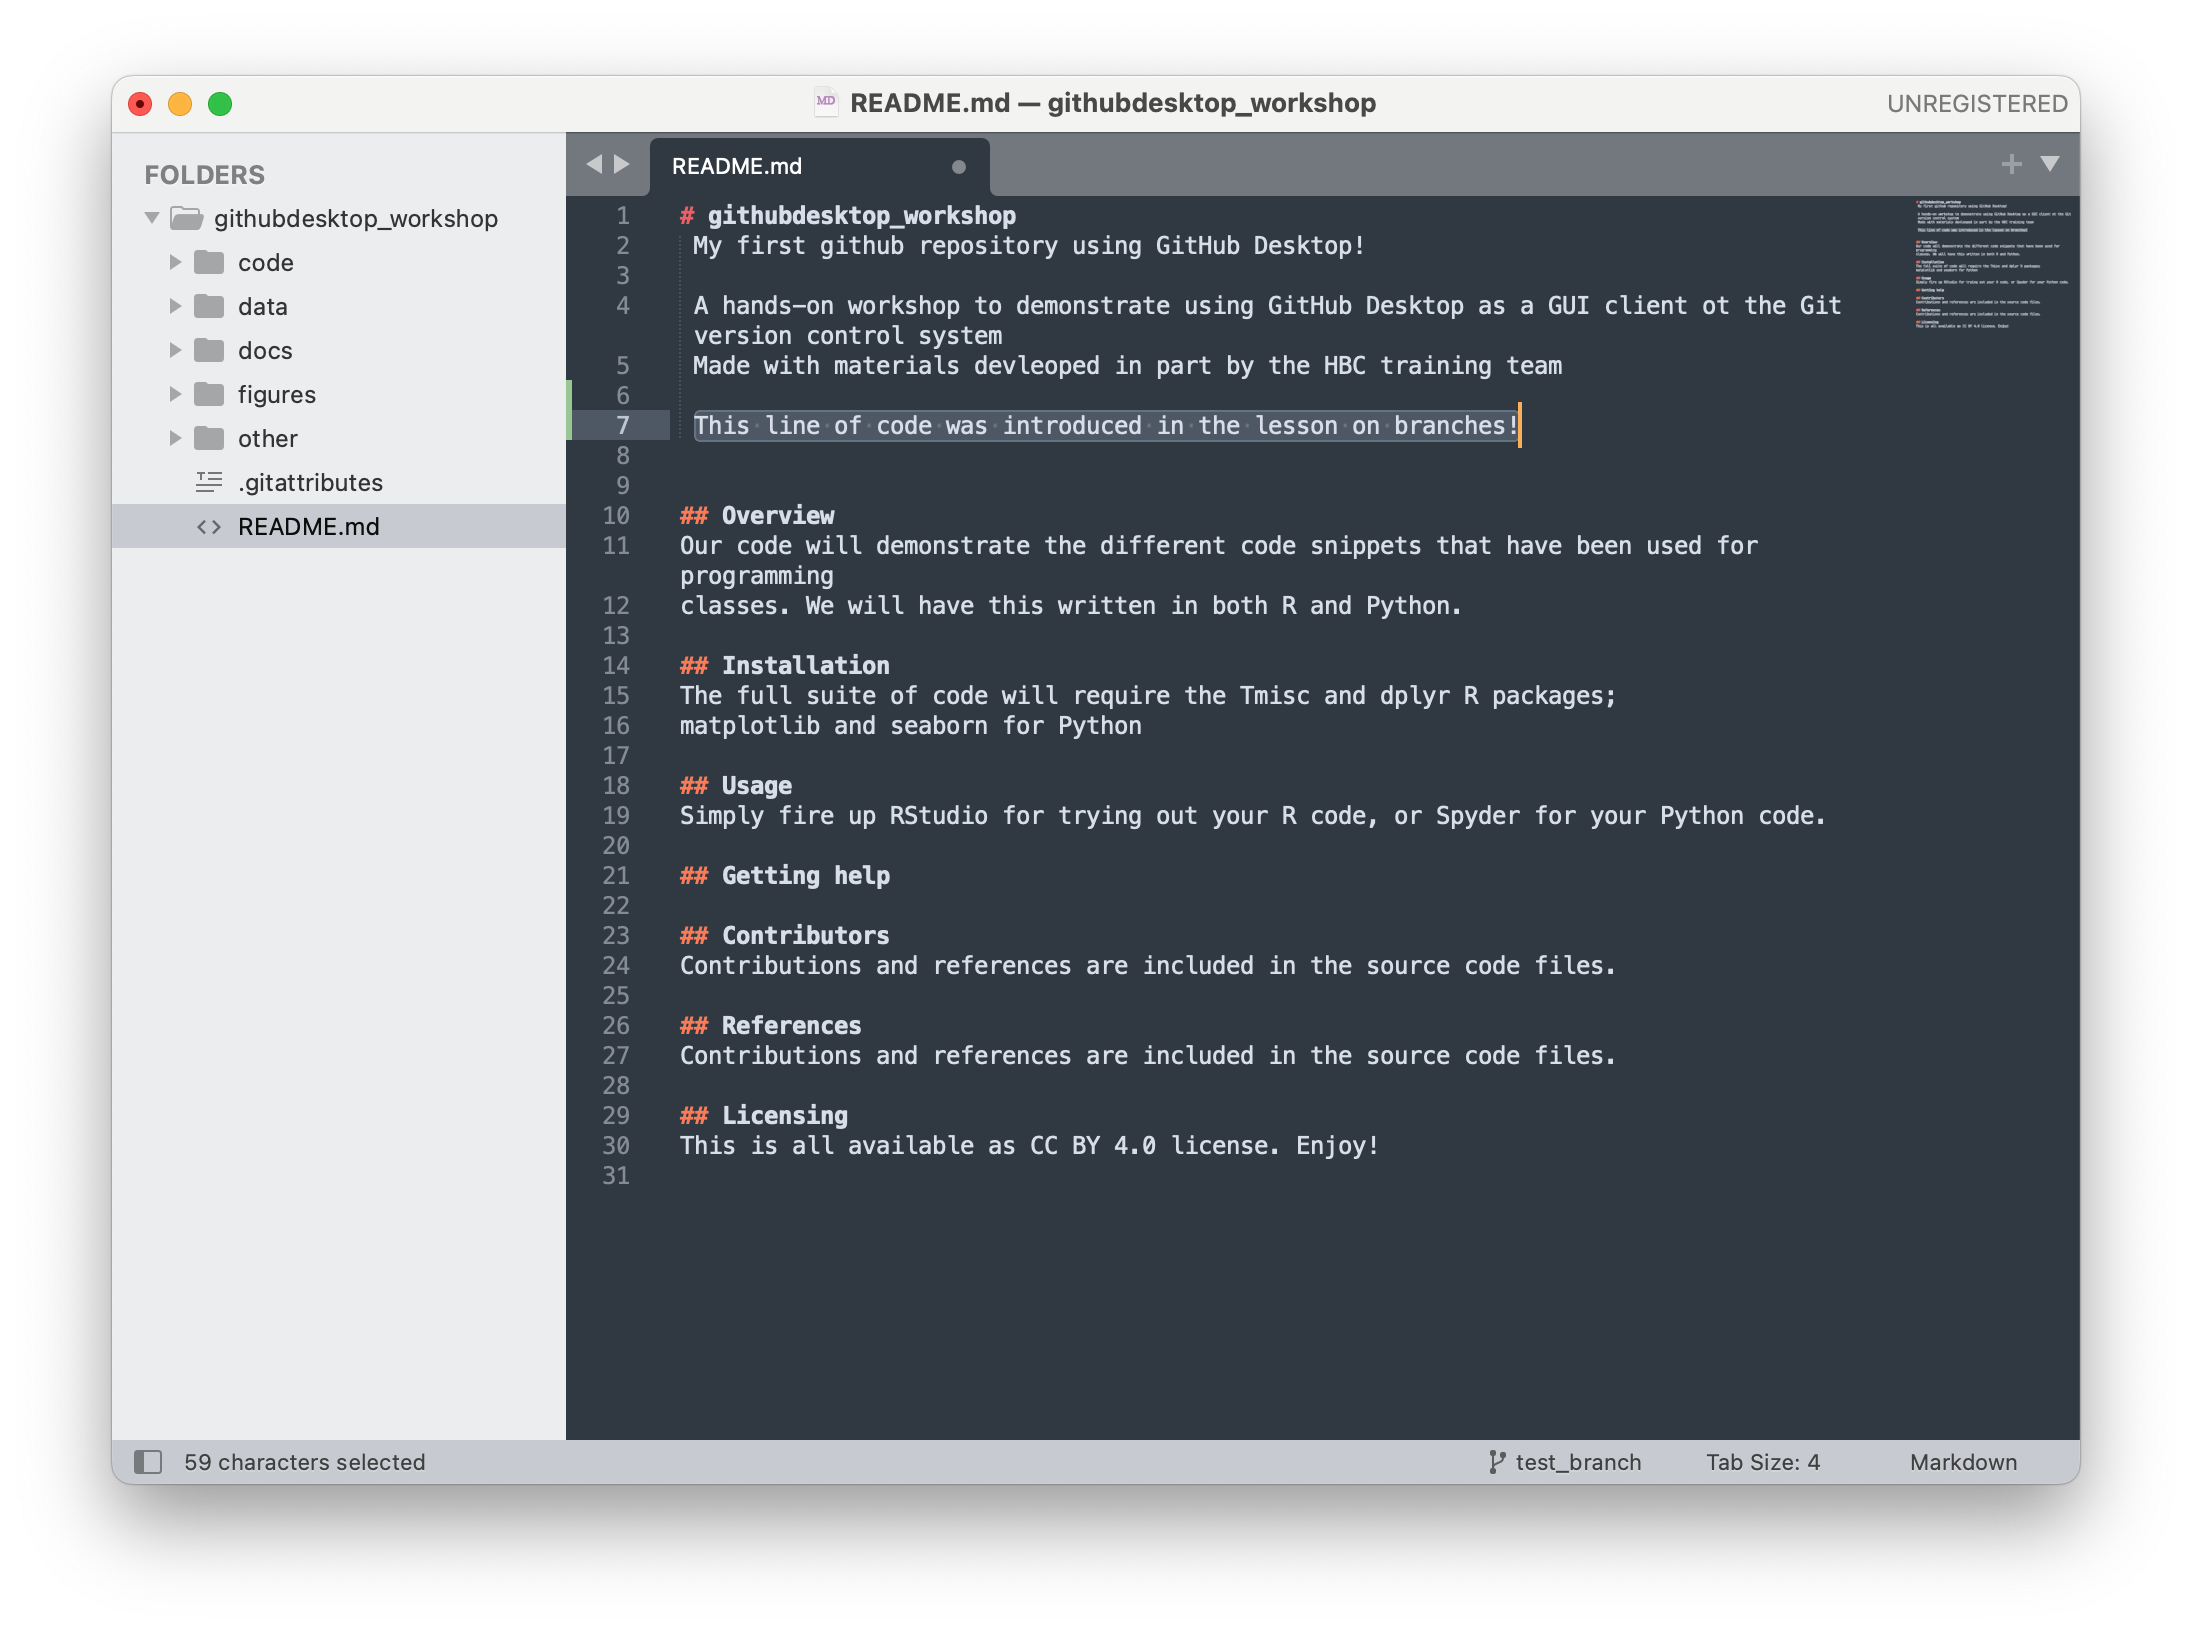
Just as before, you’ll immediately see the change in the Changes tab. Go ahead and commit this change by clicking Commit to test_branch:
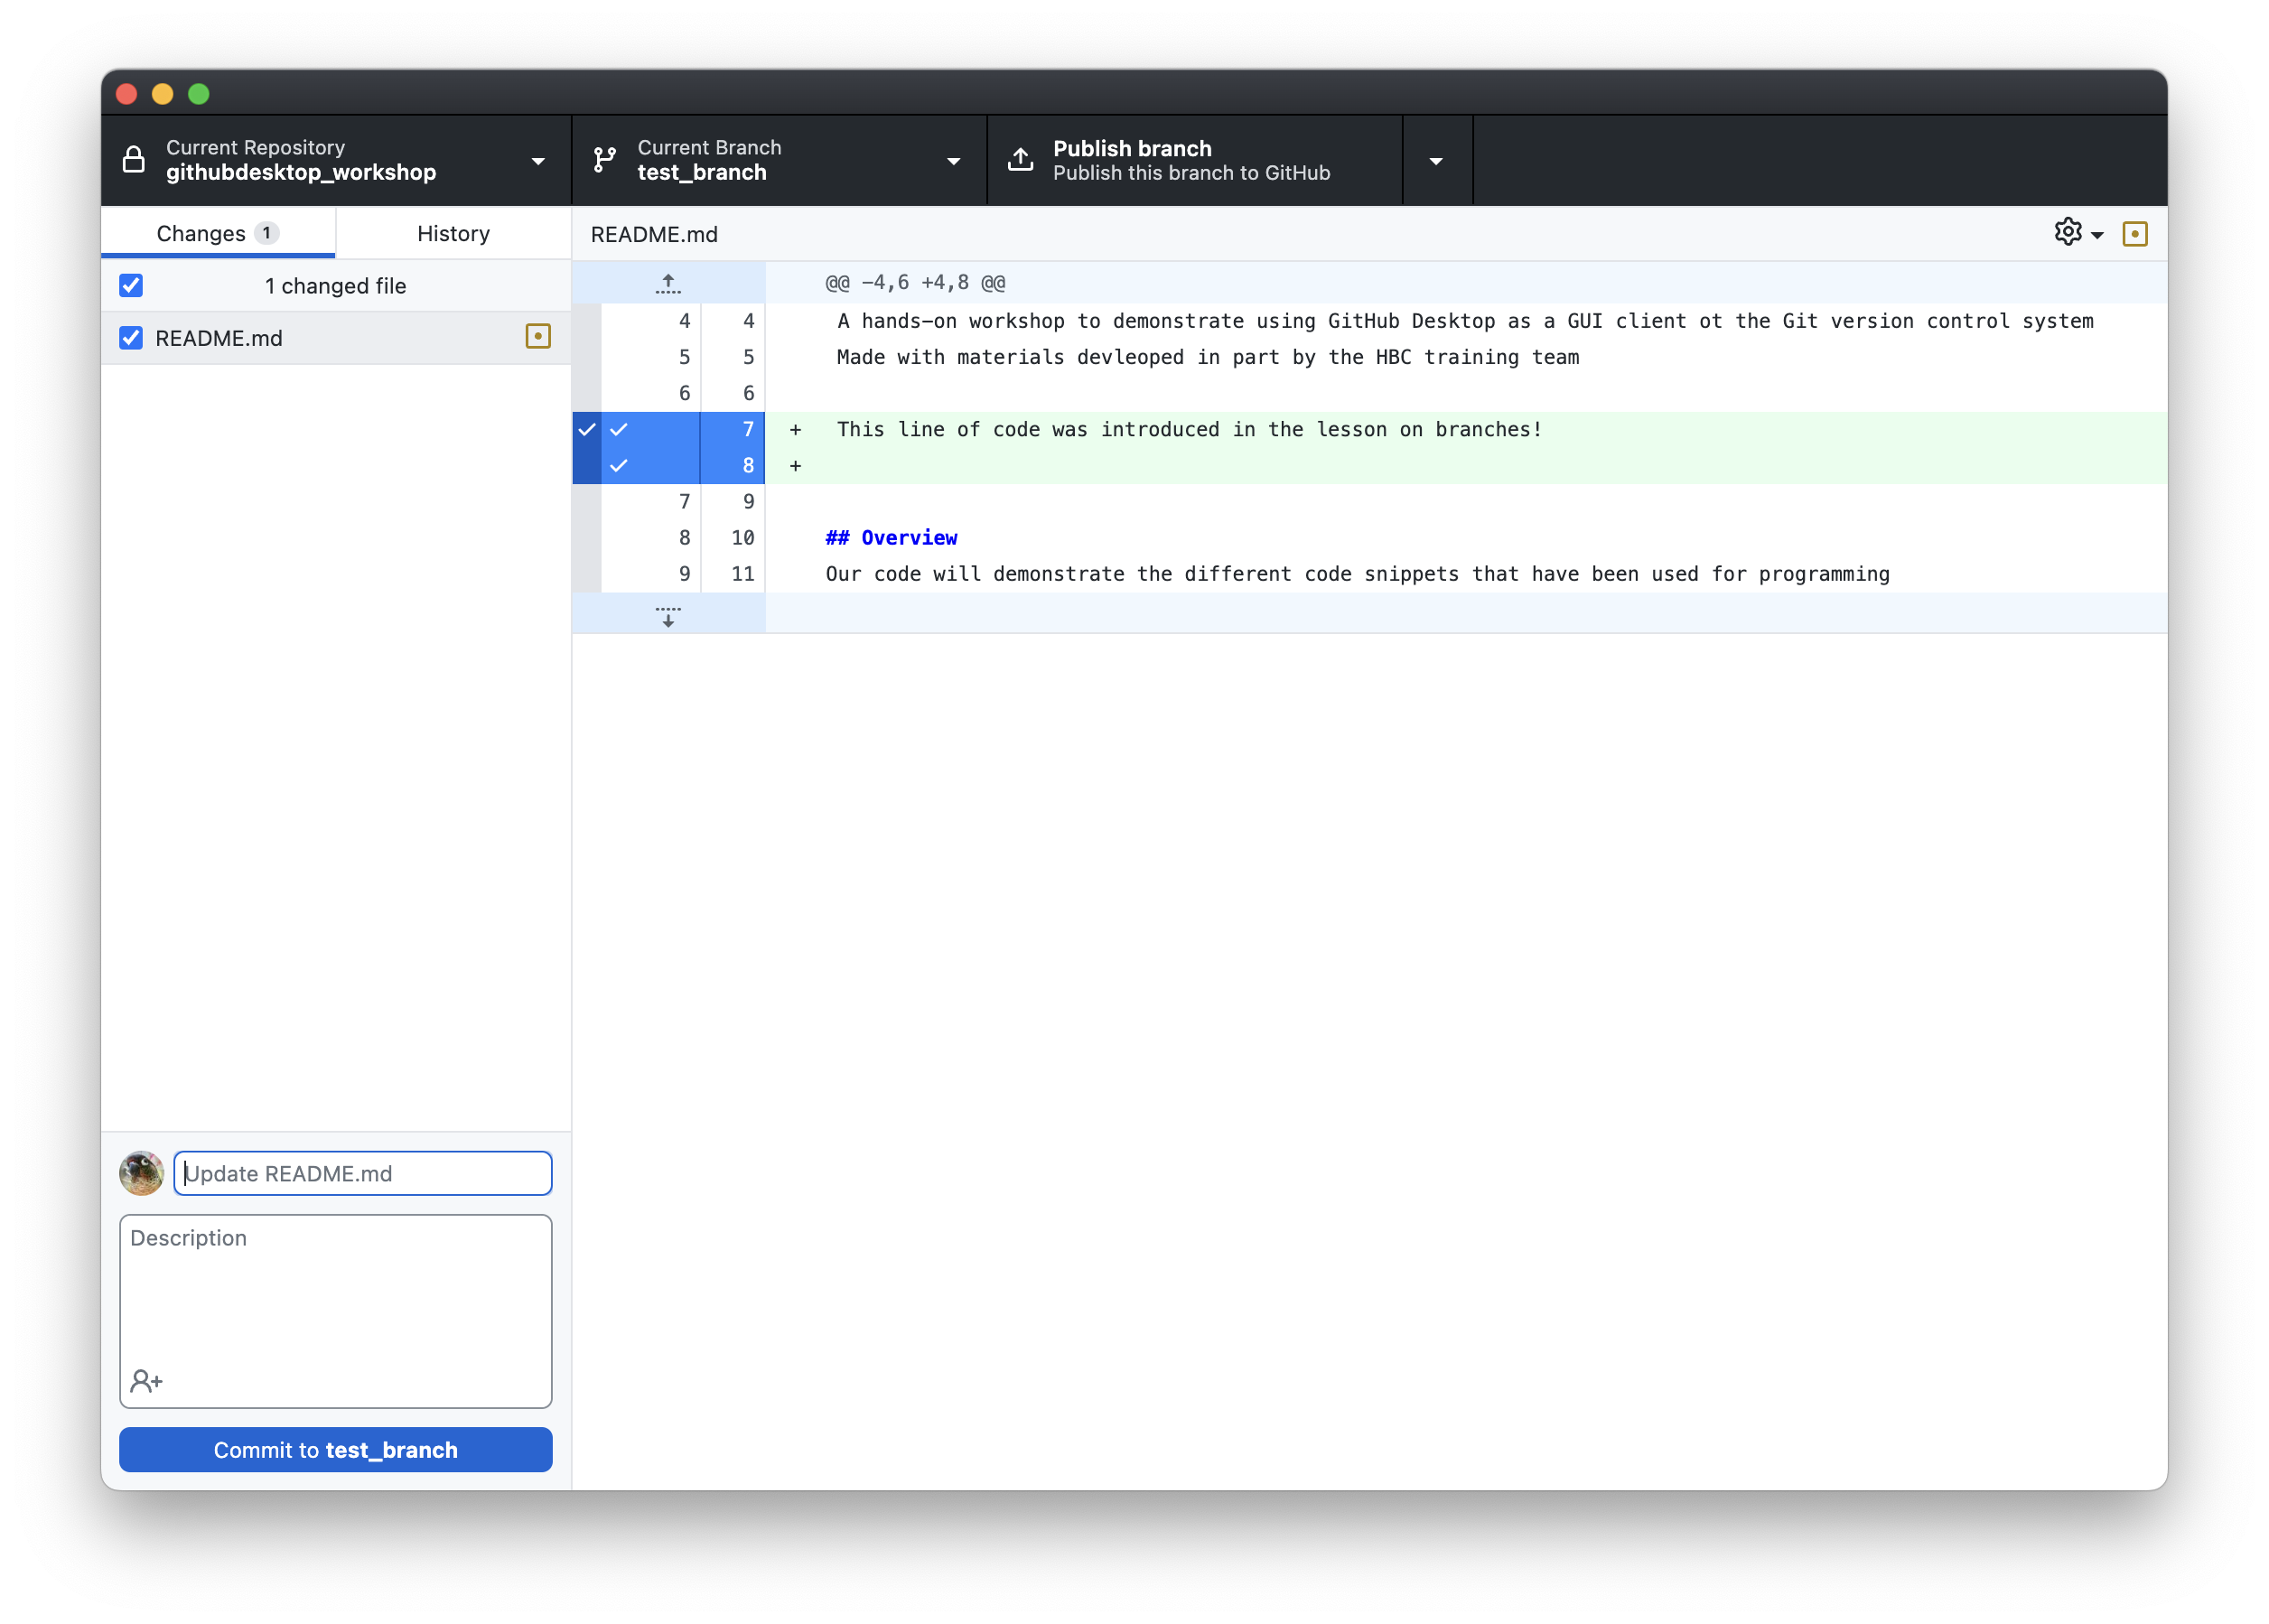
And that’s all there is to it! If you were to set your Current Branch to main and open your README.md file in your external text editor, that line of text we added would not be there, because the change we made is unique to test_branch. Go ahead and see for yourself!
Publishing/pushing your branch to GitHub
One last step: let’s publish our new branch to GitHub. From the main Changes tab, click the Publish branch button to publish it to Remote. Be sure if your branch is test_branch and not main if you had switched it to the main branch inspect the README.md.
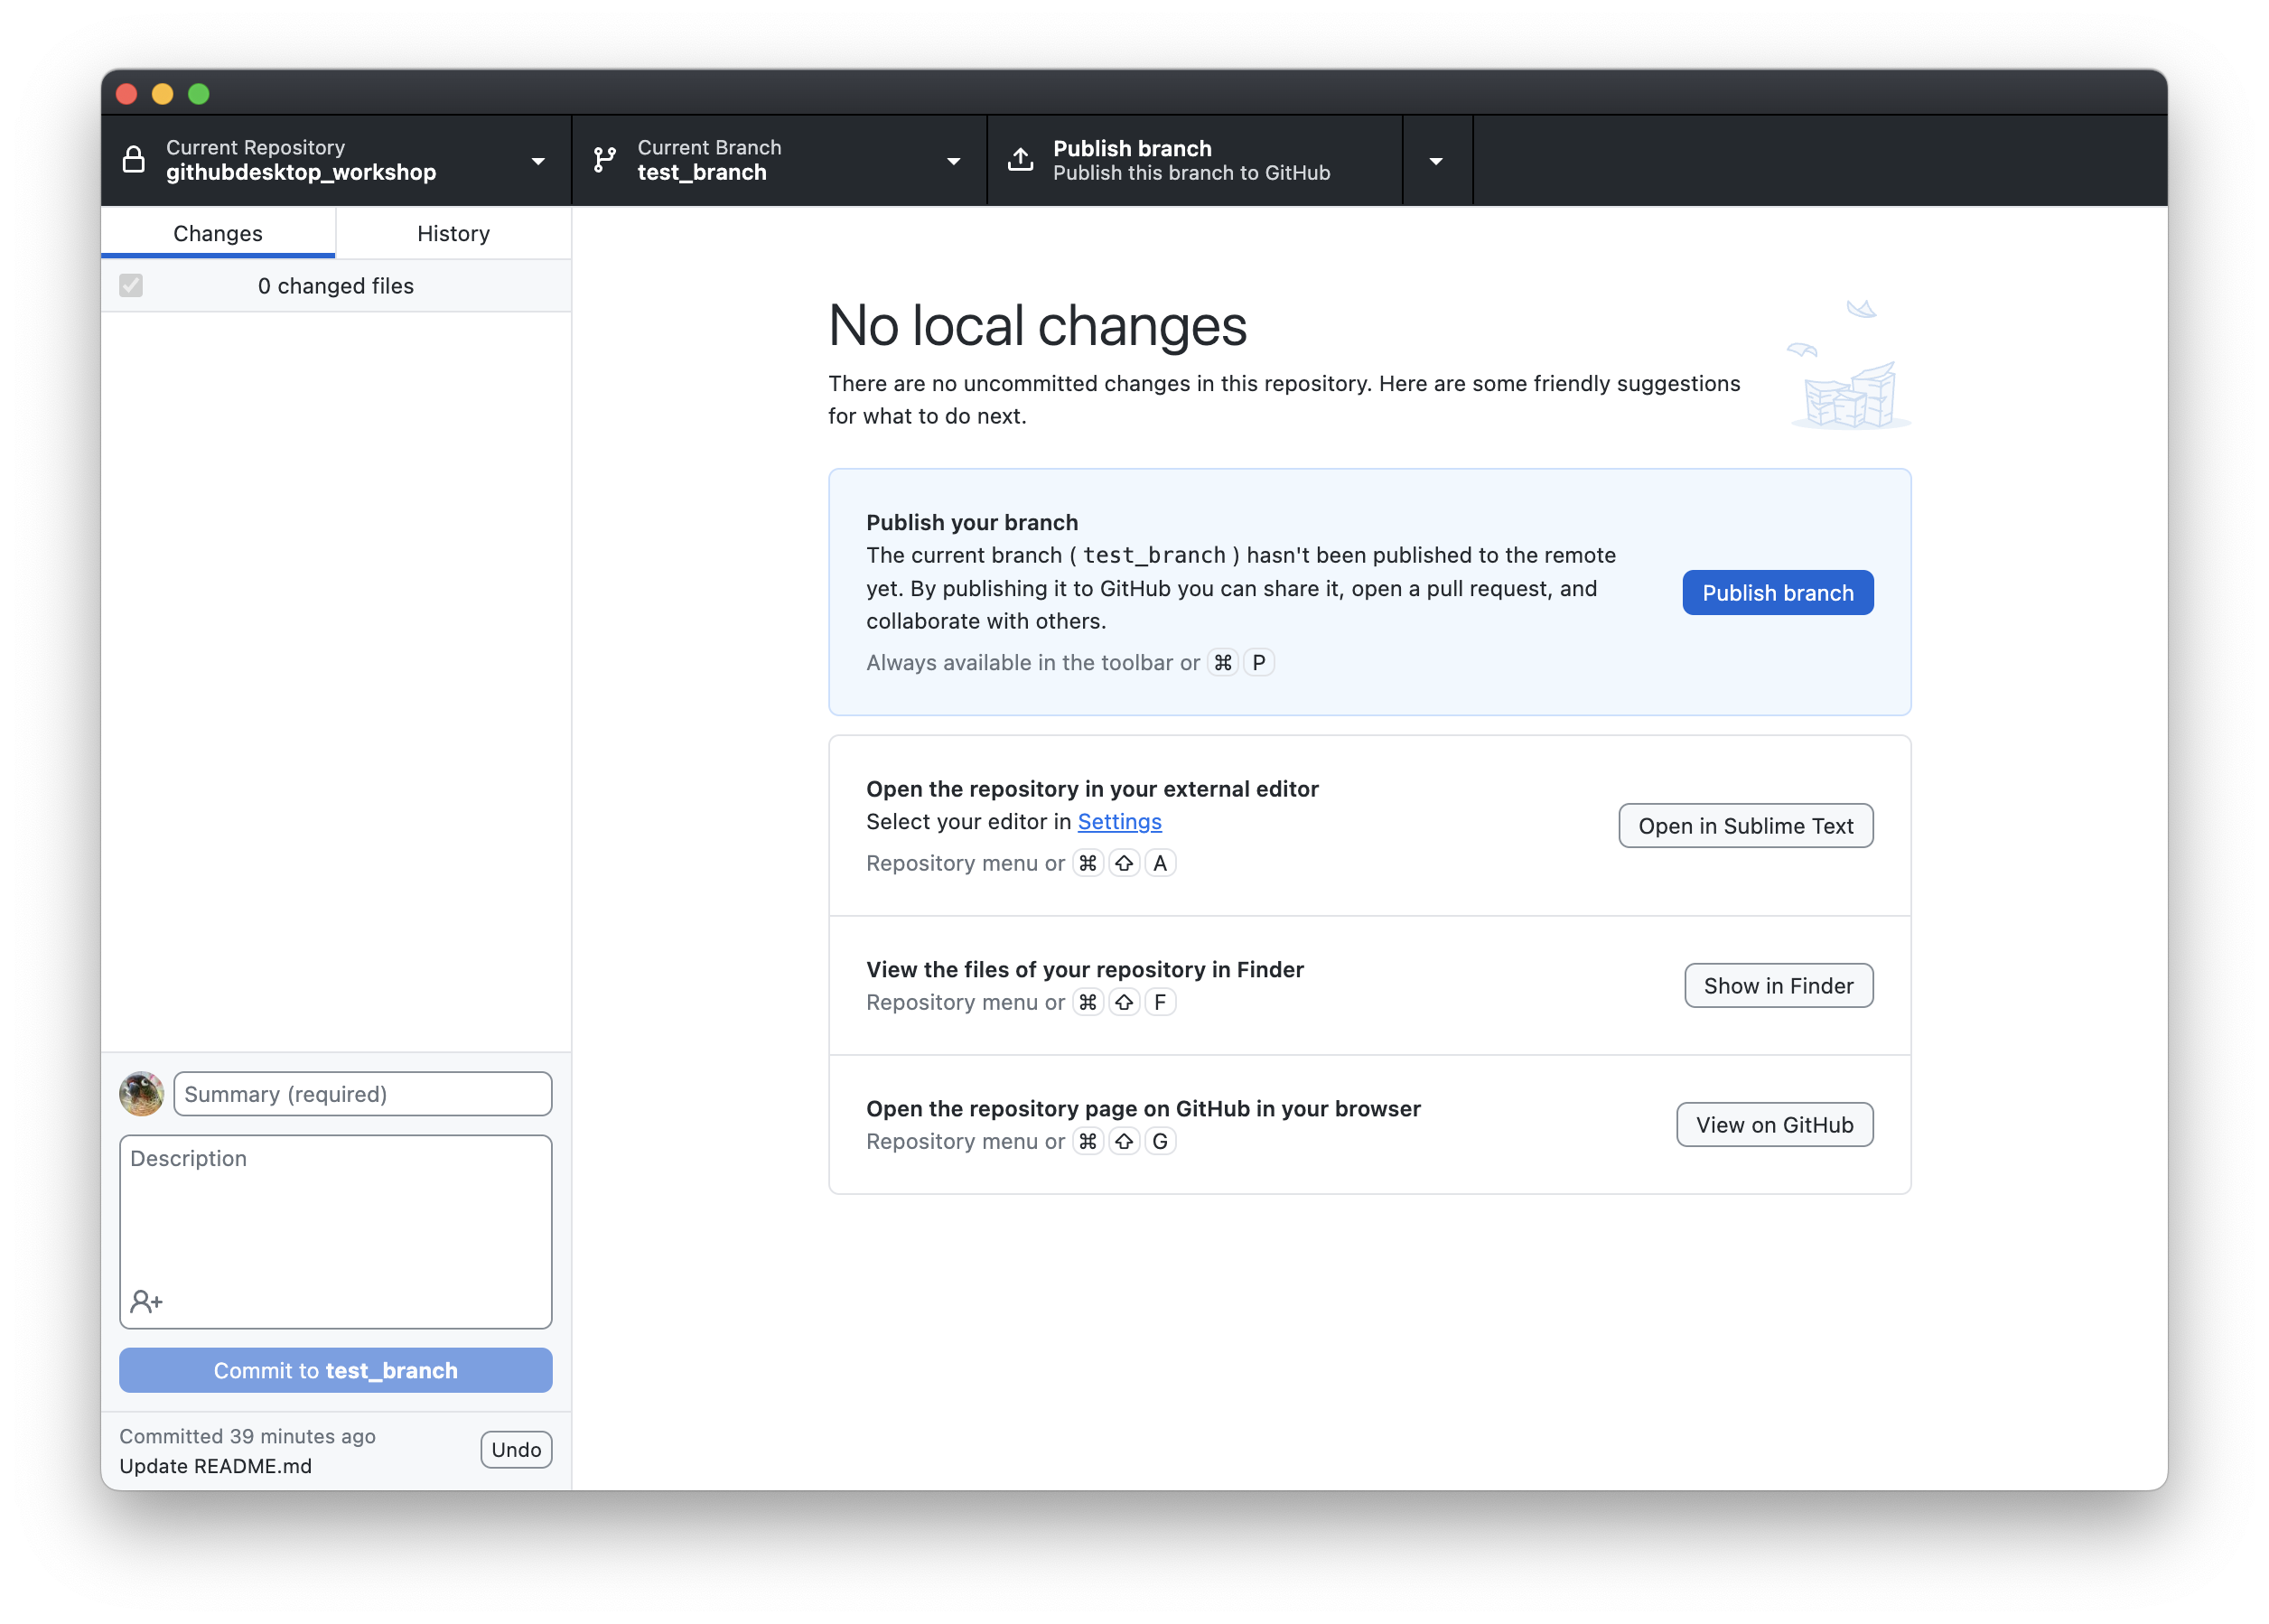
If you go to your repo on GitHub, you’ll see that the branch has been published:
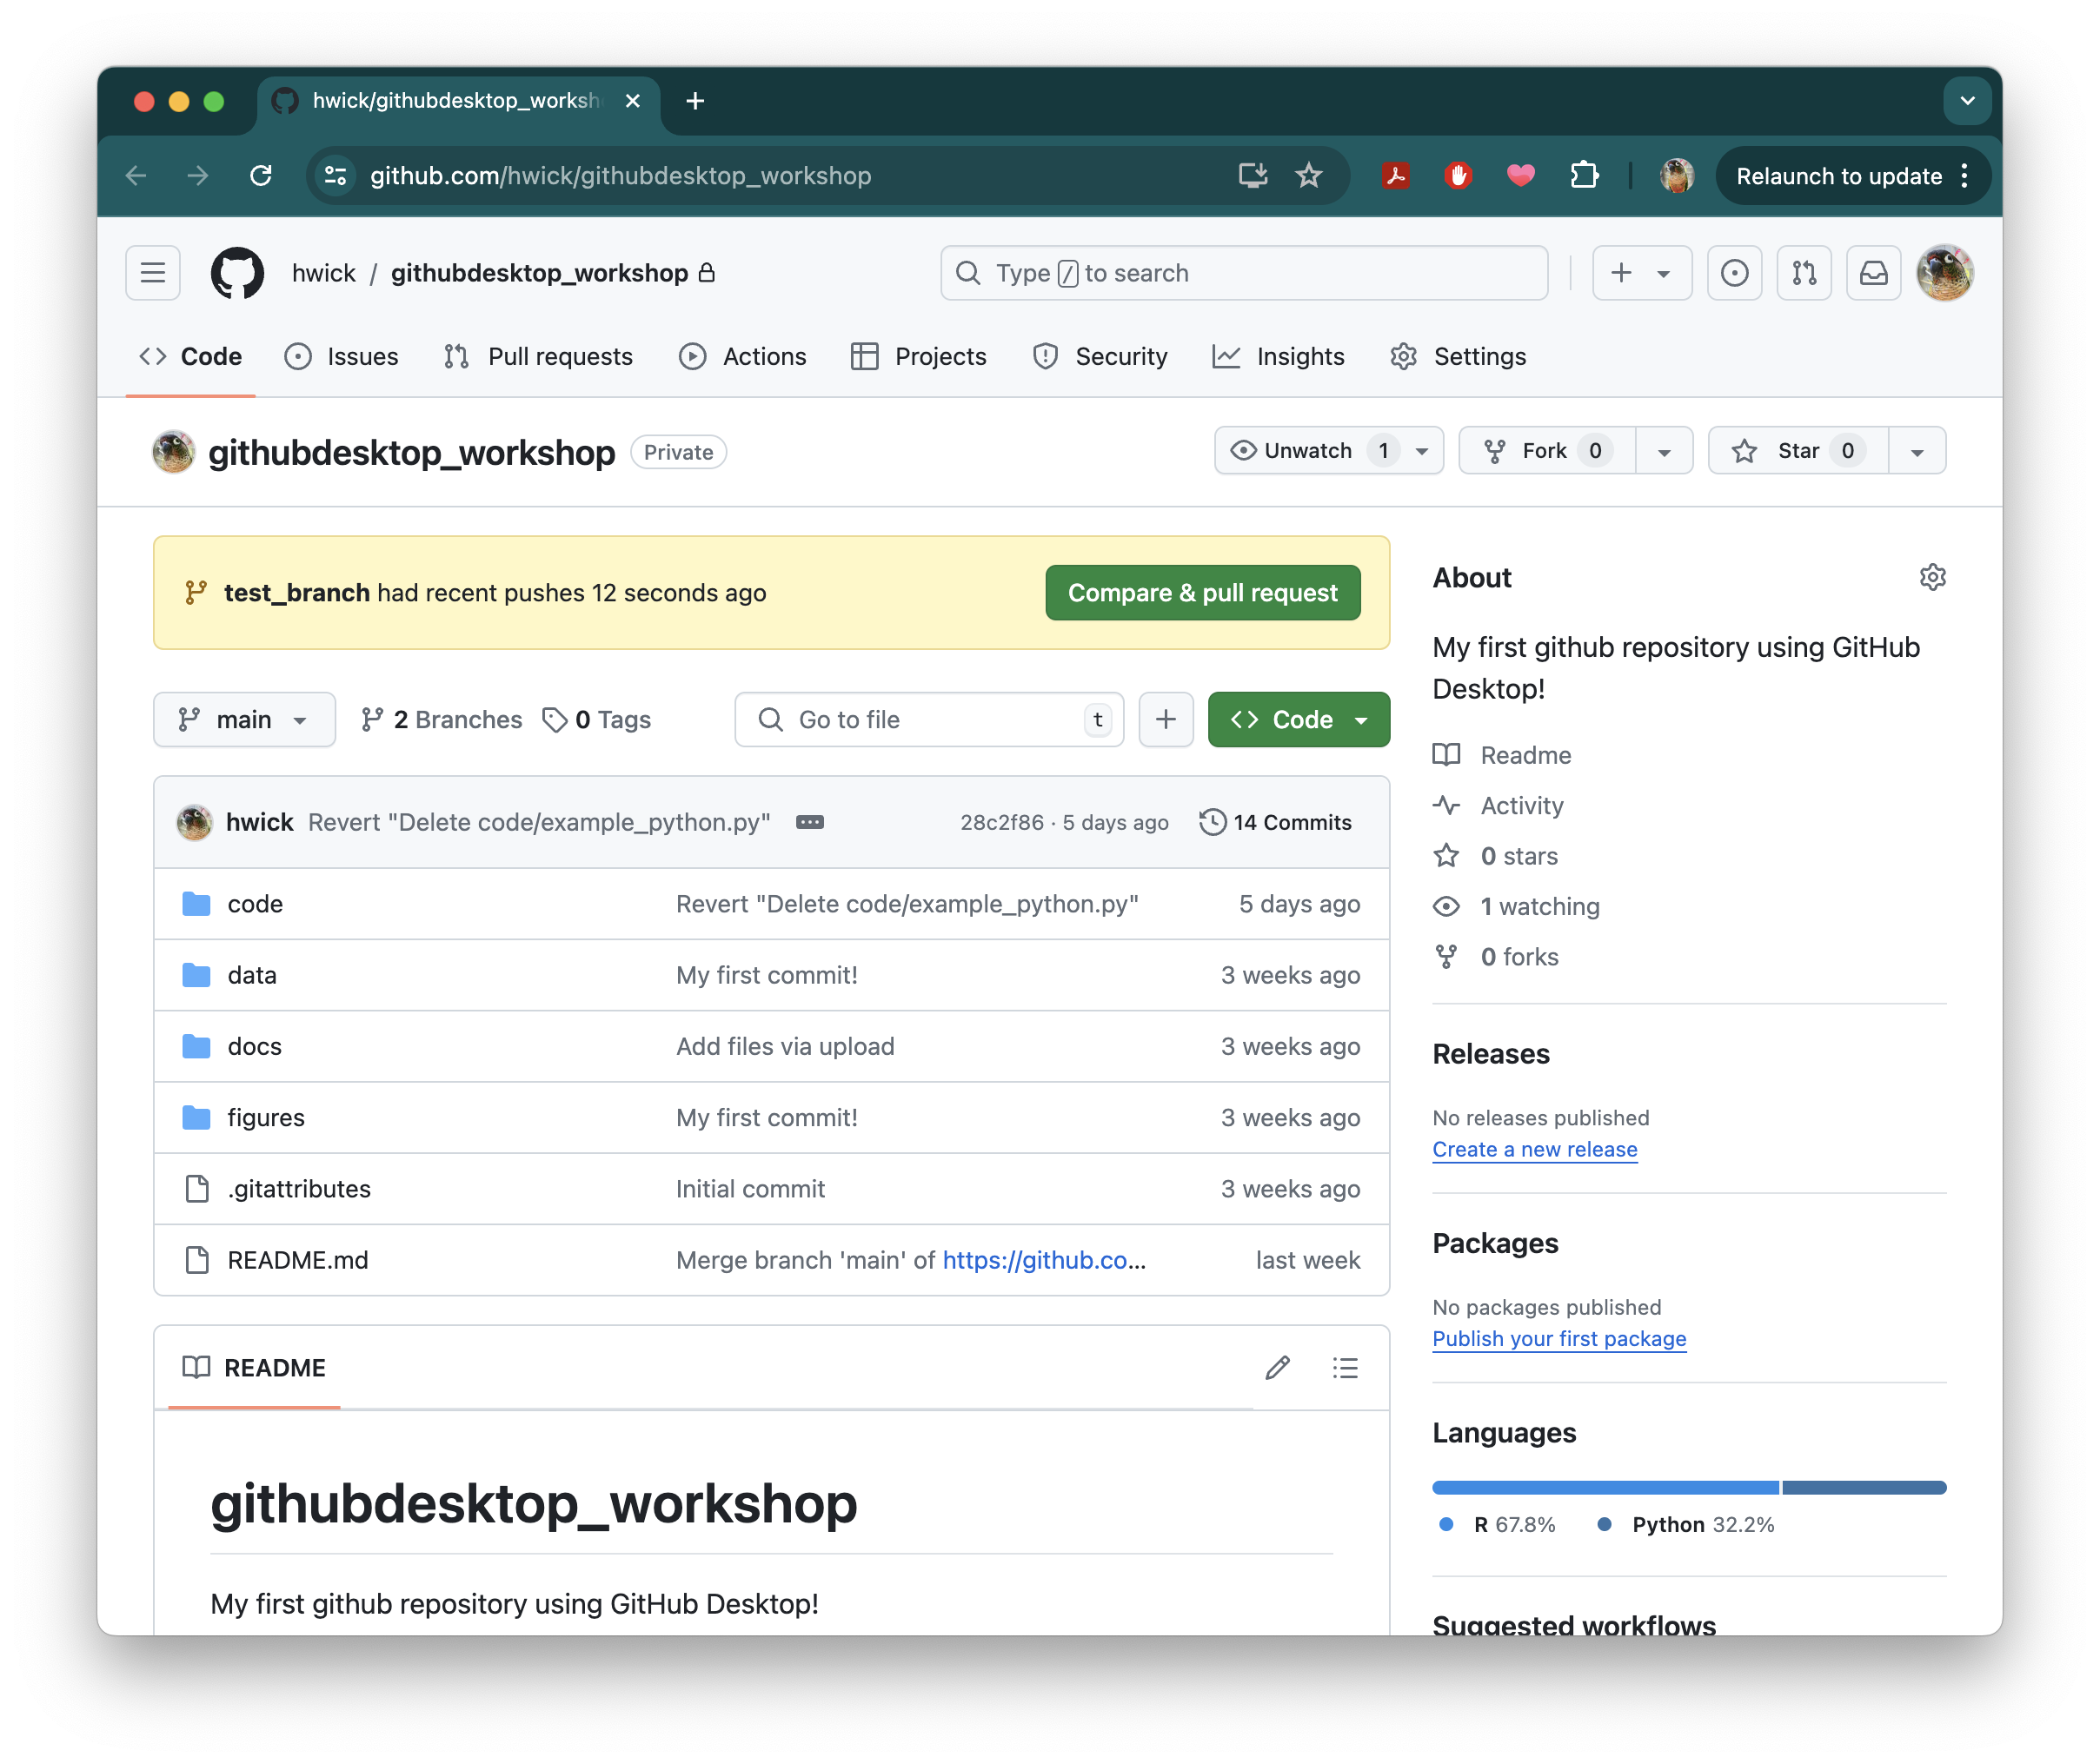
Note: If you already published your branch to GitHub and then make additional changes, you’ll still have to Push your new changes to GitHub to sync your remote repository and create a pull request
Merging branches
Once you’re done making changes to your new branch, and you’ve decided you want to keep these changes and incorporate them into your main repo, you will want to merge branches back together. This will keep your repository organized so you don’t end up with lots of different branches with lots of different versions. To do this, we’ll be making a pull request from main. But before we do that, there’s something important to consider:
What if I don’t want to merge all the changes I made?
Sometimes, you might find that there are some changes you want to incorporate from your new branch, but other changes you want to leave behind. This is called Cherry-Picking. When we were exploring options for commits in the previous lesson, this was one of the options we saw in the dropdown menu for commits in the
Historytab. We’re going to keep all of our changes, but for demonstration purposes let’s show you how to cherry-pick in case you want to in the future:While still in
test_branch, if you go to yourHistorytab and right-click the most recent commit we made, you’ll seeCherry-pick Commit...in the dropdown menu:
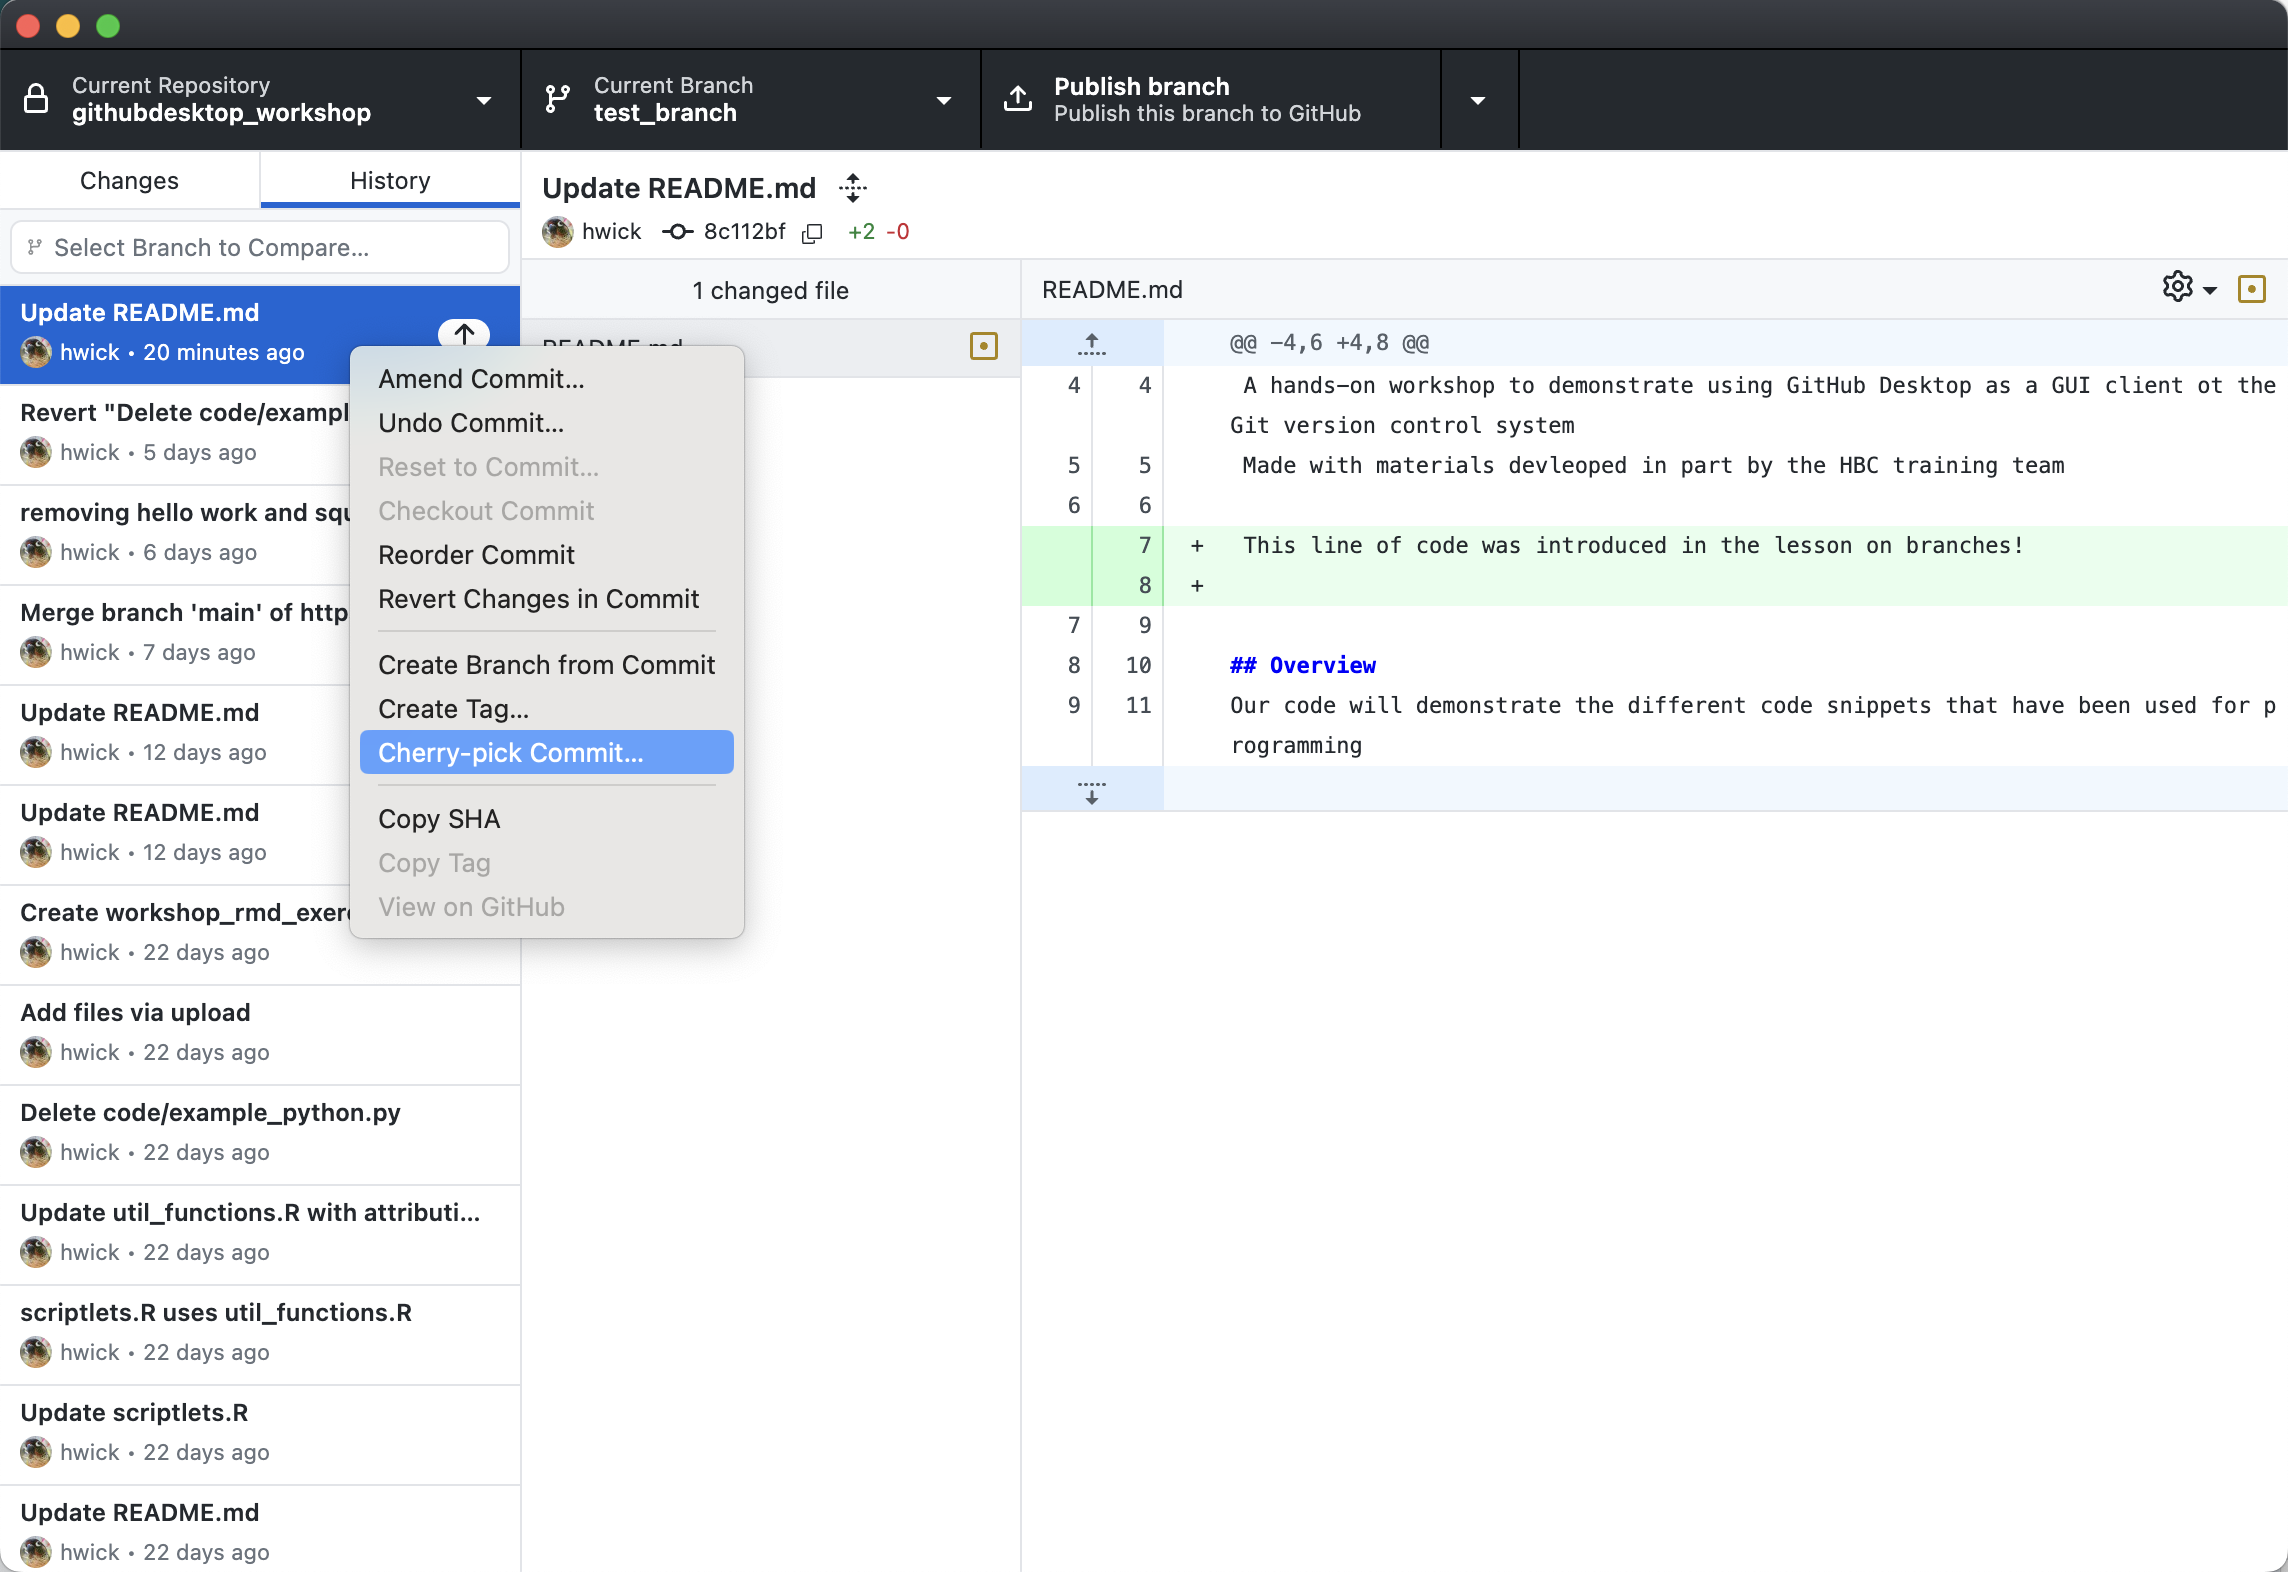
If you select this, it will give you the option to select a branch and then cherry-pick the commit to that branch:
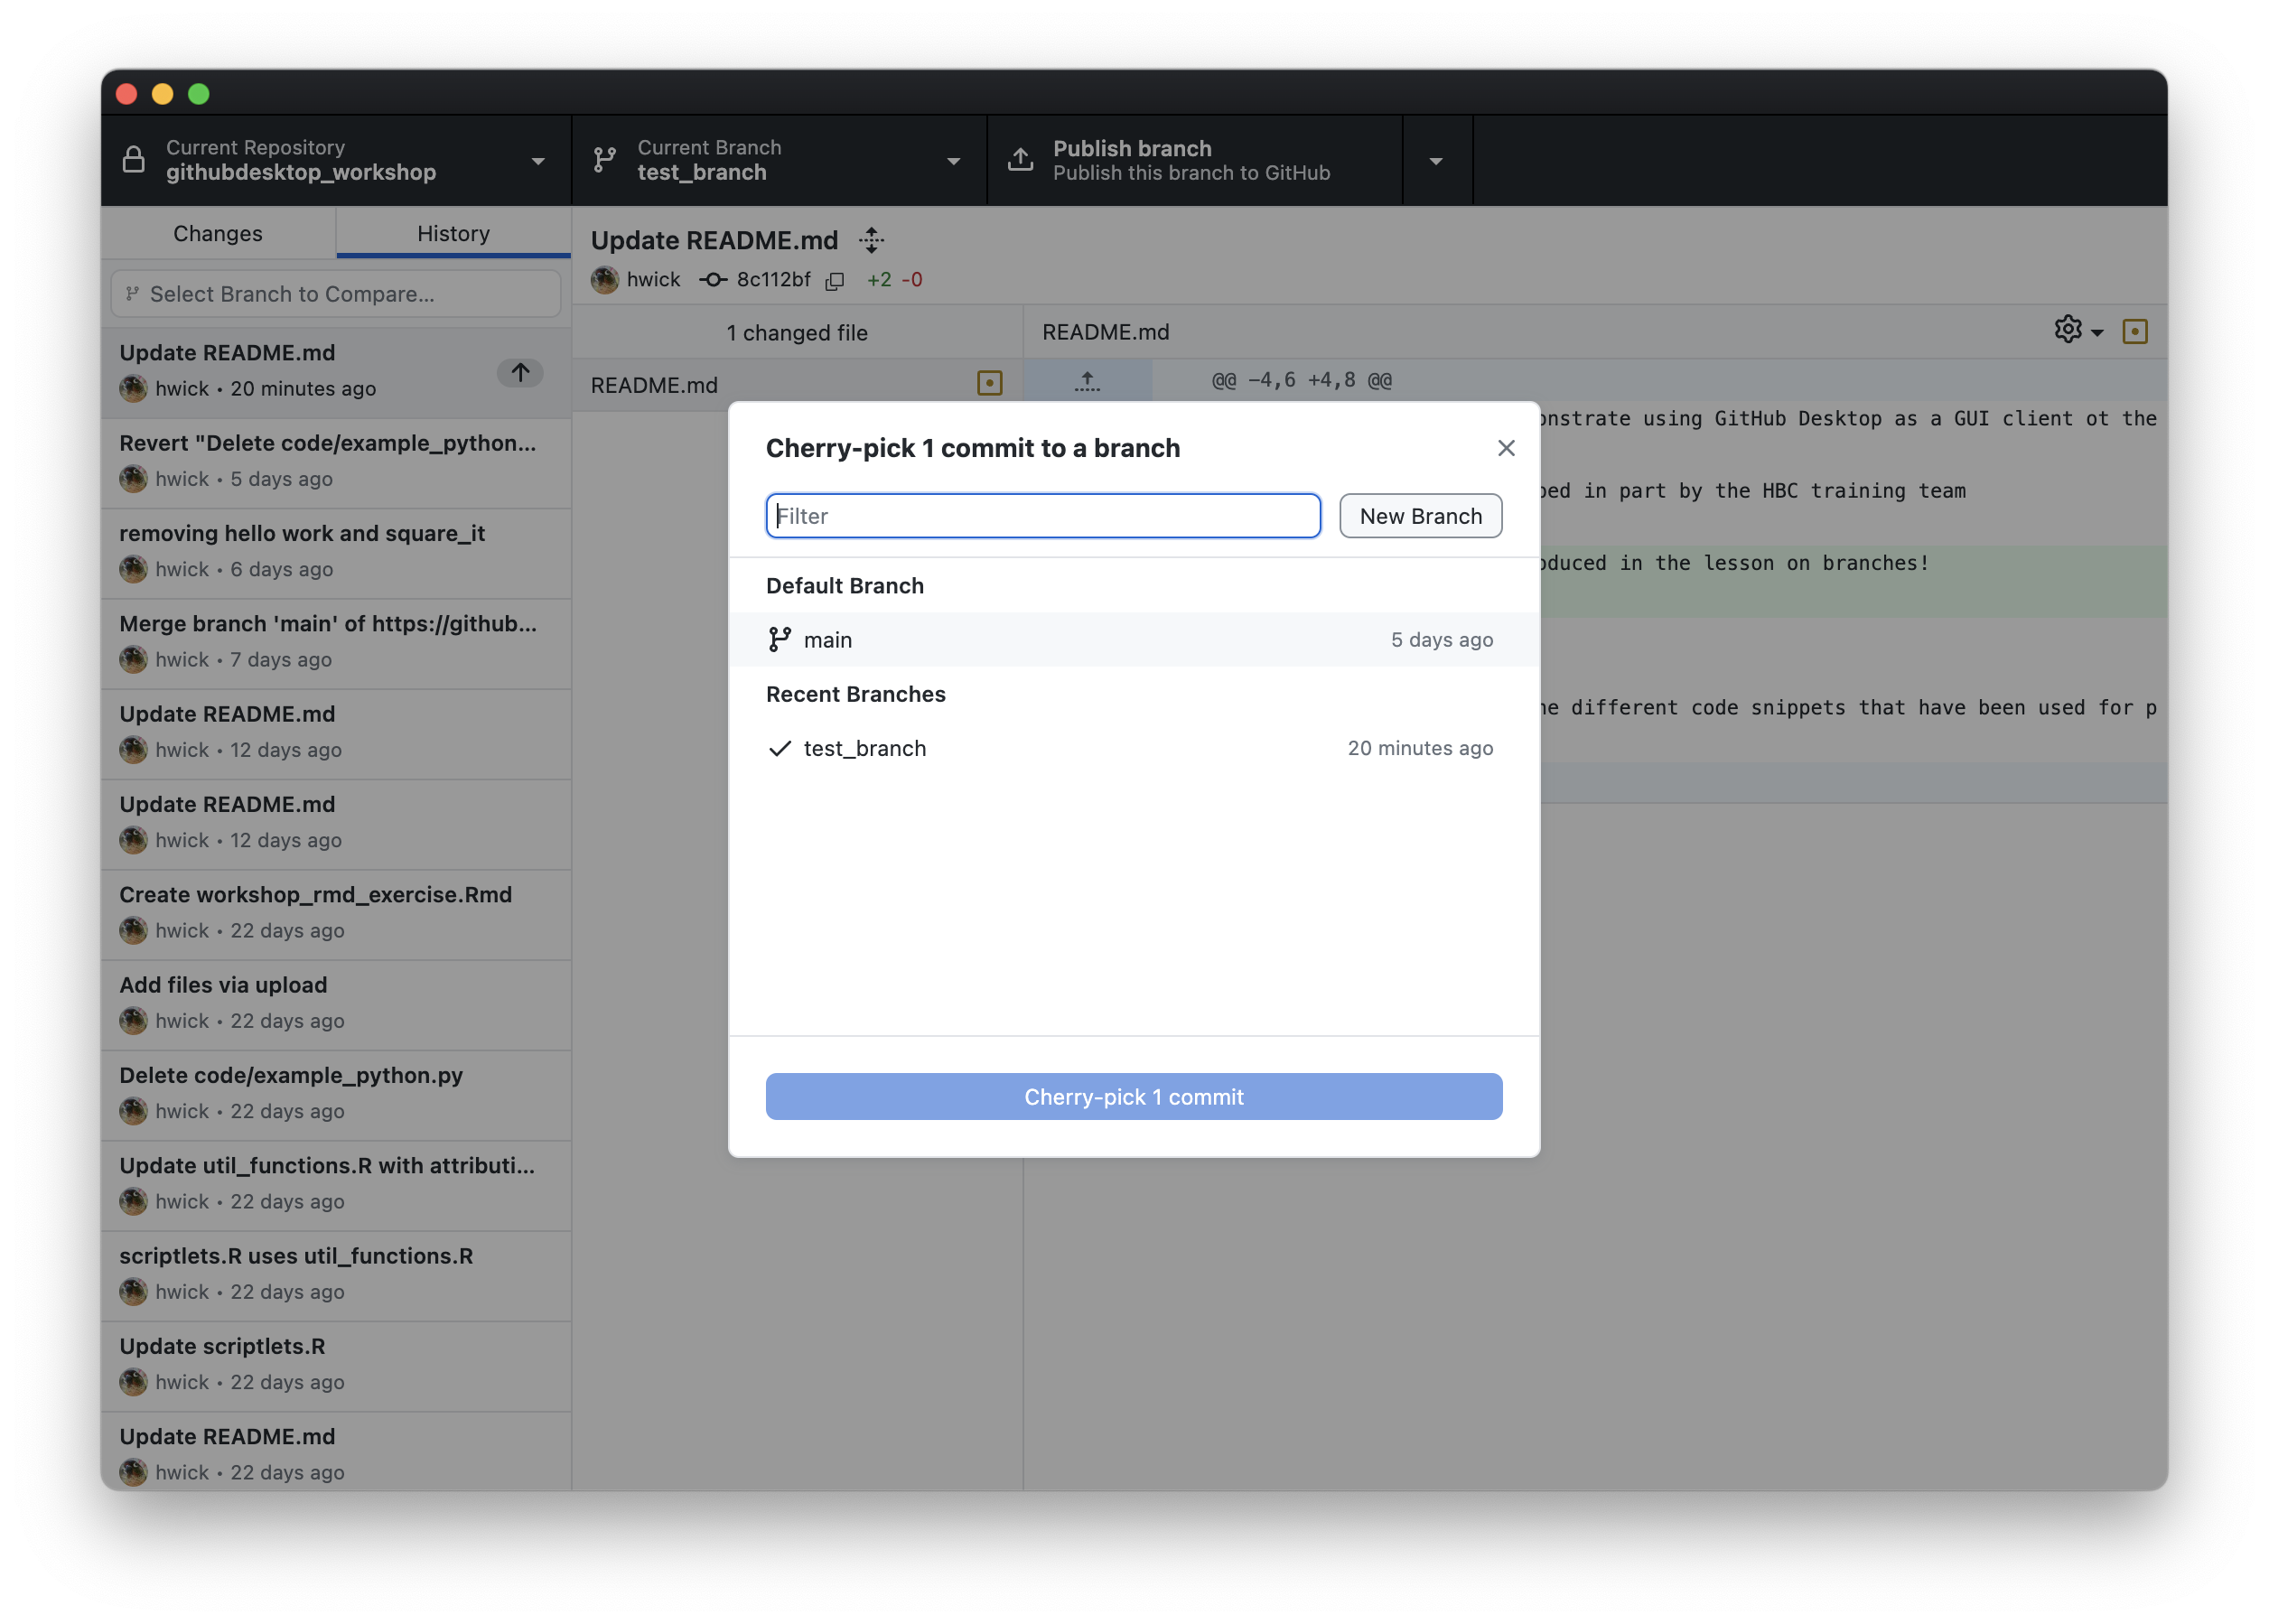
For now though, we’re going to skip this – just close the pop-up without cherry-picking.
Making a pull request to merge branches
Instead, we’re going to keep all of our changes and merge test_branch with main via a pull request. You’ll notice a new highlighted box with a blue button that gives the option to Preview Pull Request (you may notice that this button has a drop down menu to skip straight to Create Pull Request, but we recommend reviewing your pull request first):
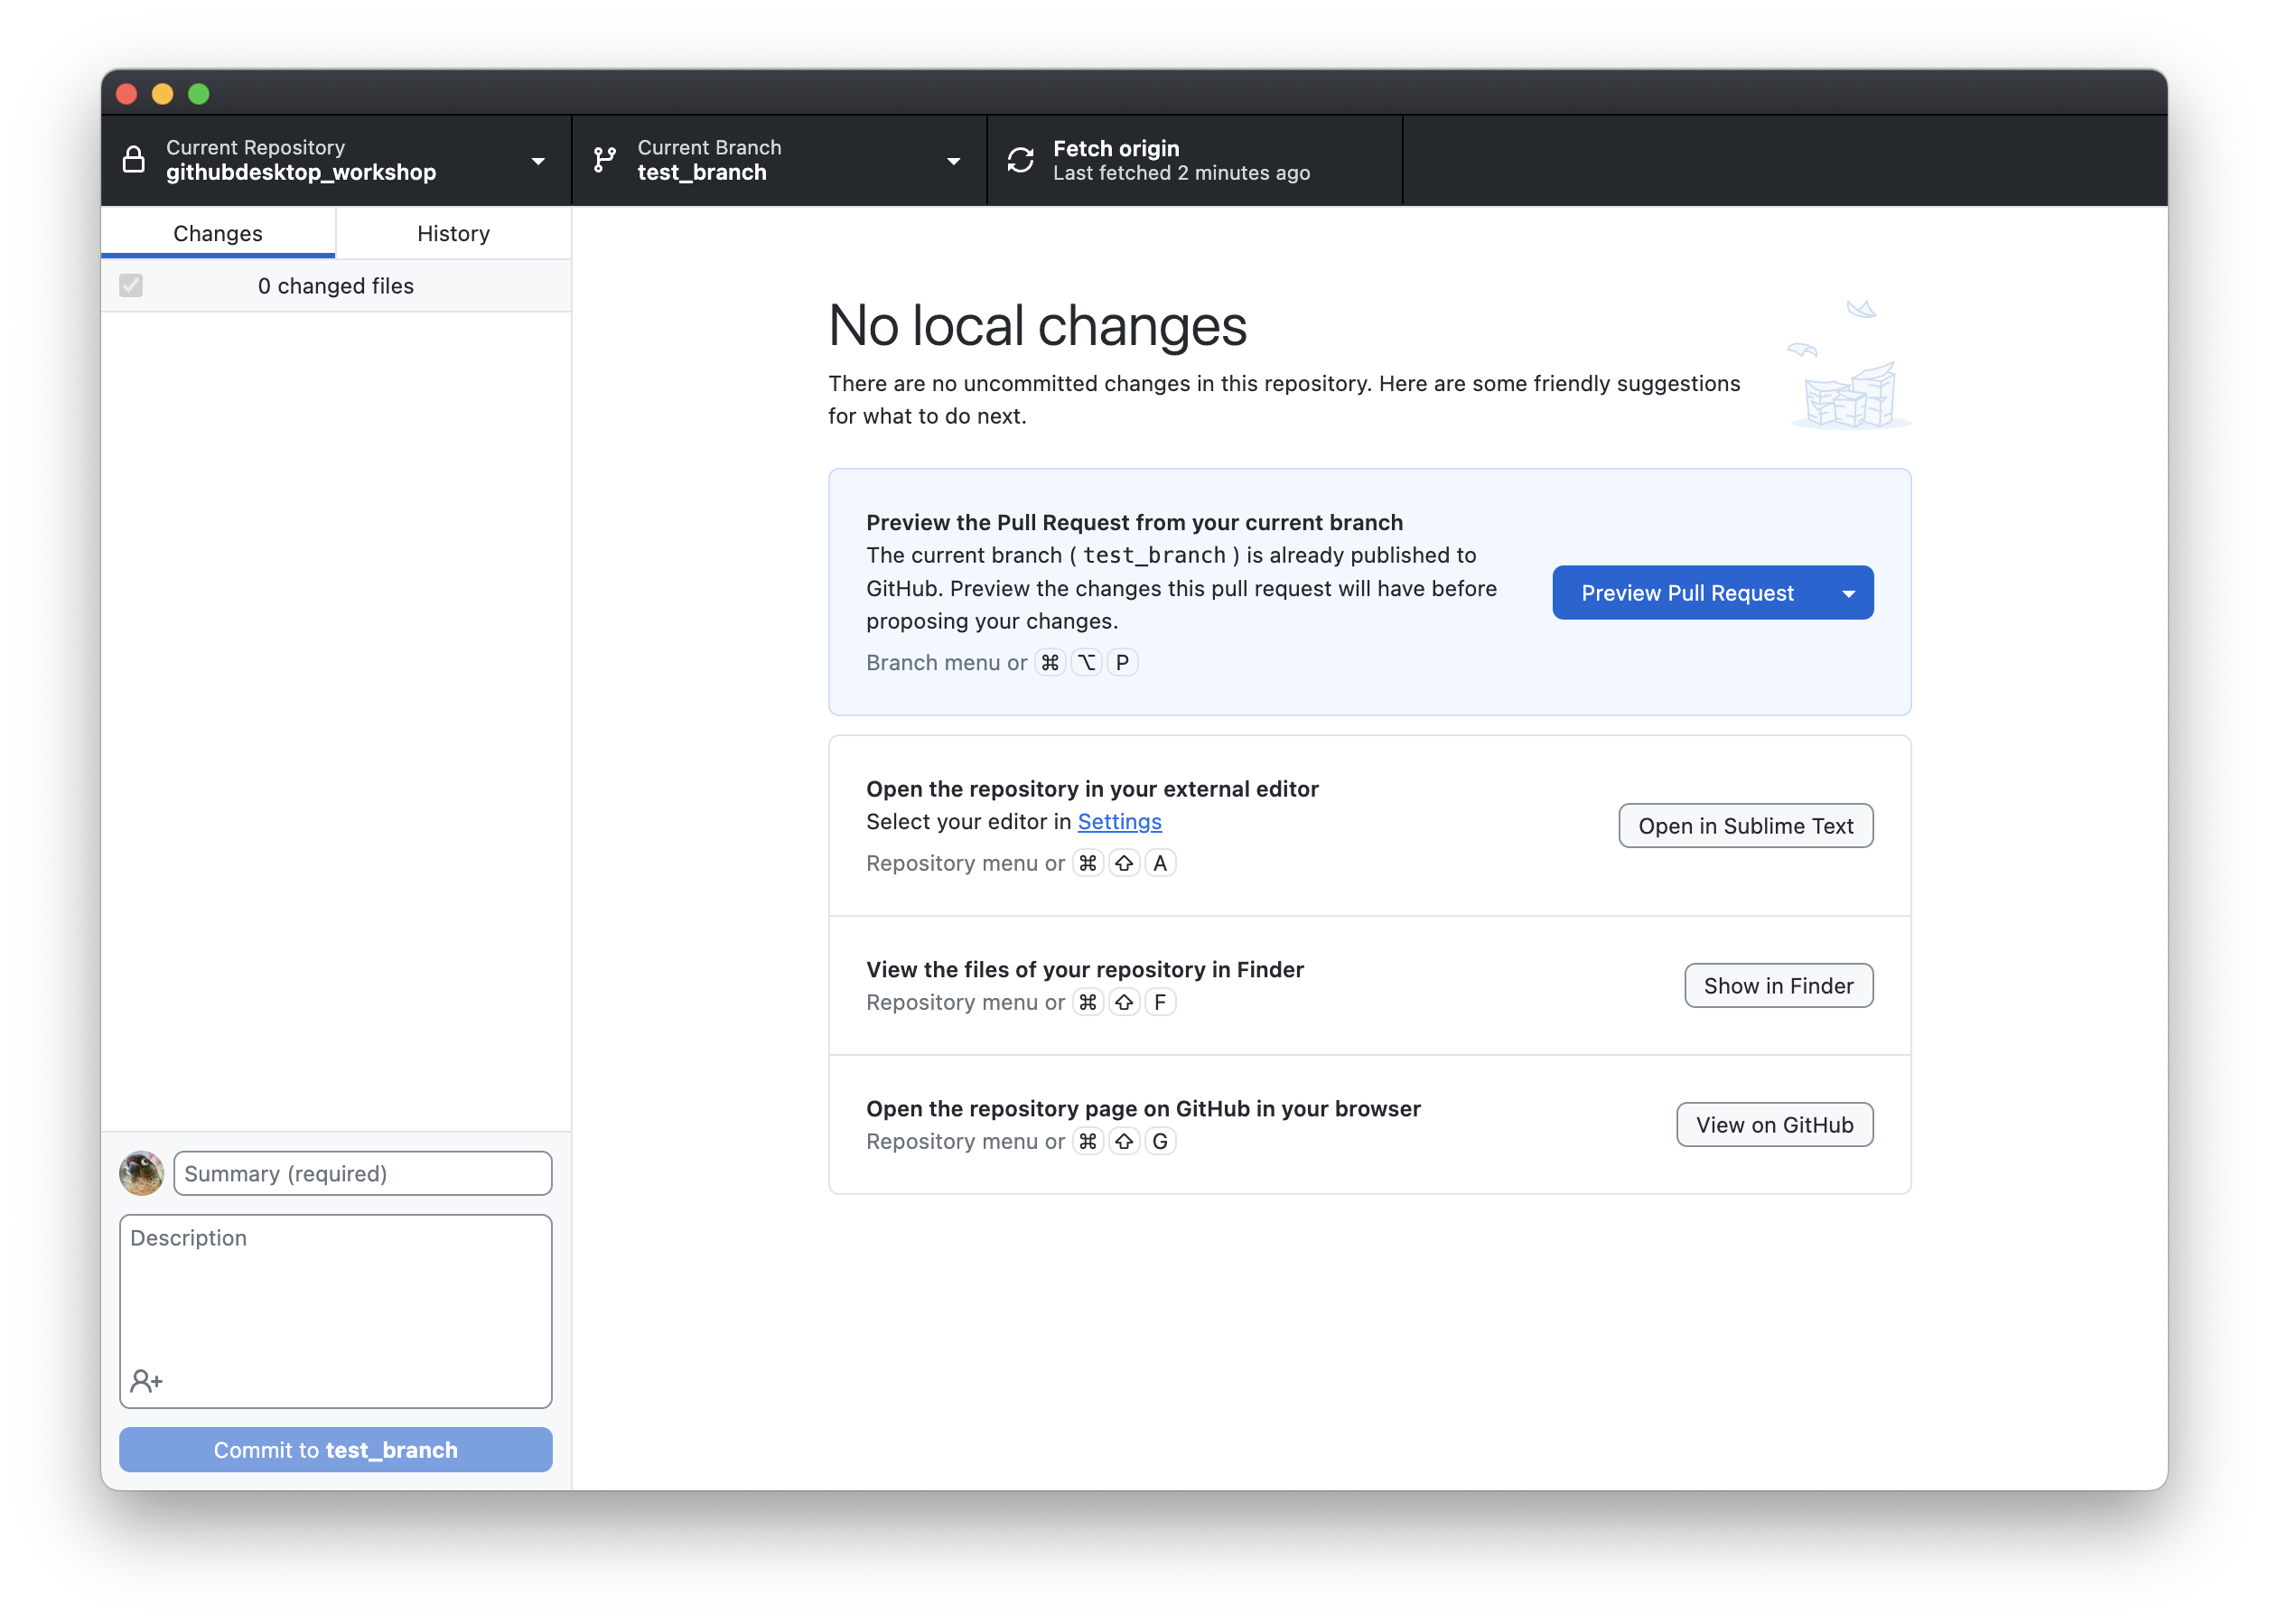
If you click this button, it will pull up a summary of changes, with the option to Create Pull Request:
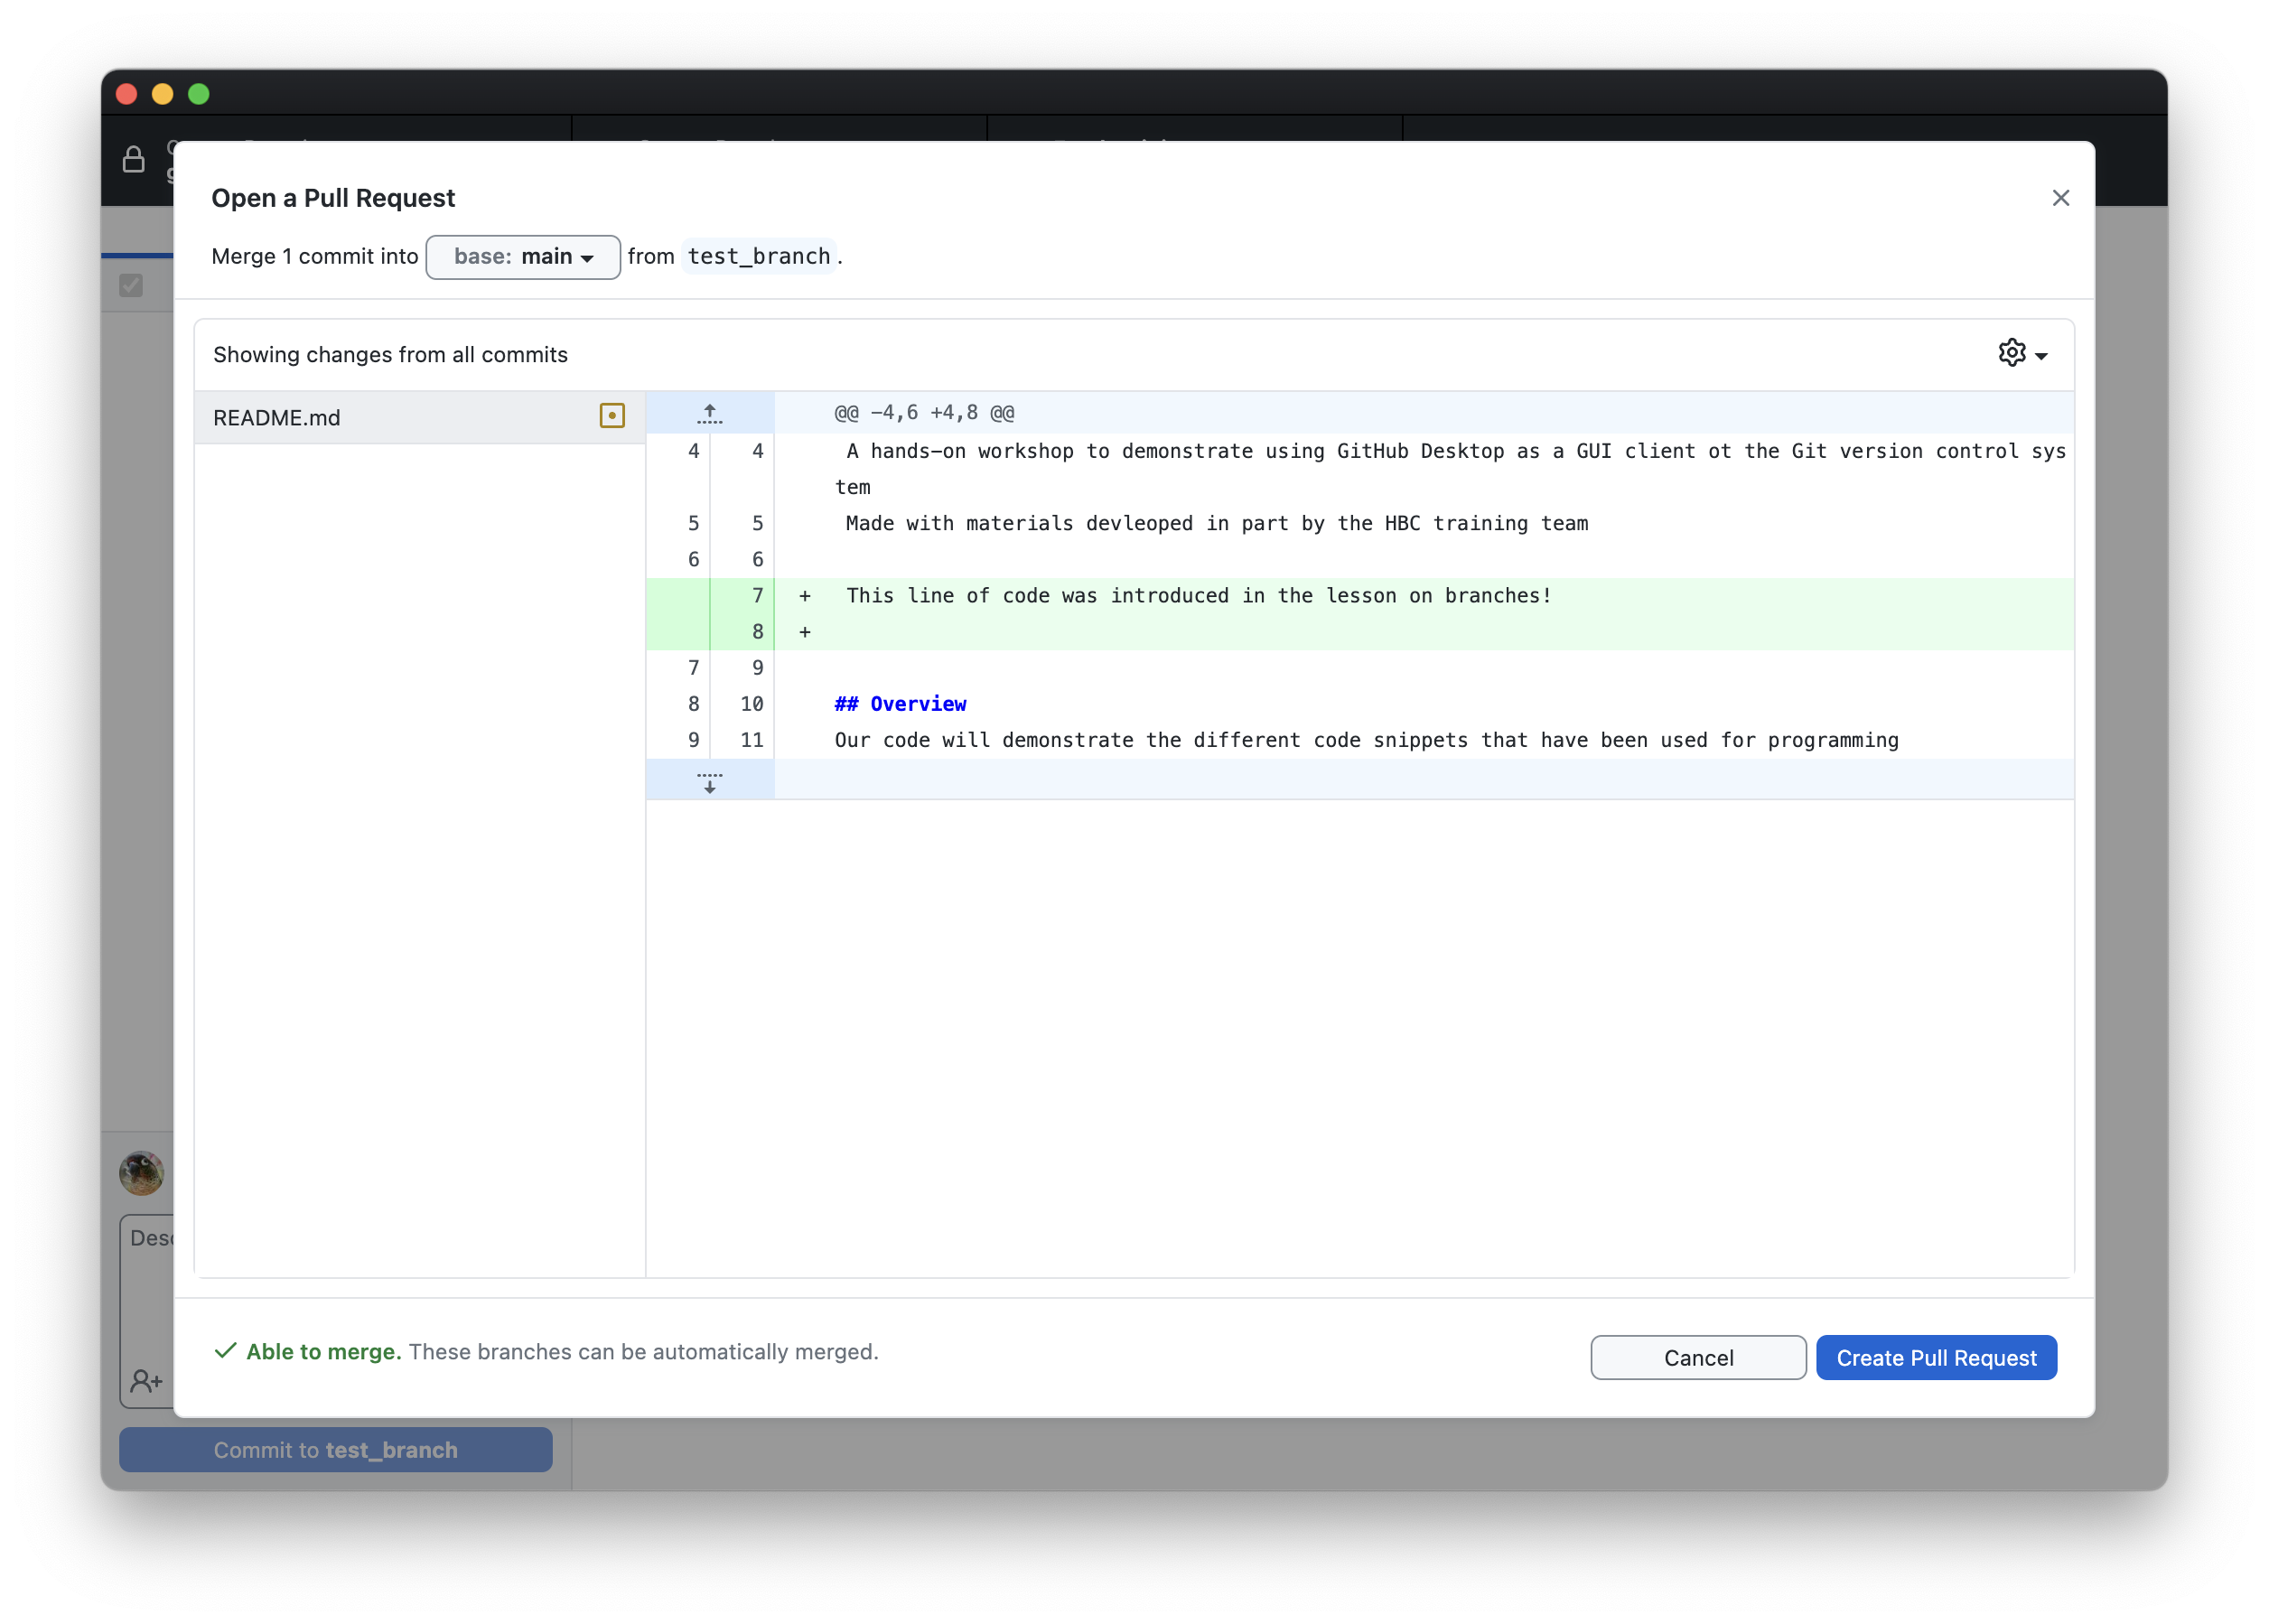
Clicking this will immediately open your repo on GitHub. Similar to when making a commit, you’ll be prompted for a title and a description for your pull request. Go ahead and add a brief description and click the green Create pull request button
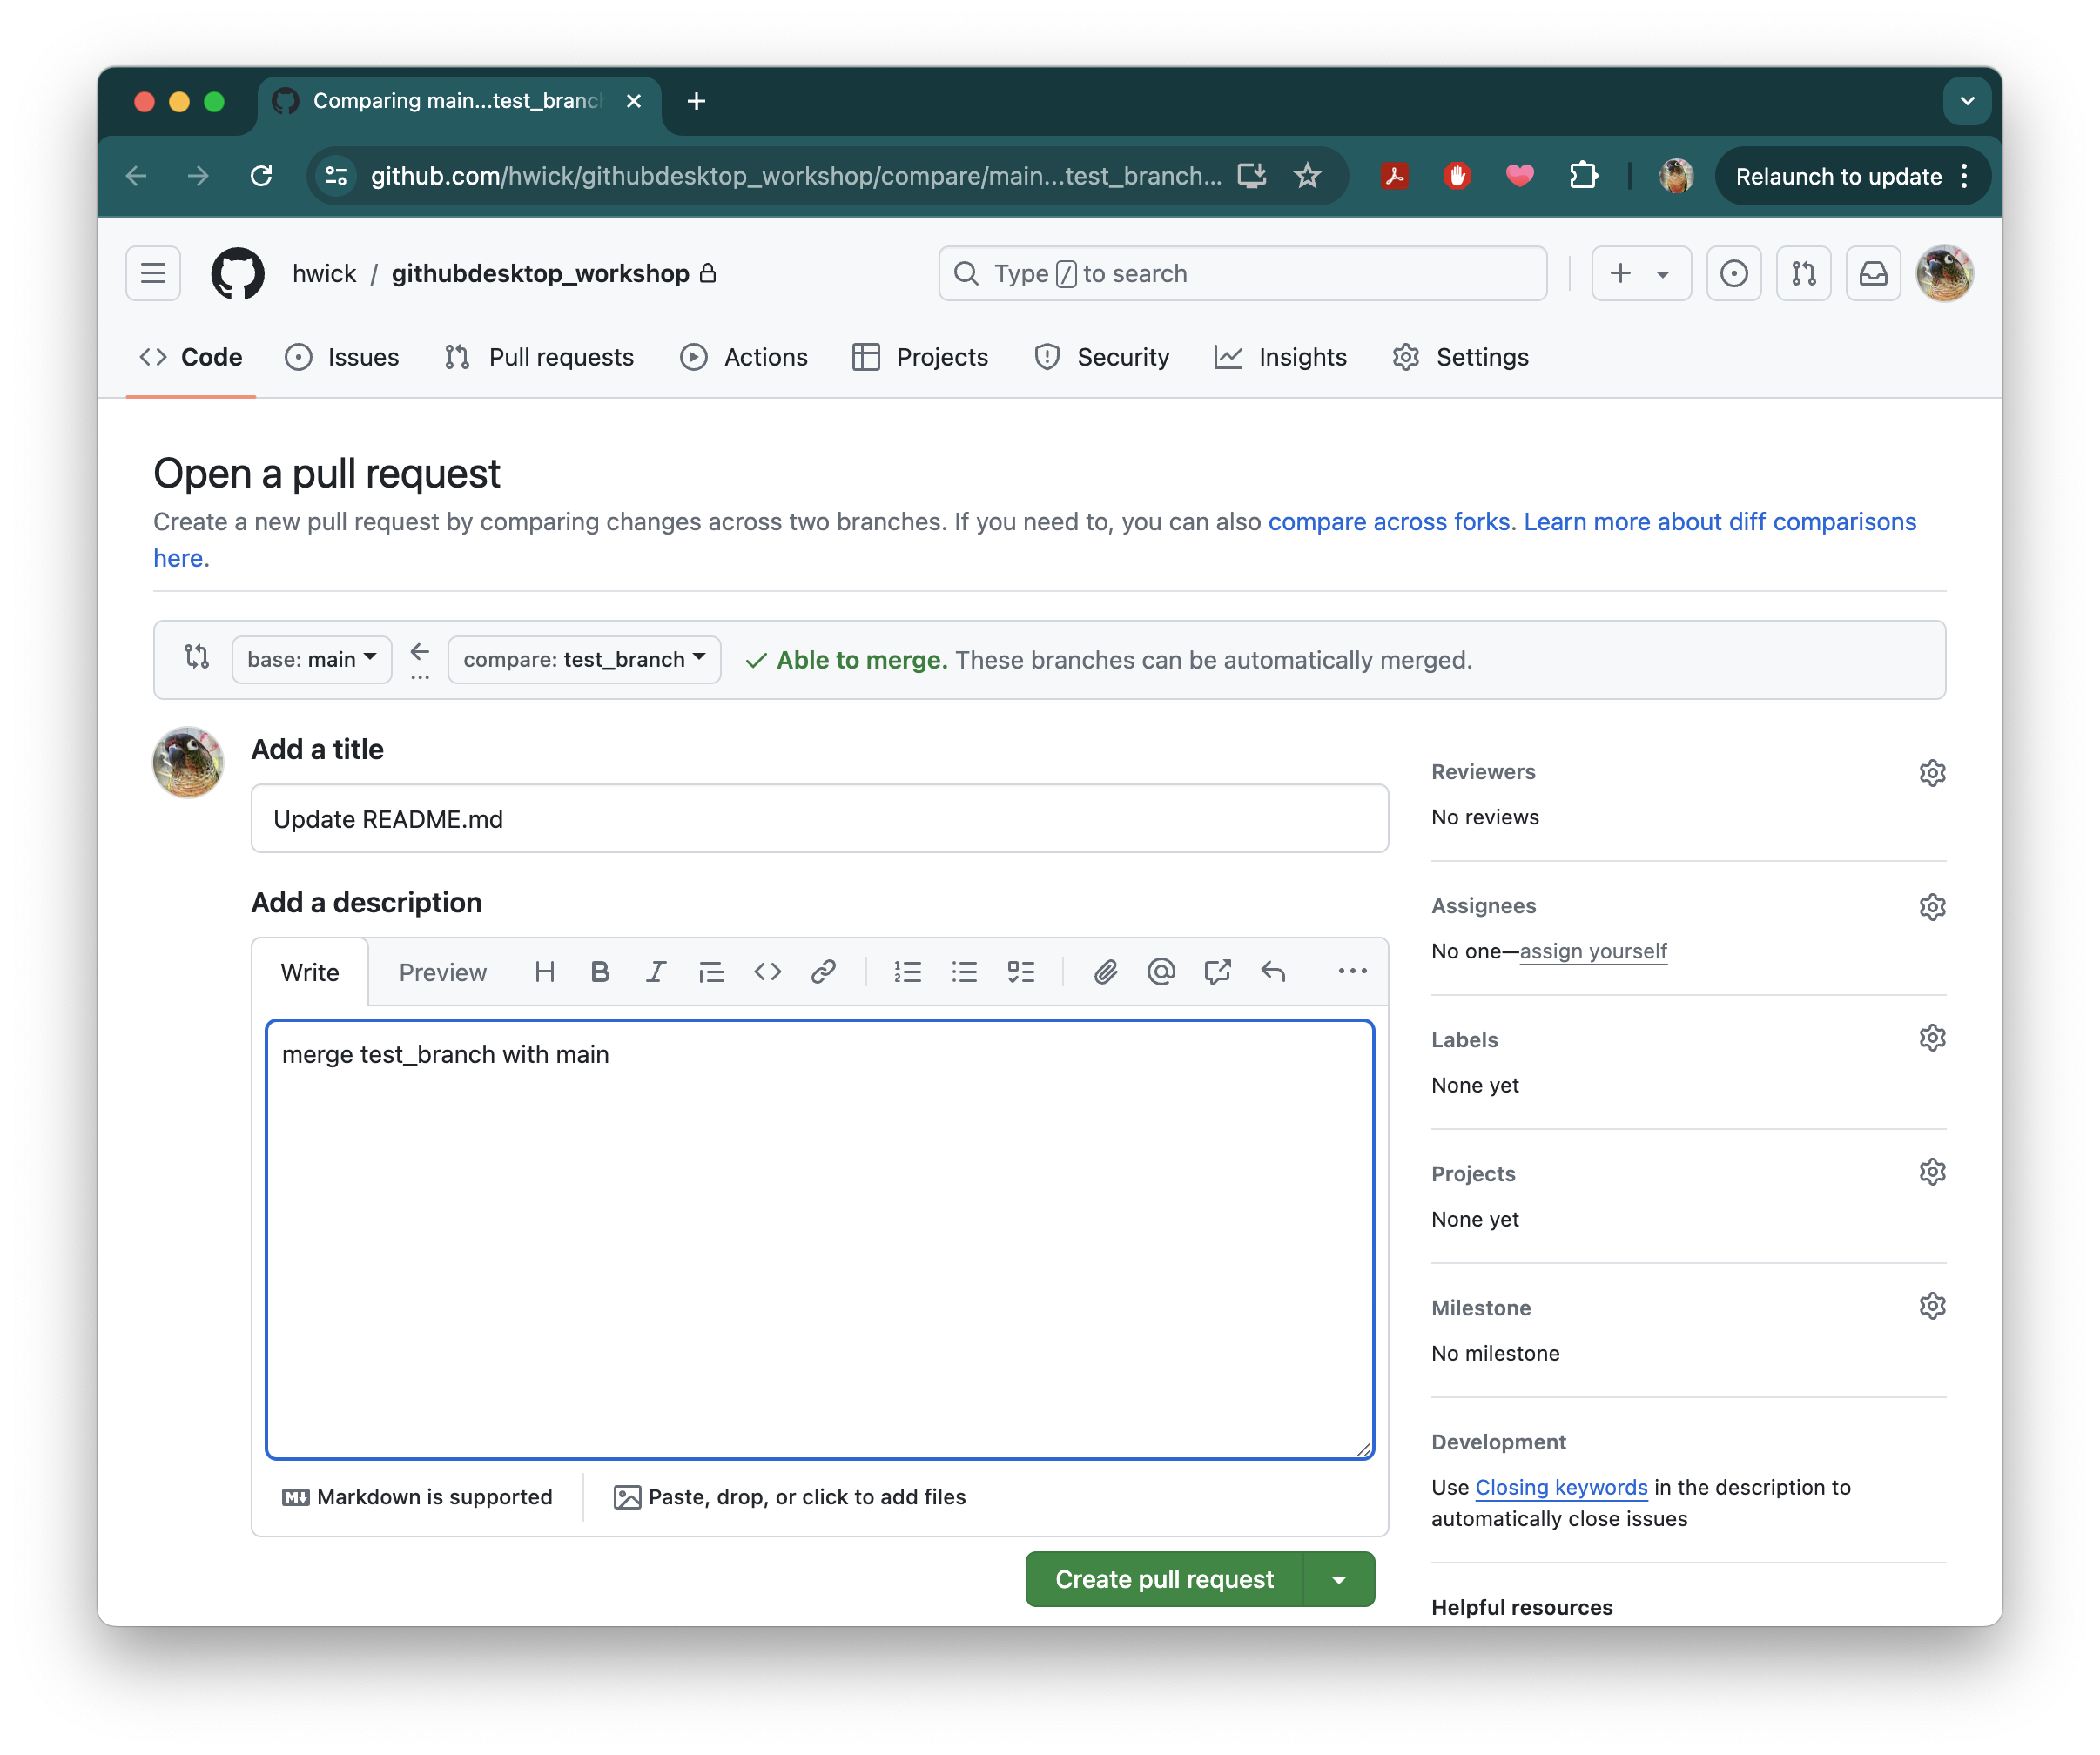
Note: you’ll see a message up top here that says “Able to merge. These branches can be automatically merged.” There may be cases where your branches conflict, just as commits can conflict, and they’ll need to be manually reviewed.
After a moment of processing, the page will show you a number of useful options, including the ability to require review from specific users (useful if you have multiple people working on a project that belongs primarily to one person who is the main editor) or to turn on debugging options through continuous integration. Notice we have a nice green checkmark indicating that This branch has no conflicts with the base branch meaning we can merge these branches automatically without having to review any conflicting changes between main and test_branch manually.
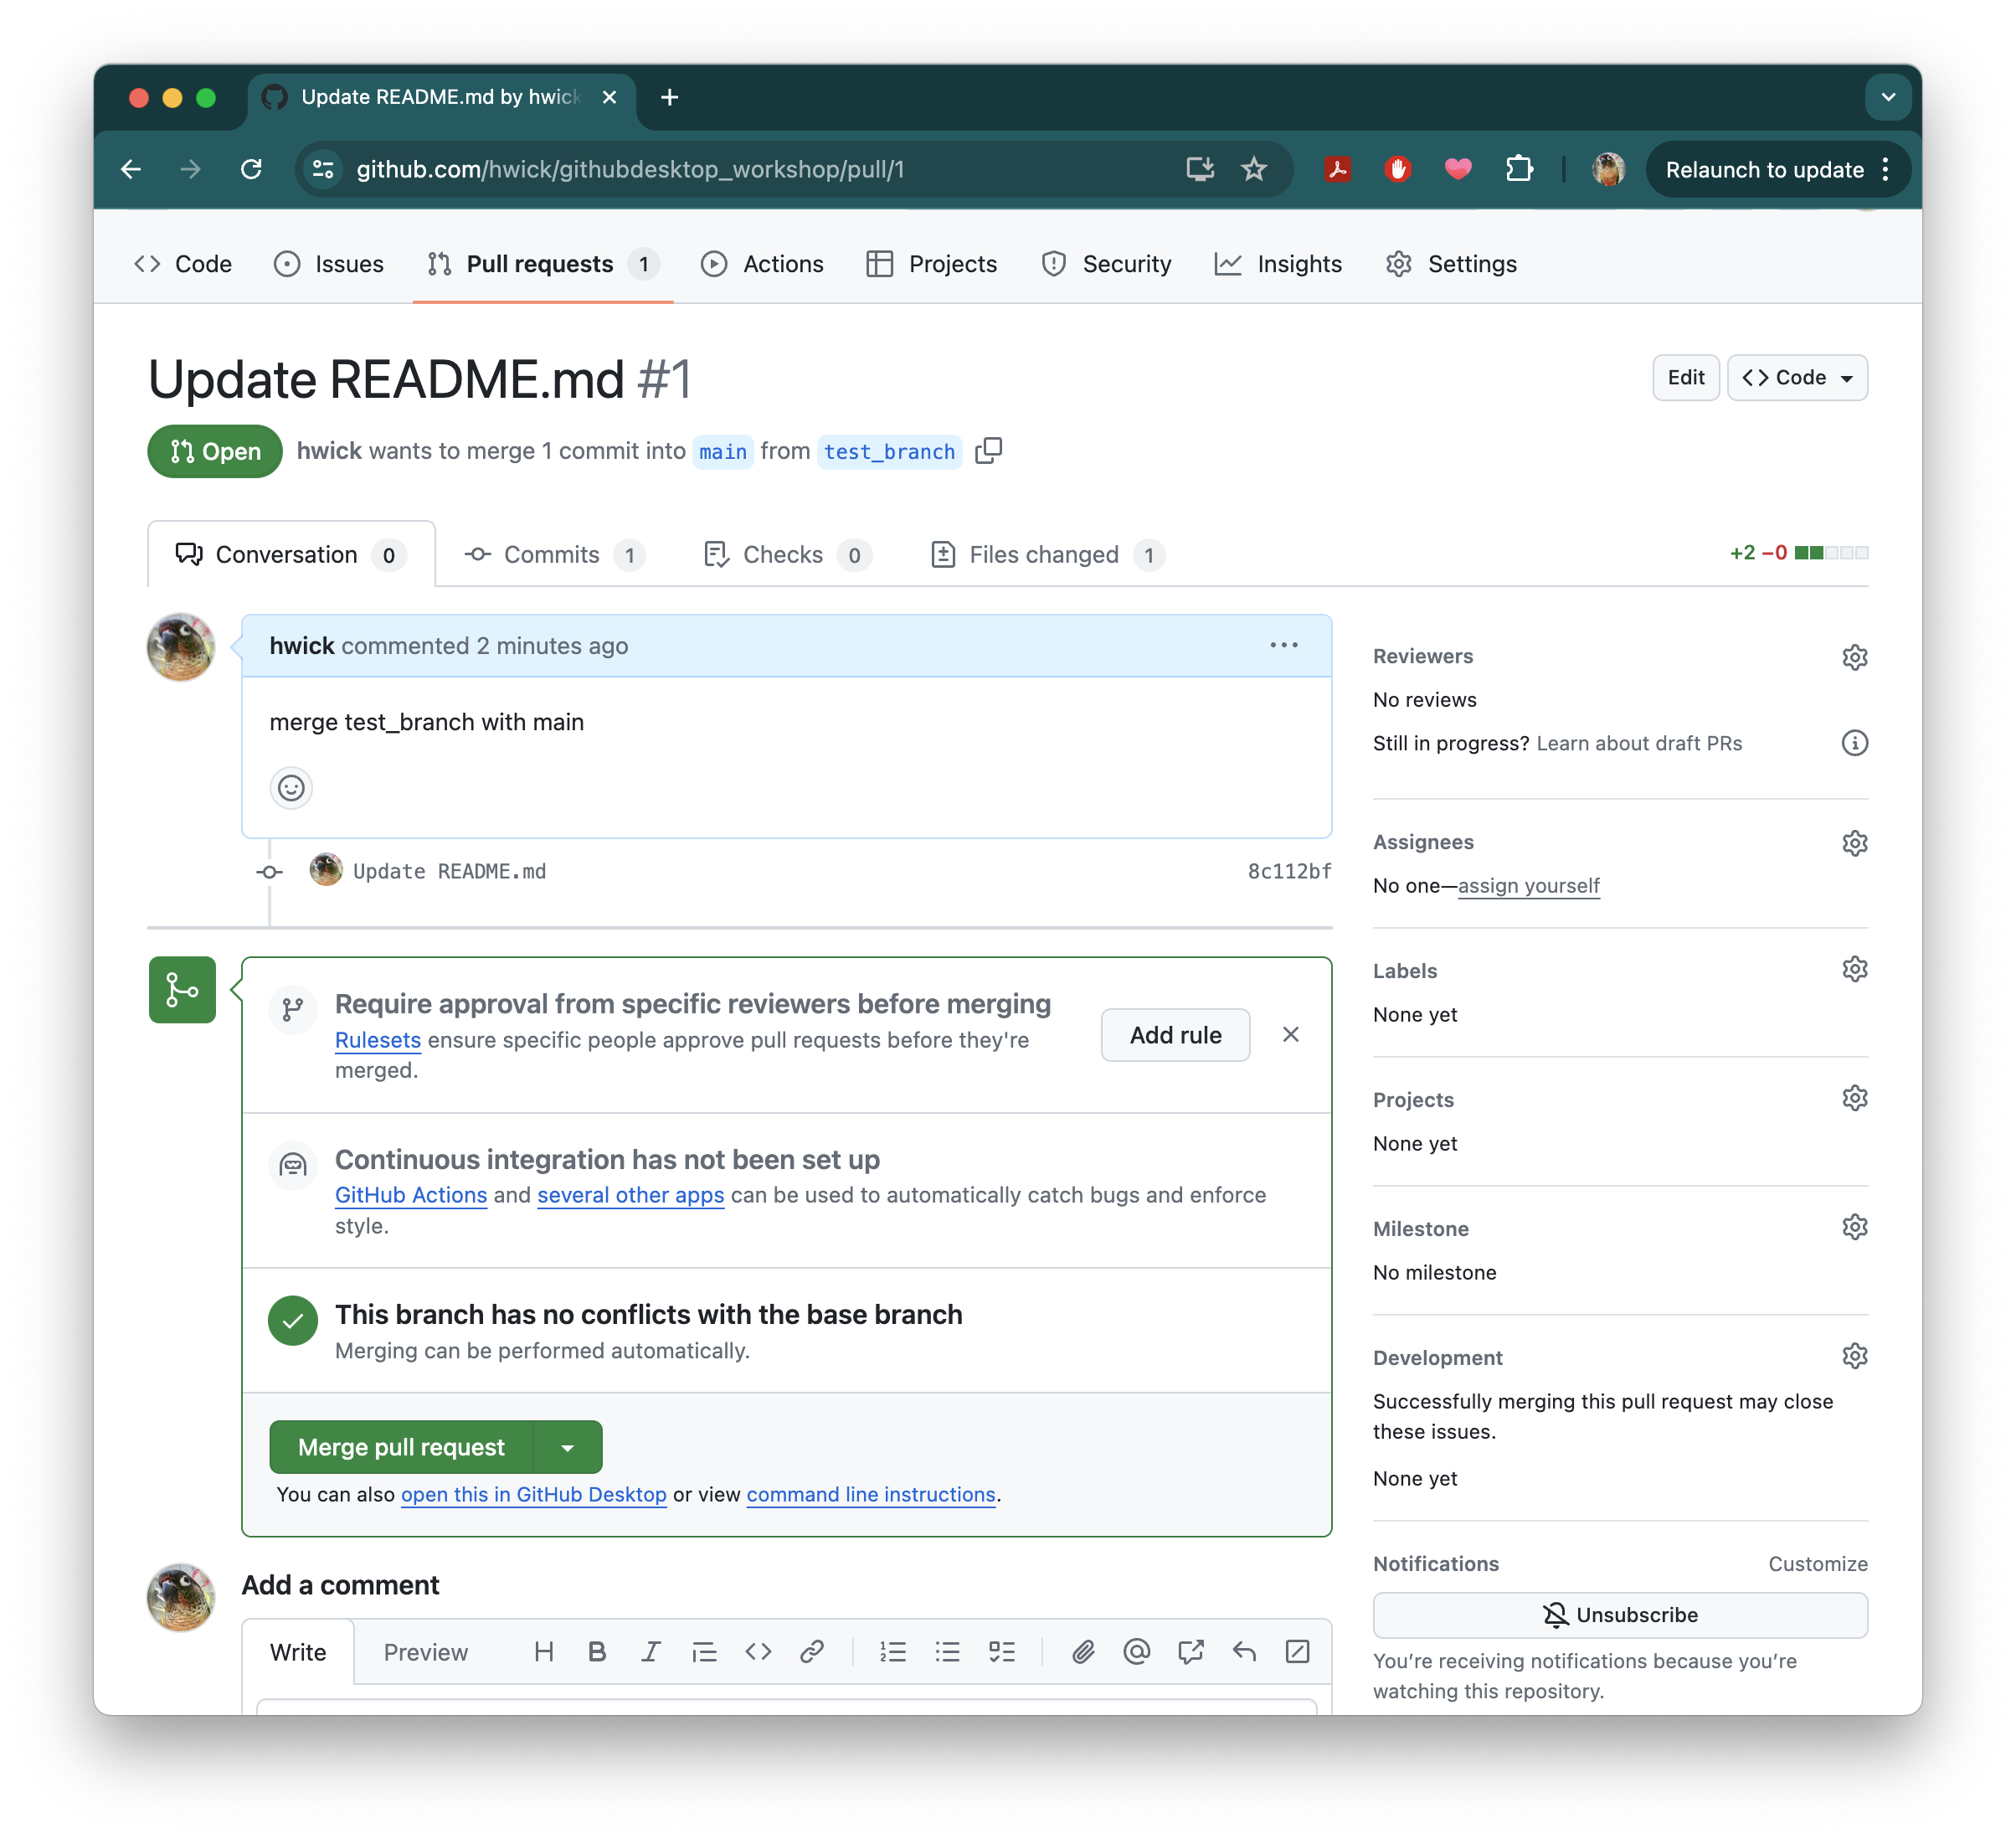
Under that is a big green button that says Merge pull request.
Side note: If you click the arrow on the
Merge pull requestbutton, you’ll notice several options. The vast majority of the time you’ll just want to use the default option, but here is a description of all available options:1) Create a merge commit – This will add all commits we made to the
test_branchintomain. This is useful for seeing individual changes that were made and even changing them down the road. If changes were also made inmain, the commits will be interleaved.2) Squash and merge – This will condense, or “squash”, all the commits from
test_branchinto a single commit. This is useful if you know you won’t want to make any changes to individual commits after merging, or don’t need the complete history from thetest_branch2) Rebase and merge – This will add all commits from
test_branchto the end ofmainbut not create an extra commit – this makes a somewhat cleaner history but does not indicate a merge commit
Go ahead and merge your branches using the default setting, clicking the green Merge Pull Request button.
Then, you’ll be prompted to Confirm merge:
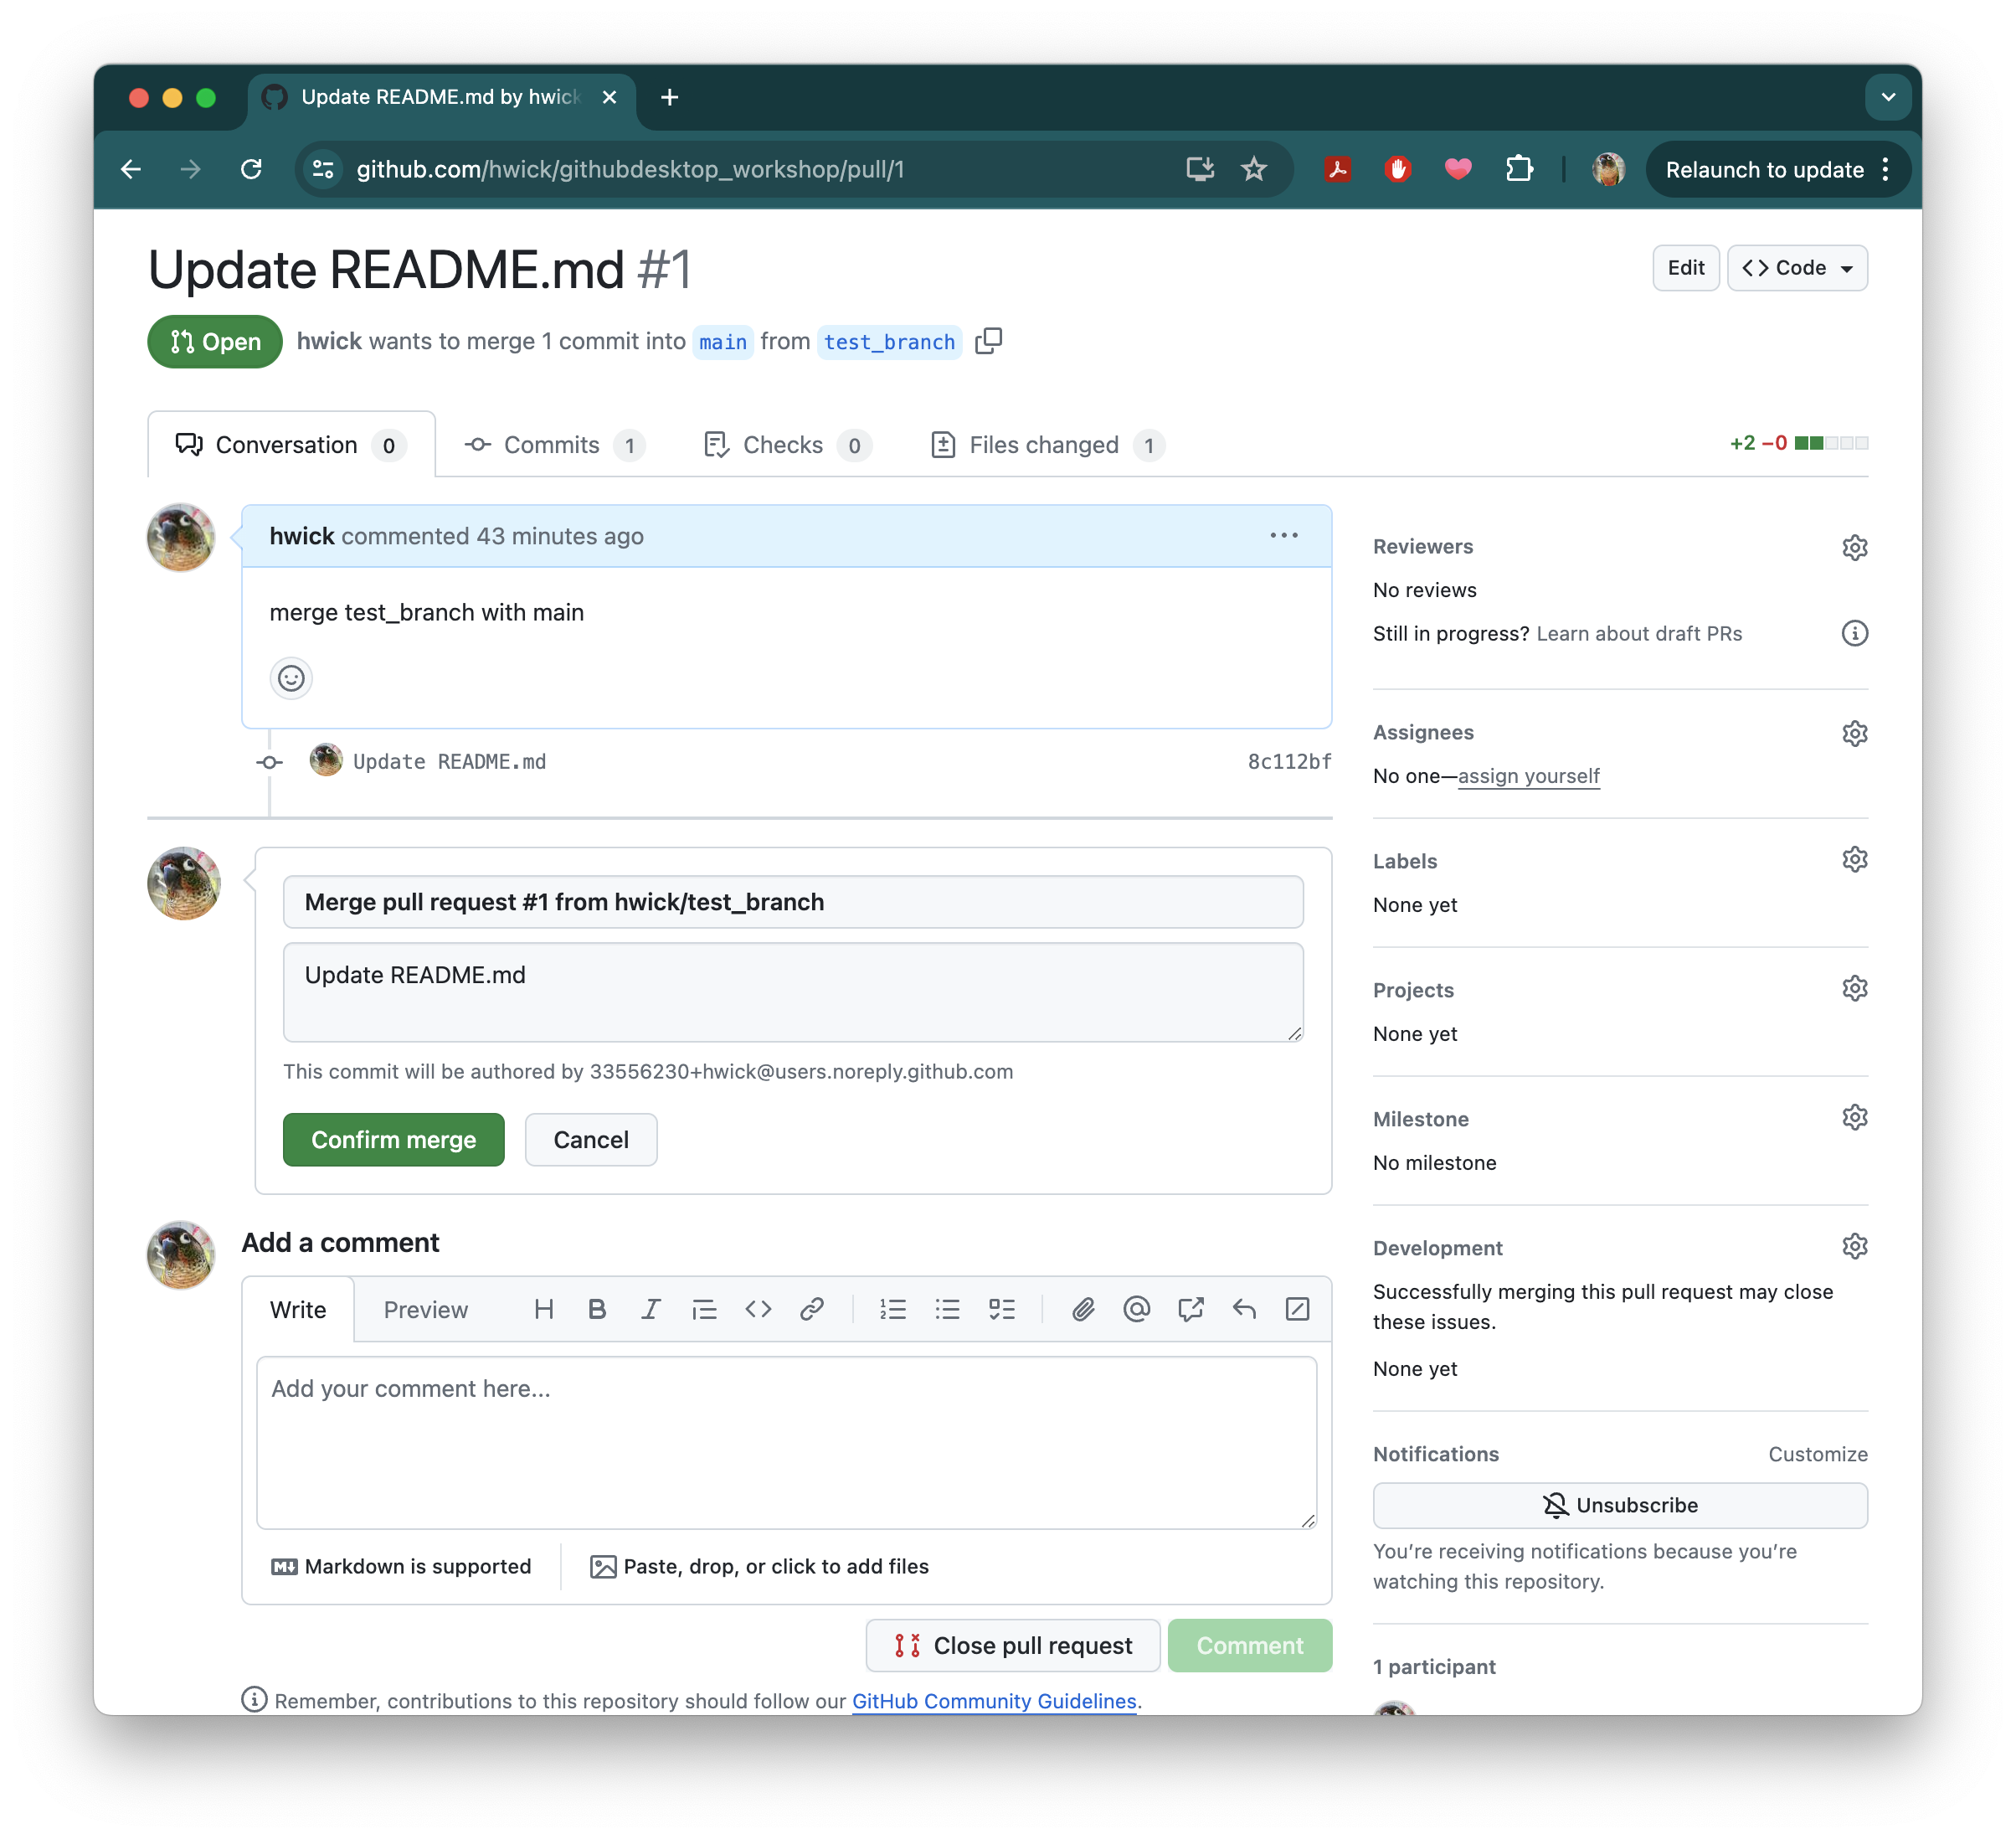
You’ll now see that the pull request has been completed on GitHub.
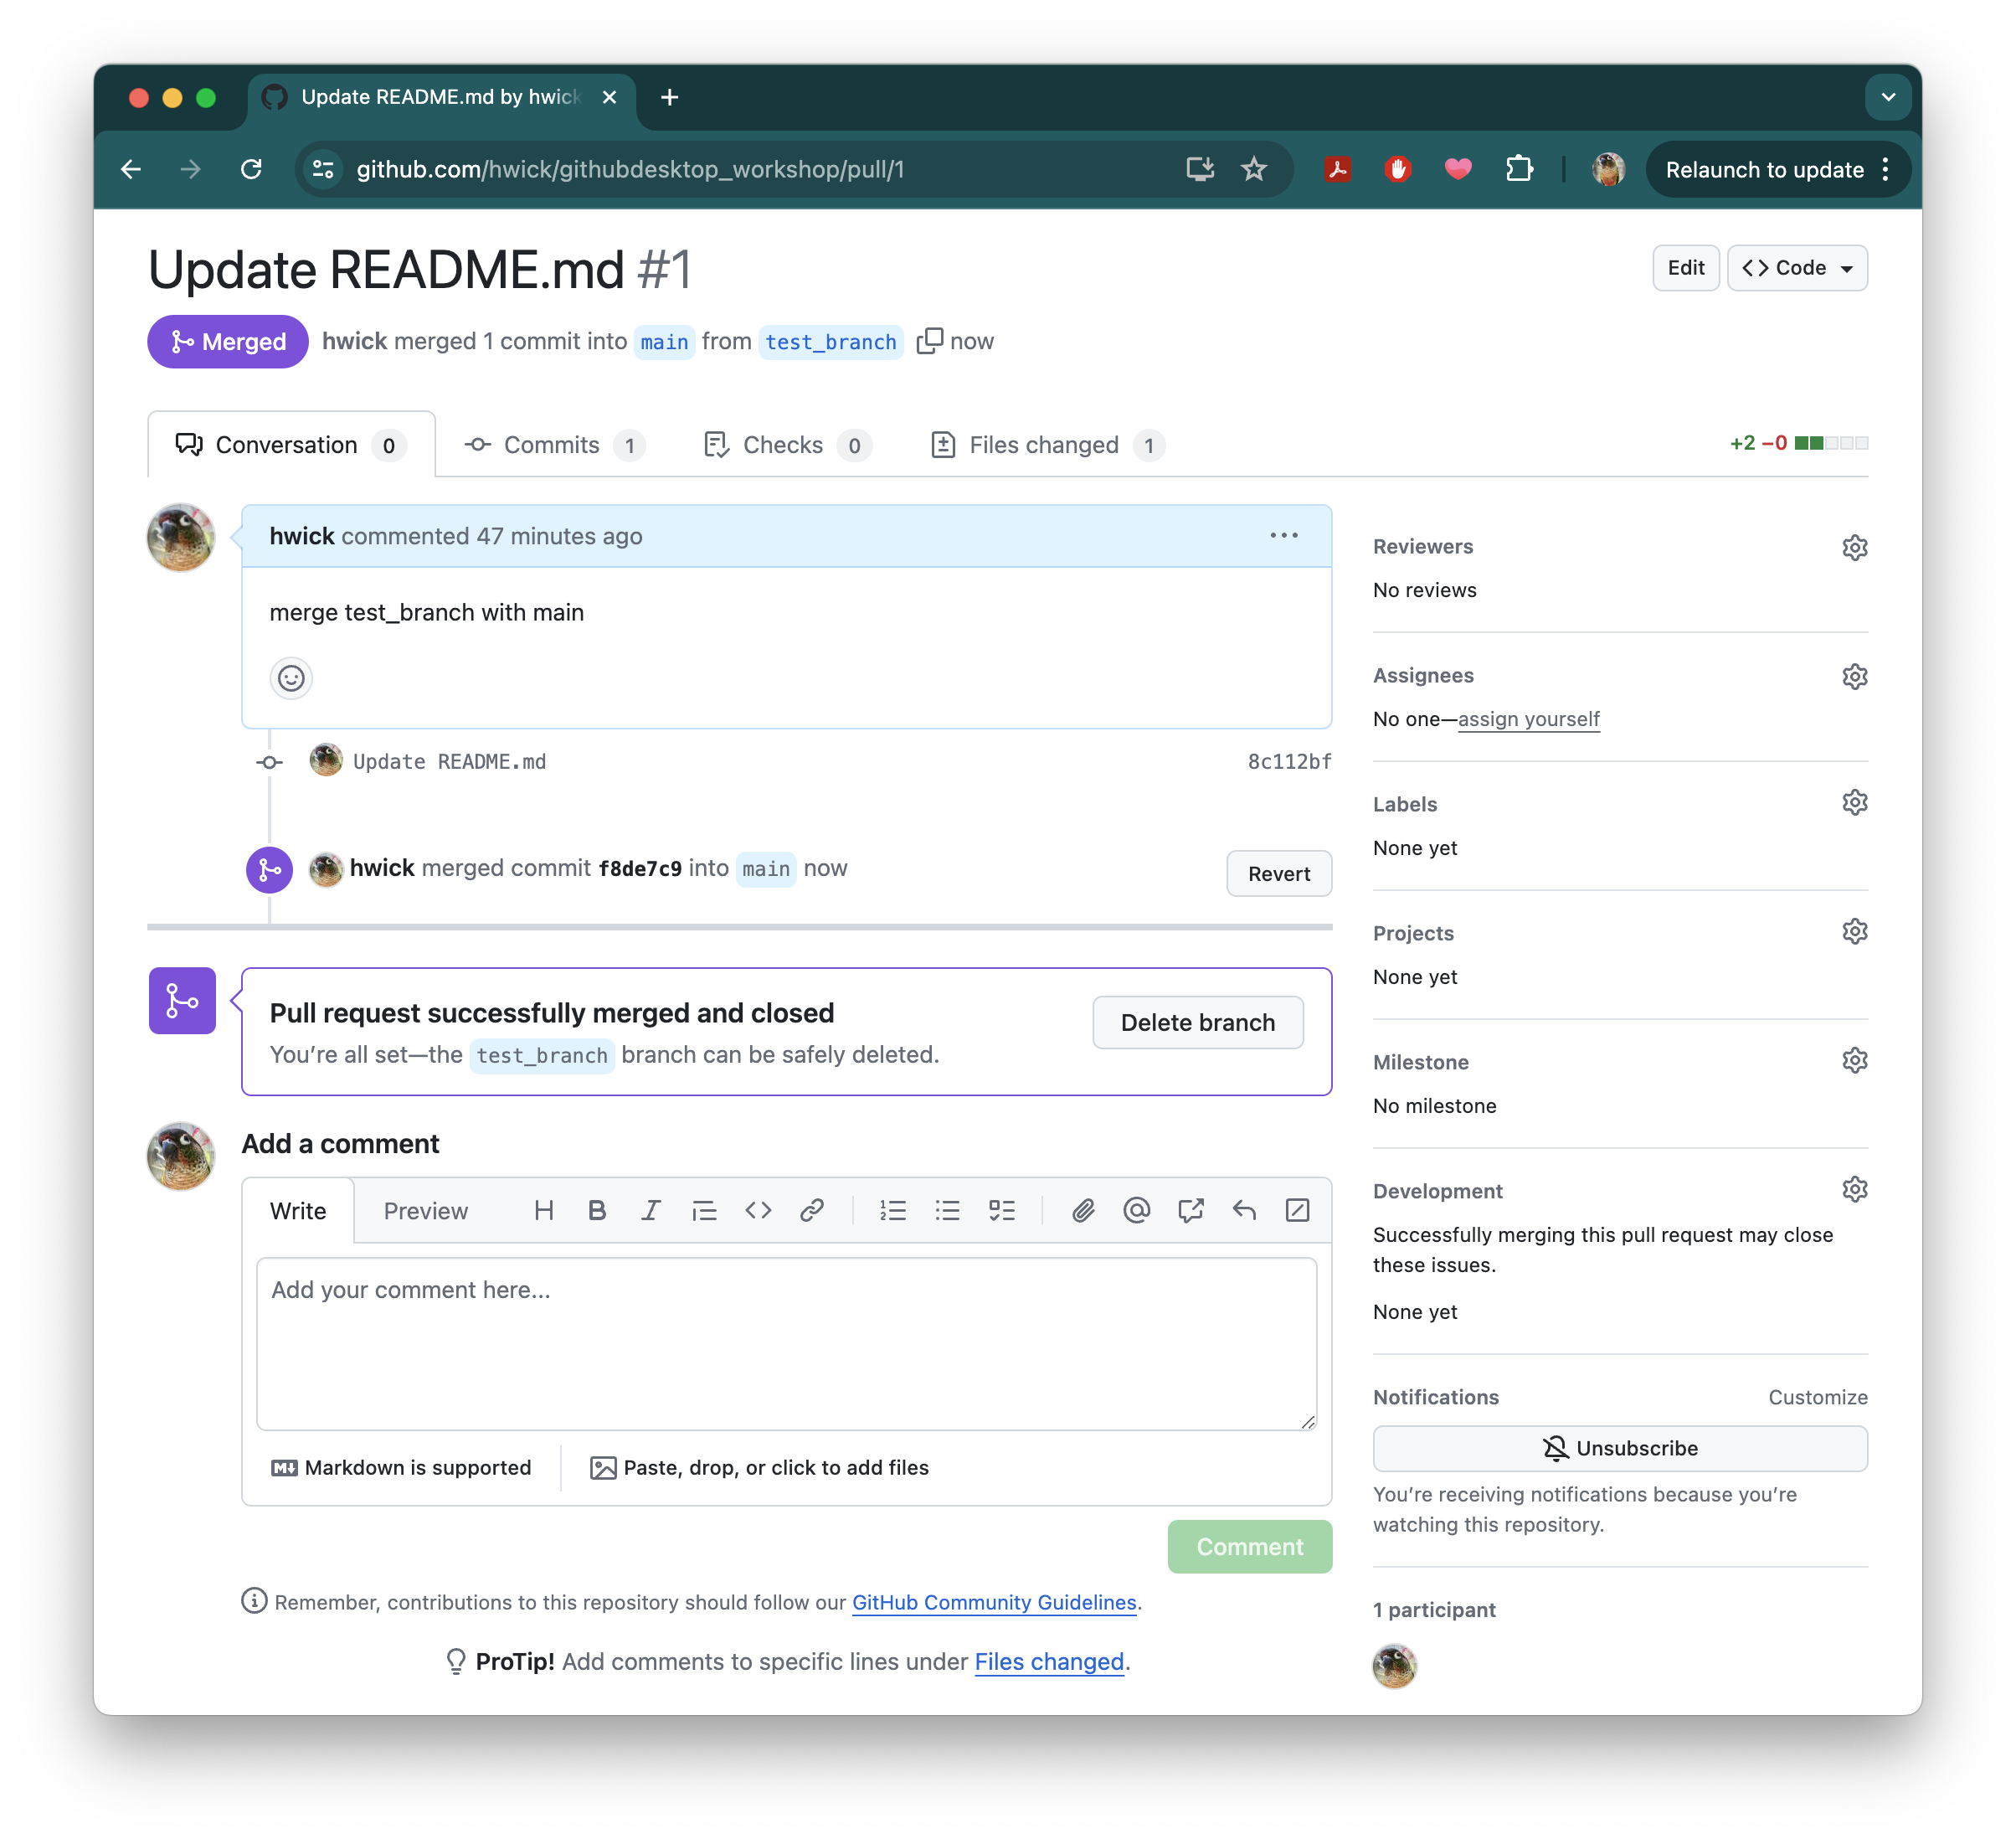
Now we still have to sync our remote origin with our local repo. You’ll see you now have a pull request:
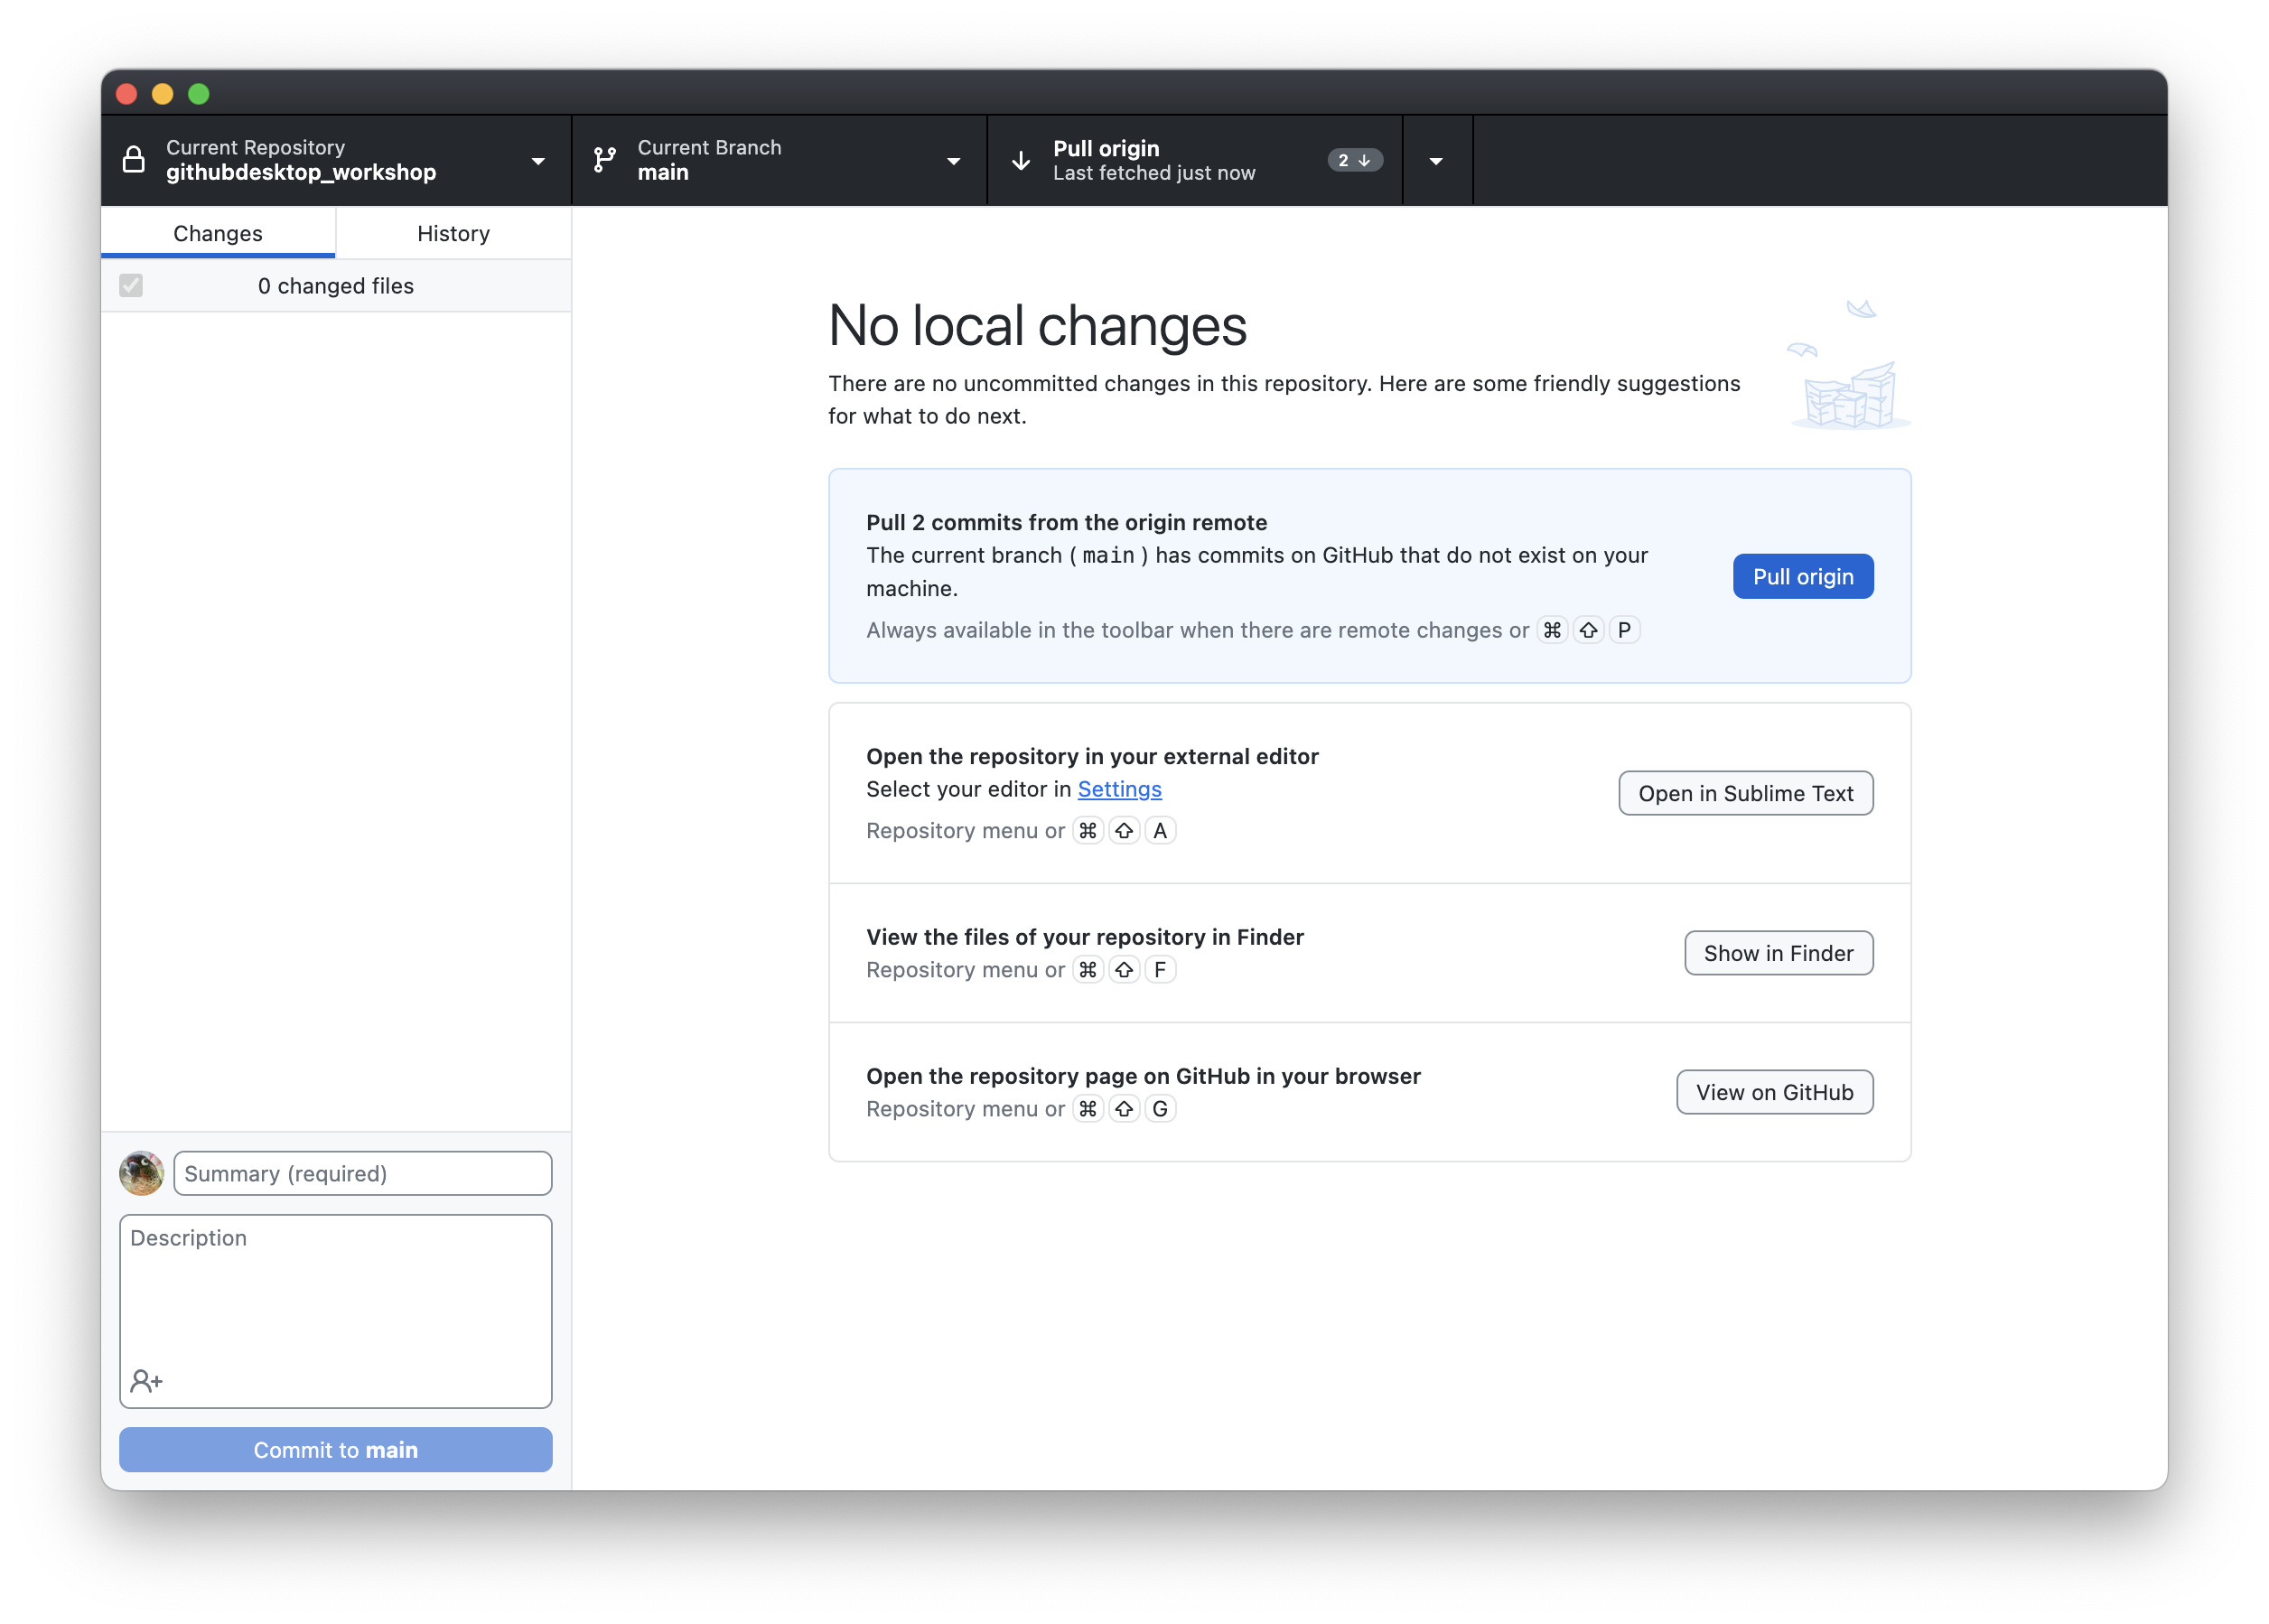
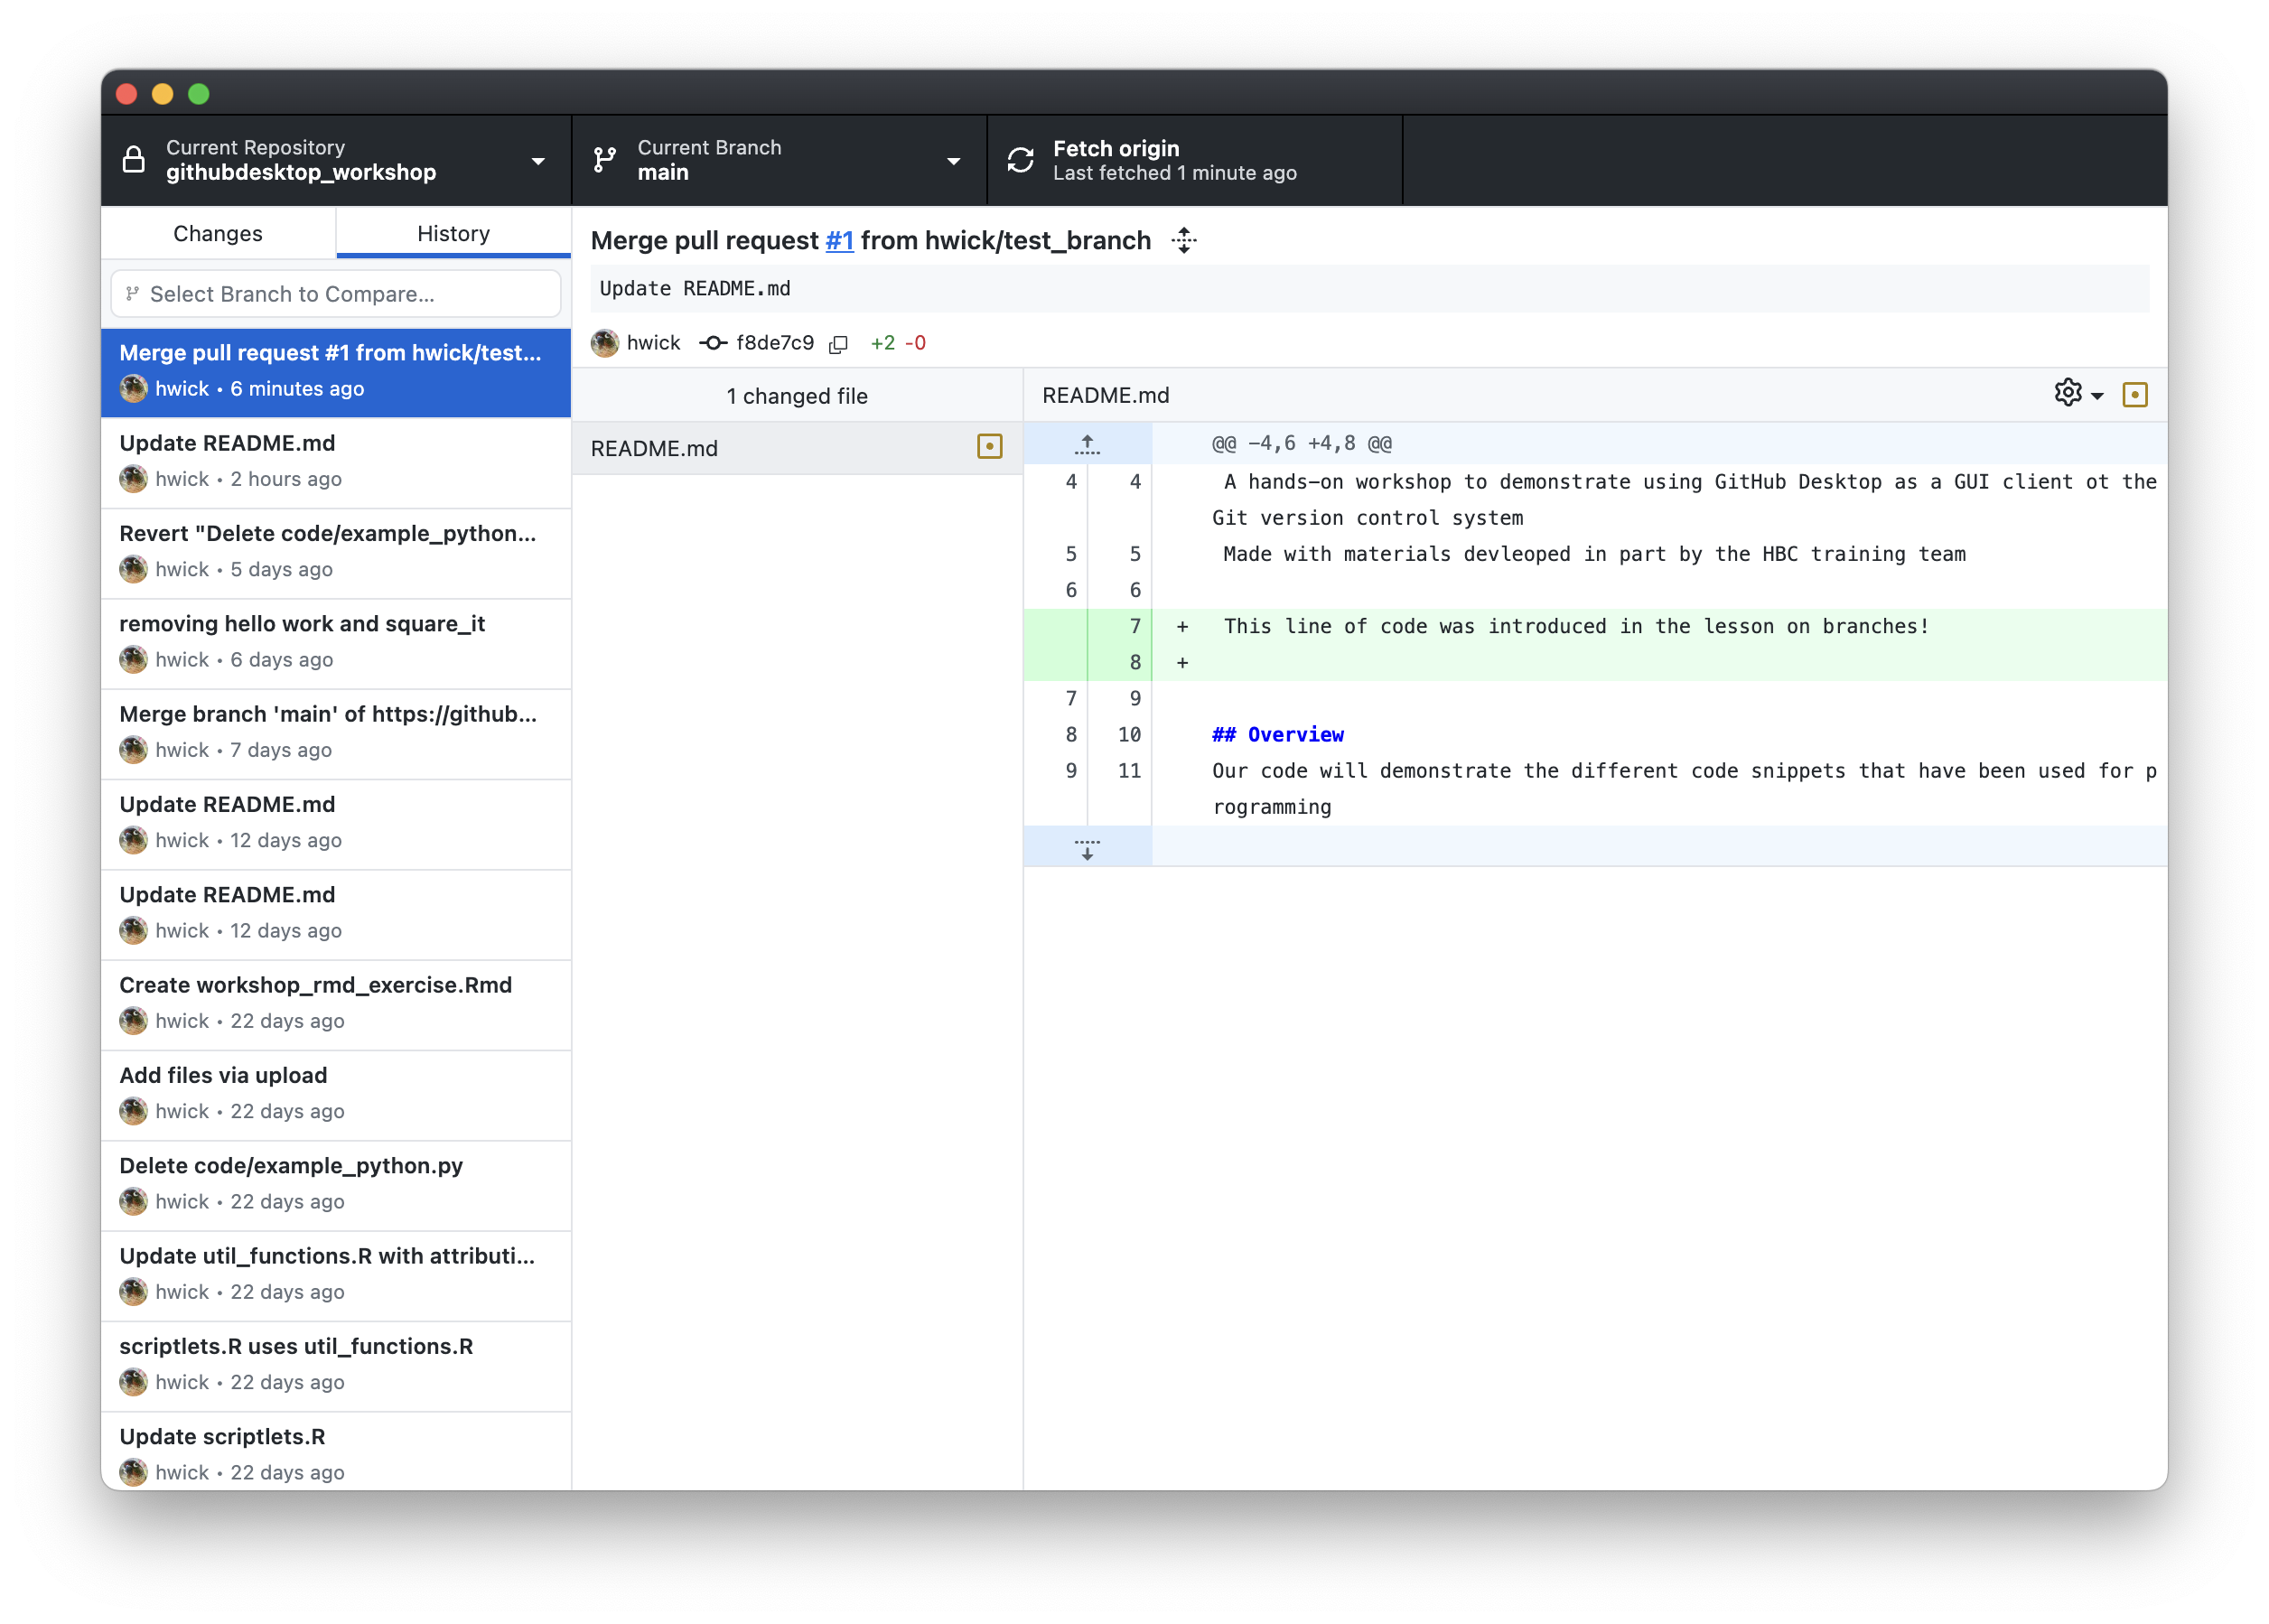
Go ahead and click Pull origin and then navigate to your History tab, and you’ll see the commit from test_branch which updated the README.md file as well as the commit which merged the two branches:
How to create a branch on GitHub
We’ve already been through how to create a pull request and merge branches on GitHub because making a pull request on GitHub Desktop requires GitHub, but it may be useful for you to know how to create a branch on GitHub as well.
From your repository on GitHub, click on the main button in the upper left and you’ll see an text box with the prompt to “Find or create a branch.” Give your branch an appropriate name (we chose remote_test_branch), then click Create directly below:
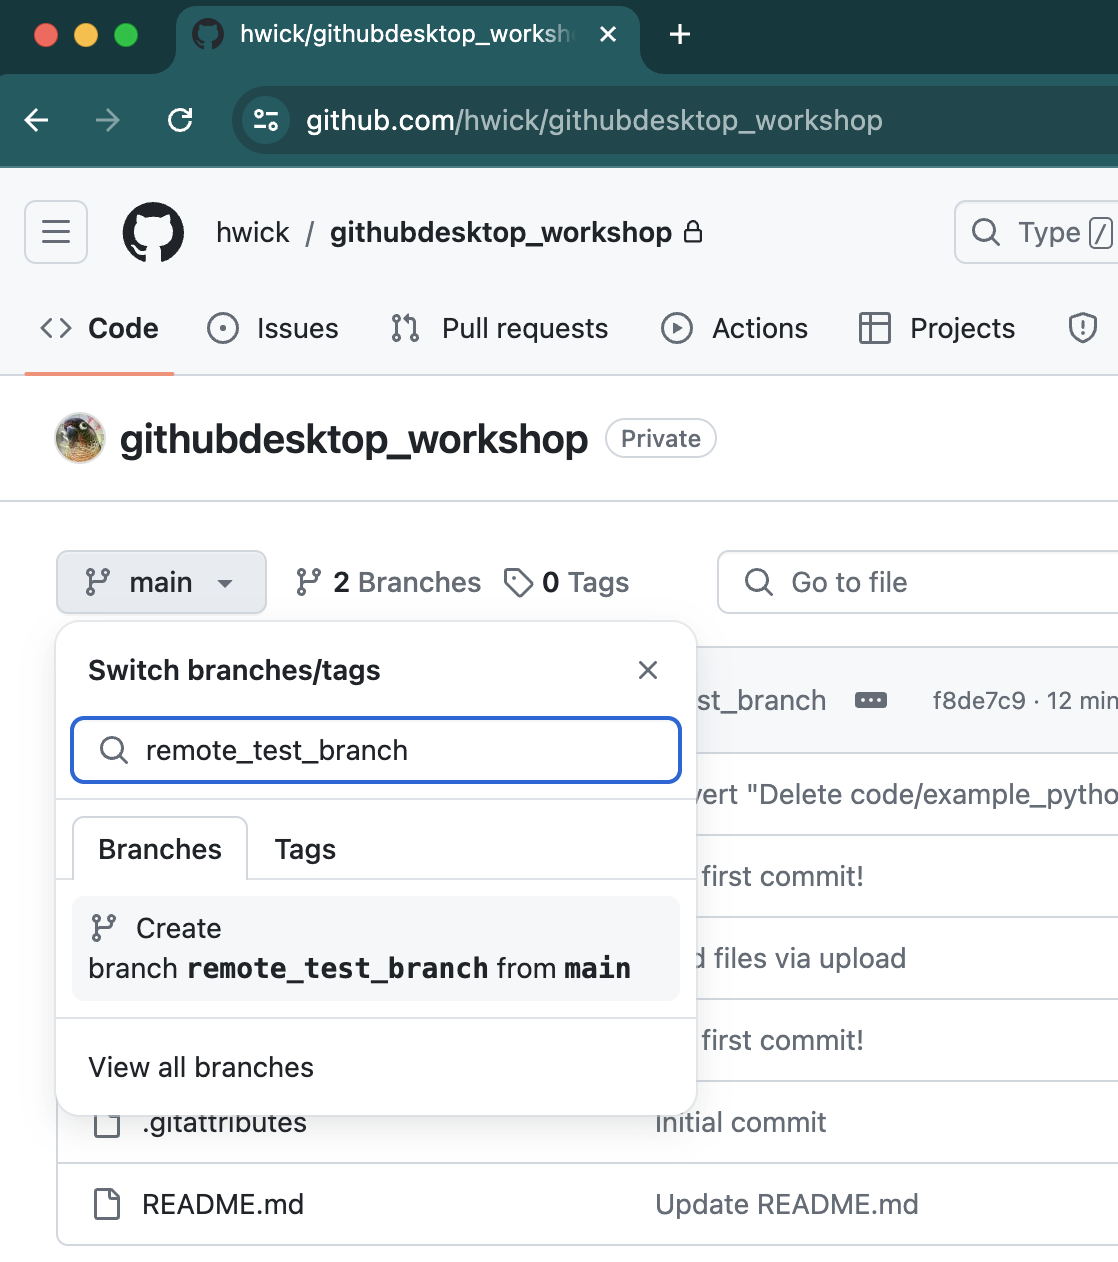
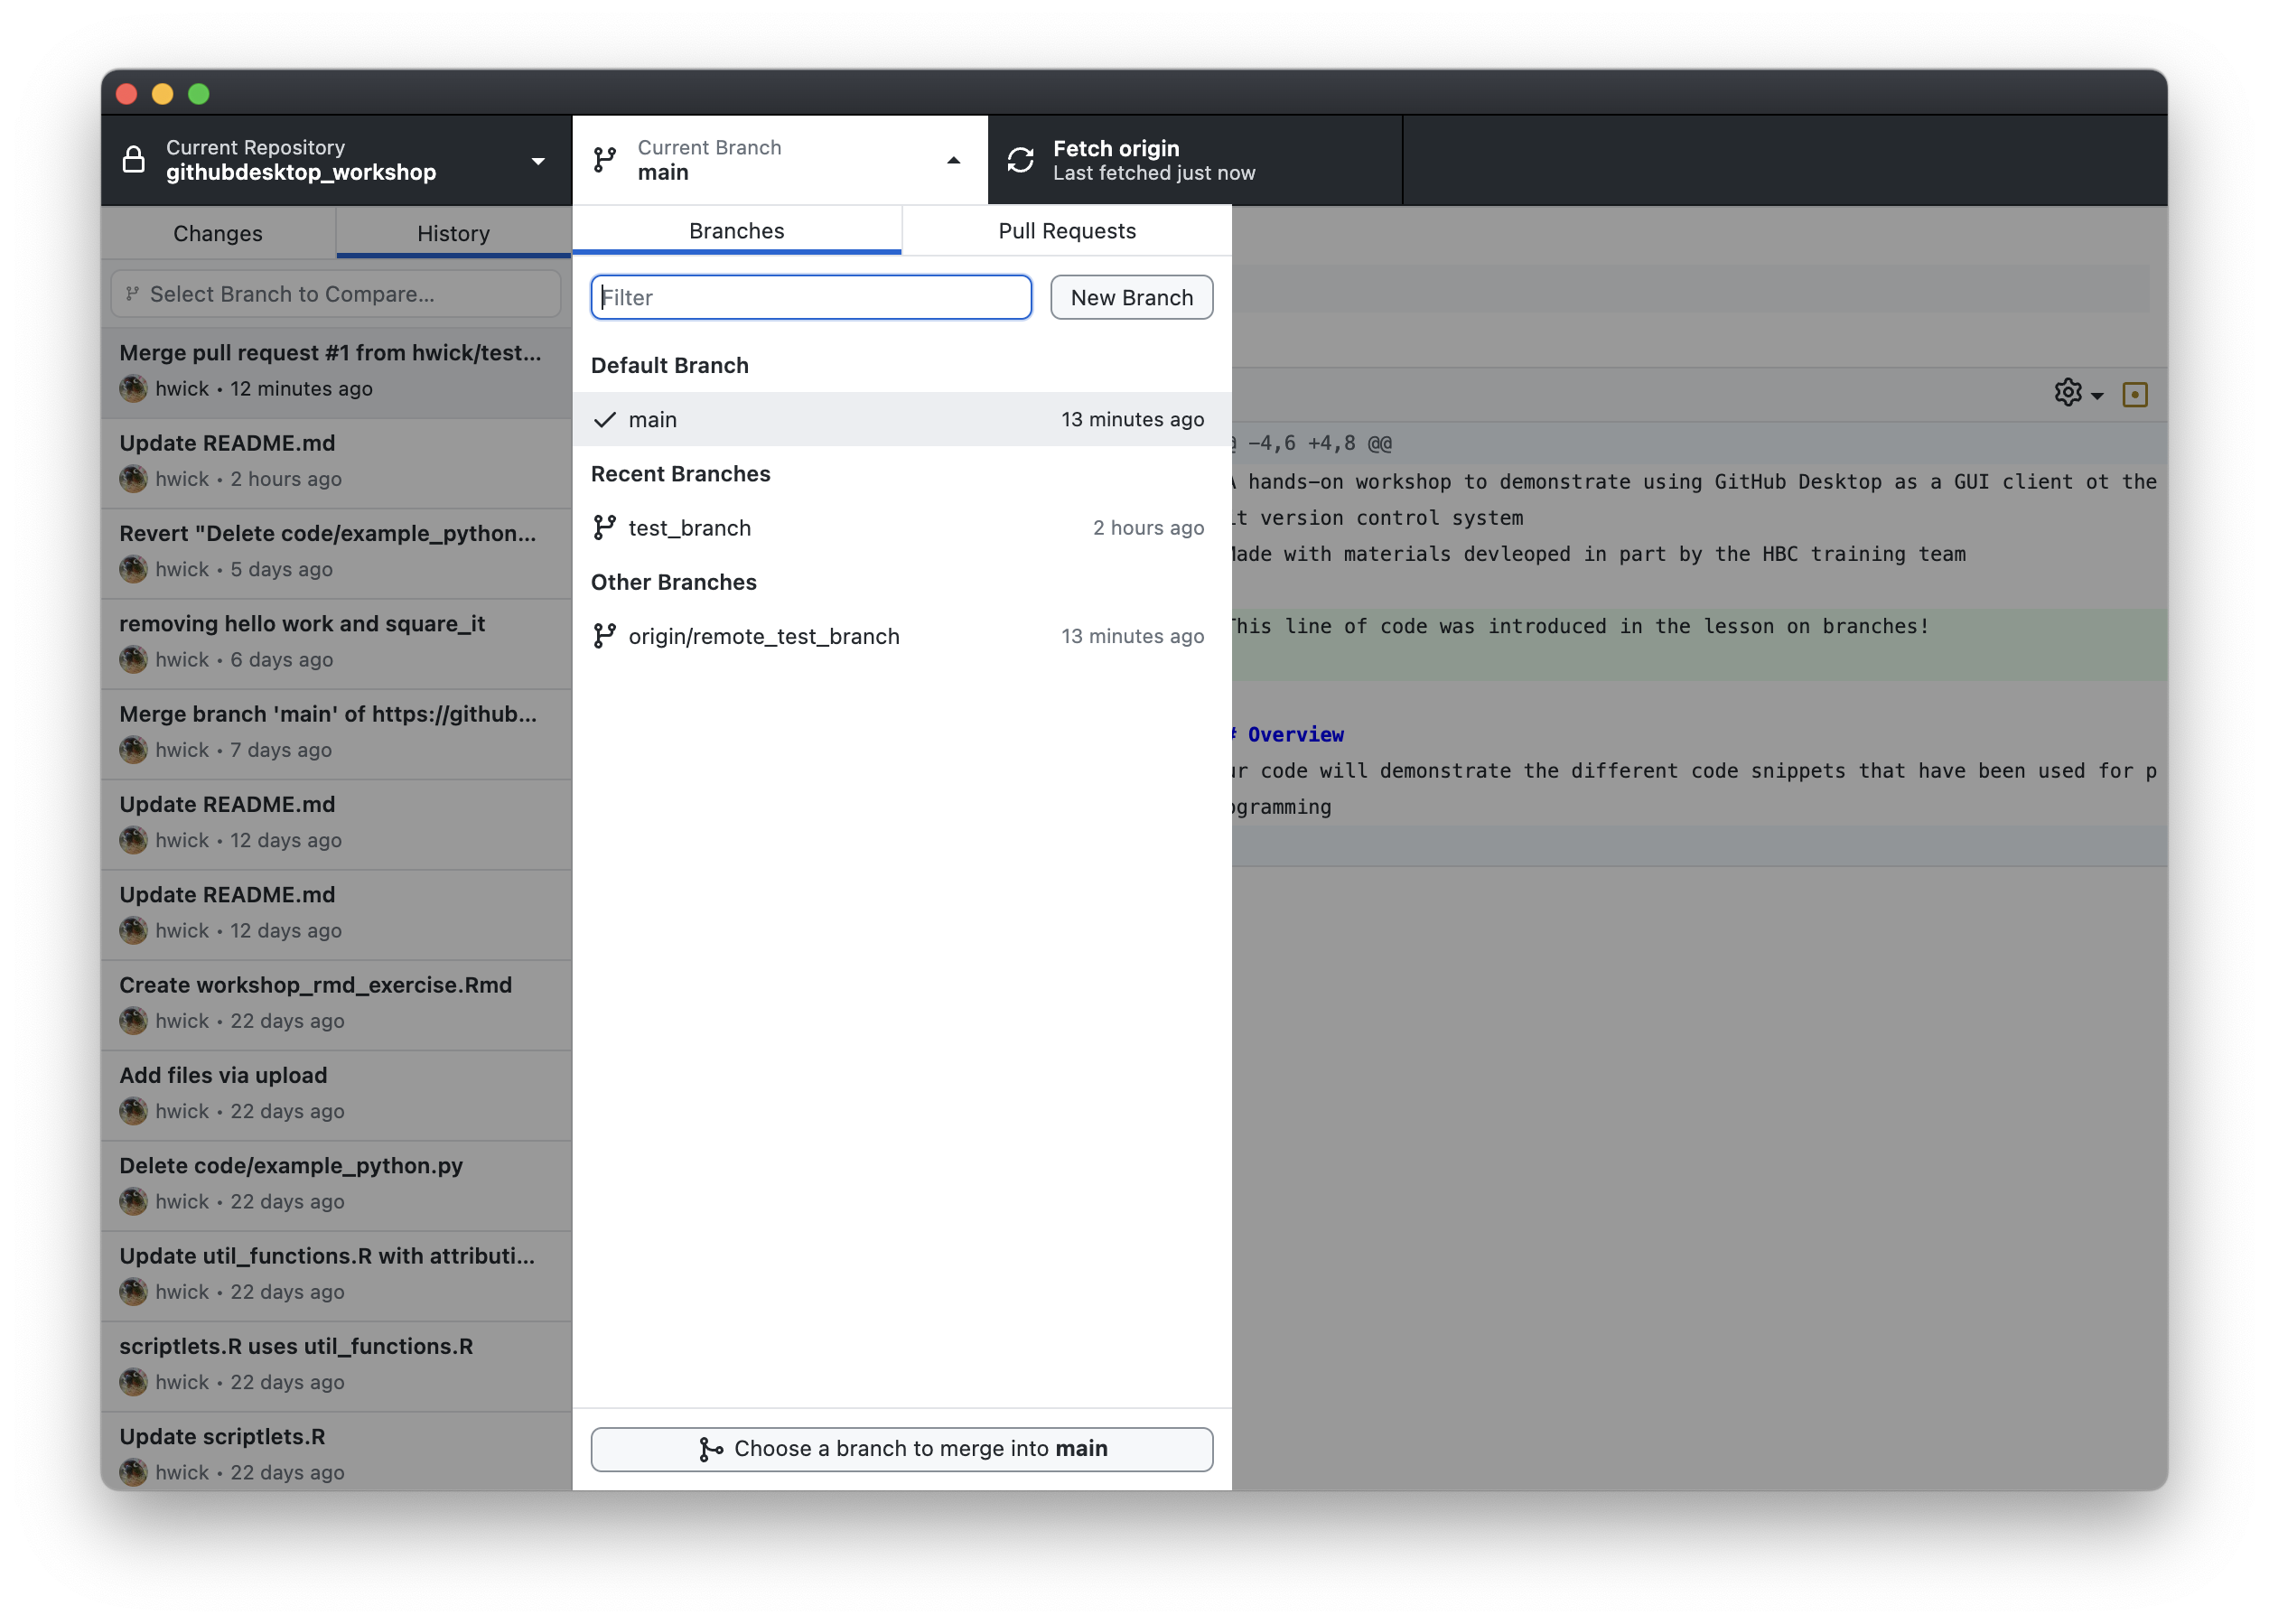
Once you’ve created your branch, you can even see the new branch on GitHub Desktop (you may need to Fetch origin in order to be able to see it):
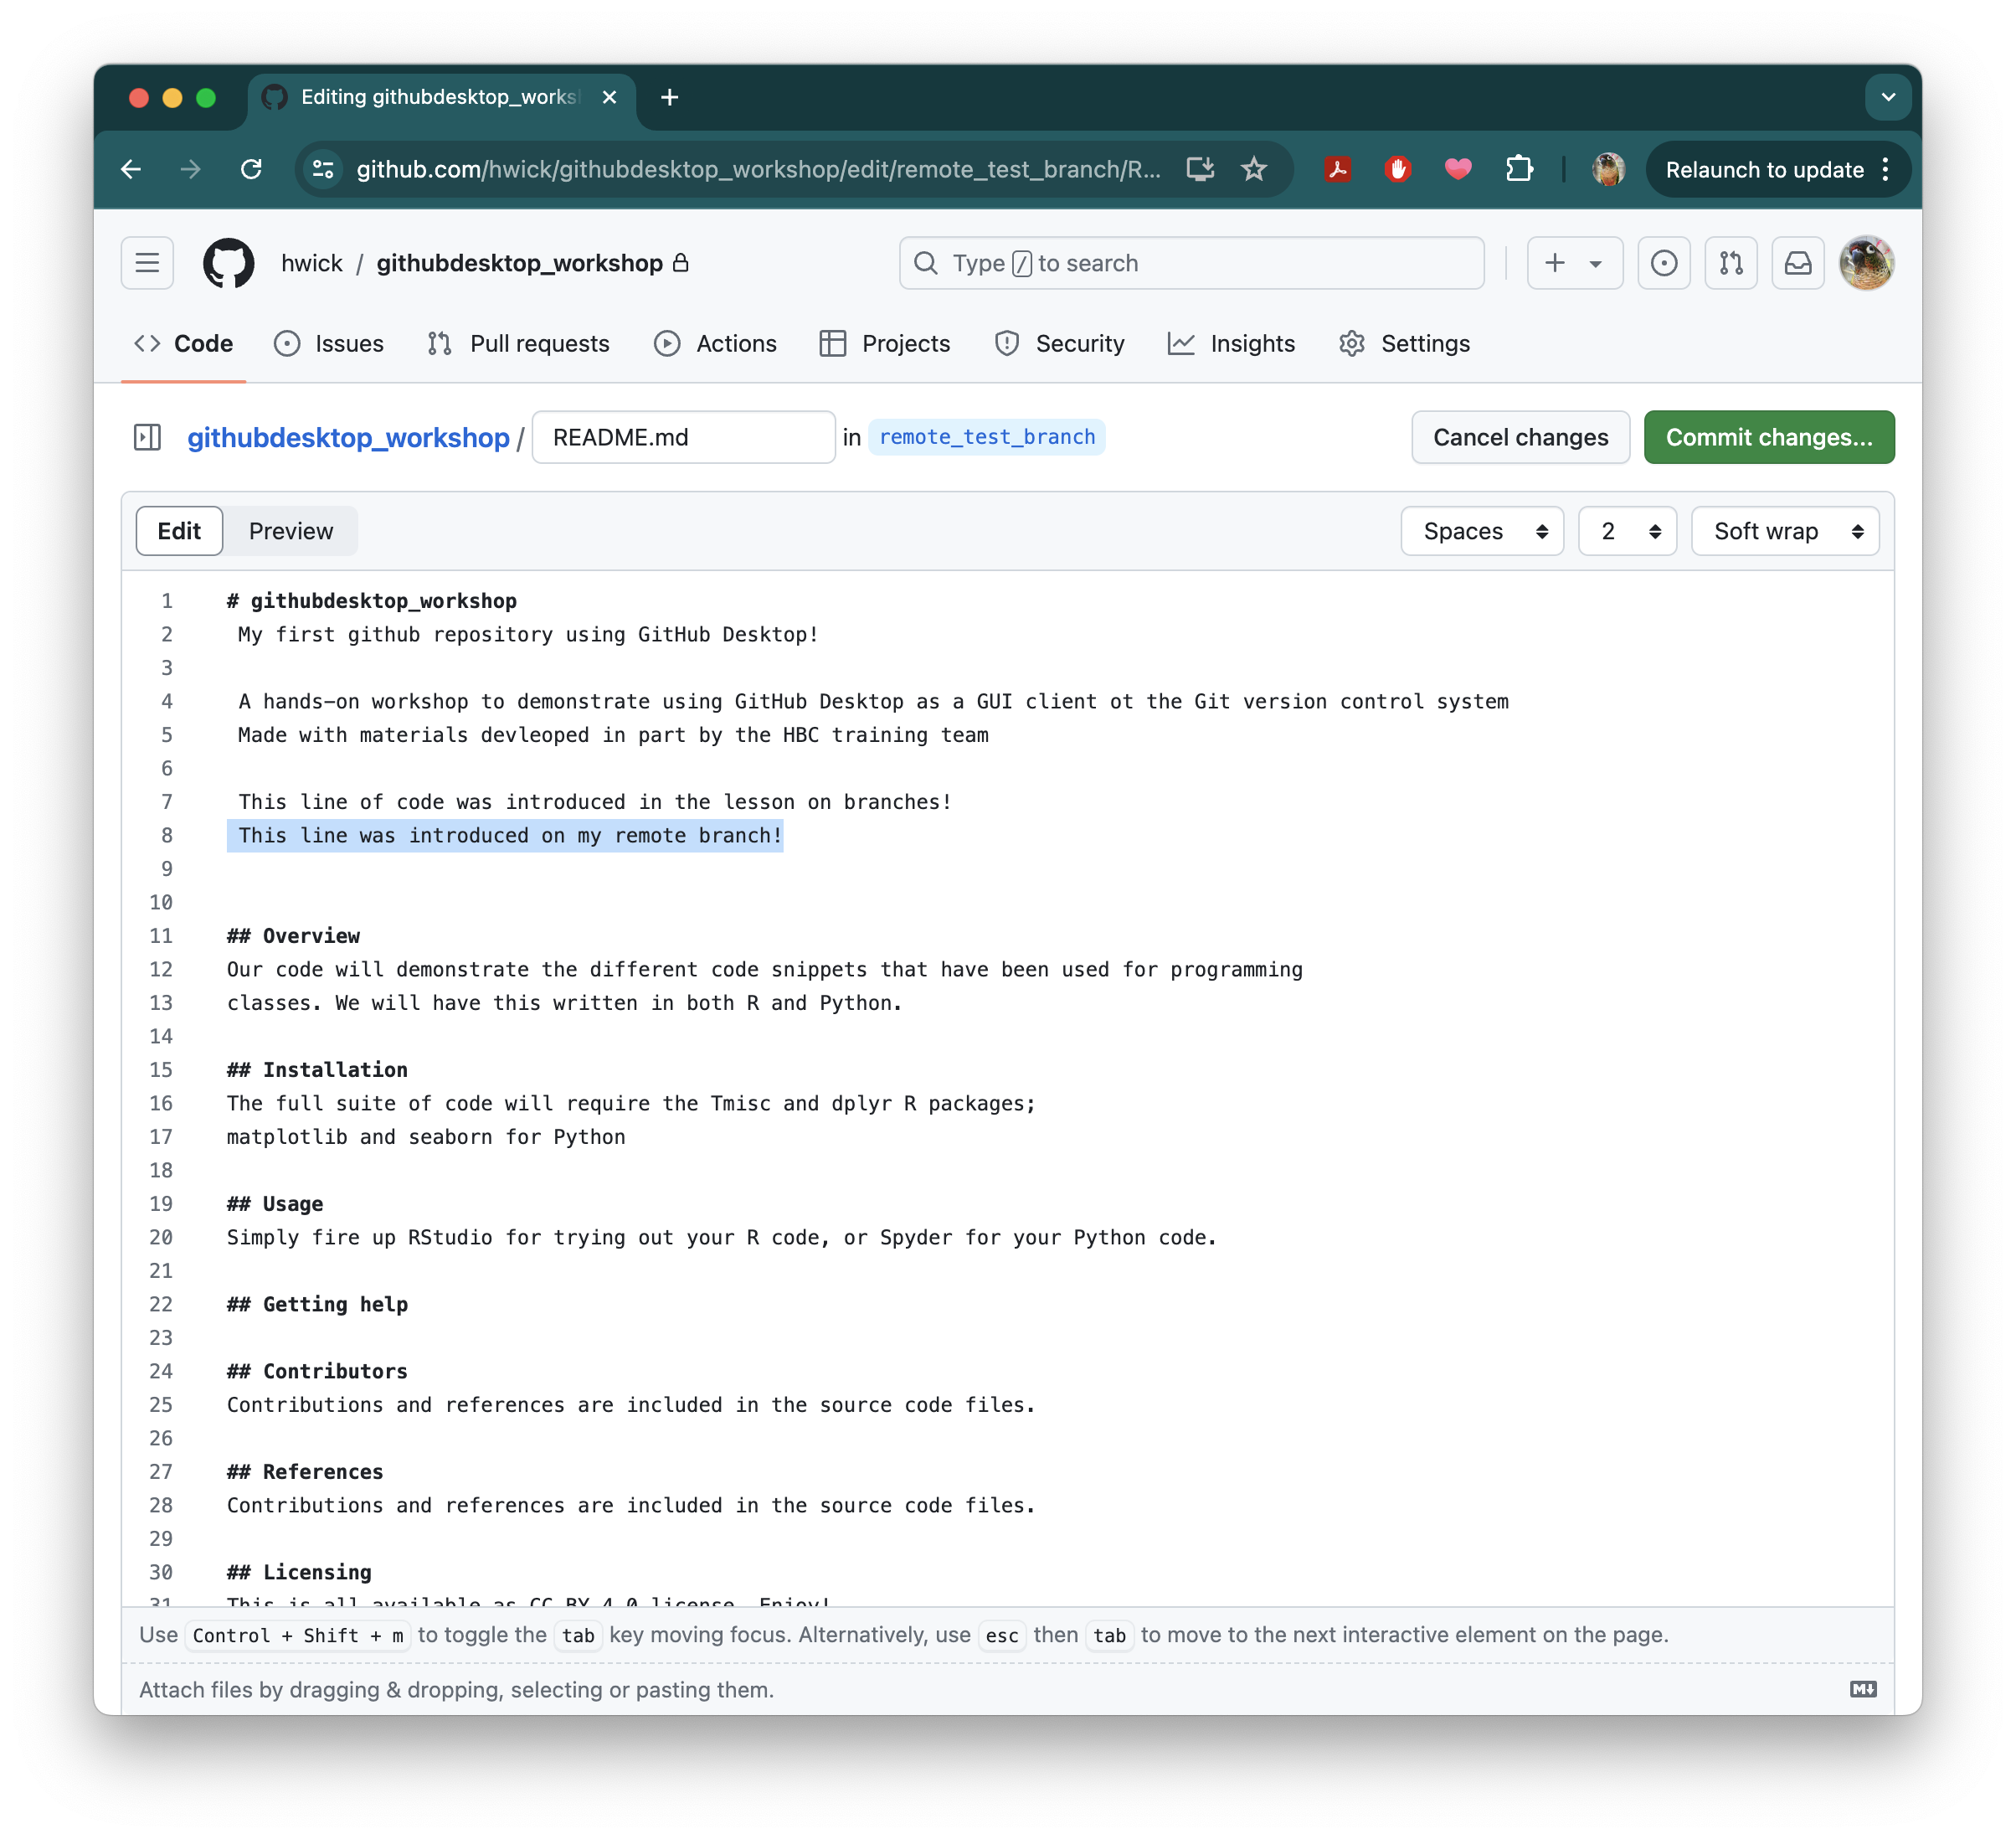
Let’s try making a change to this branch. Add the following line to your README.md file on GitHub, then observe any changes to your local repo in GitHub Desktop.
This line was introduced on my remote branch!
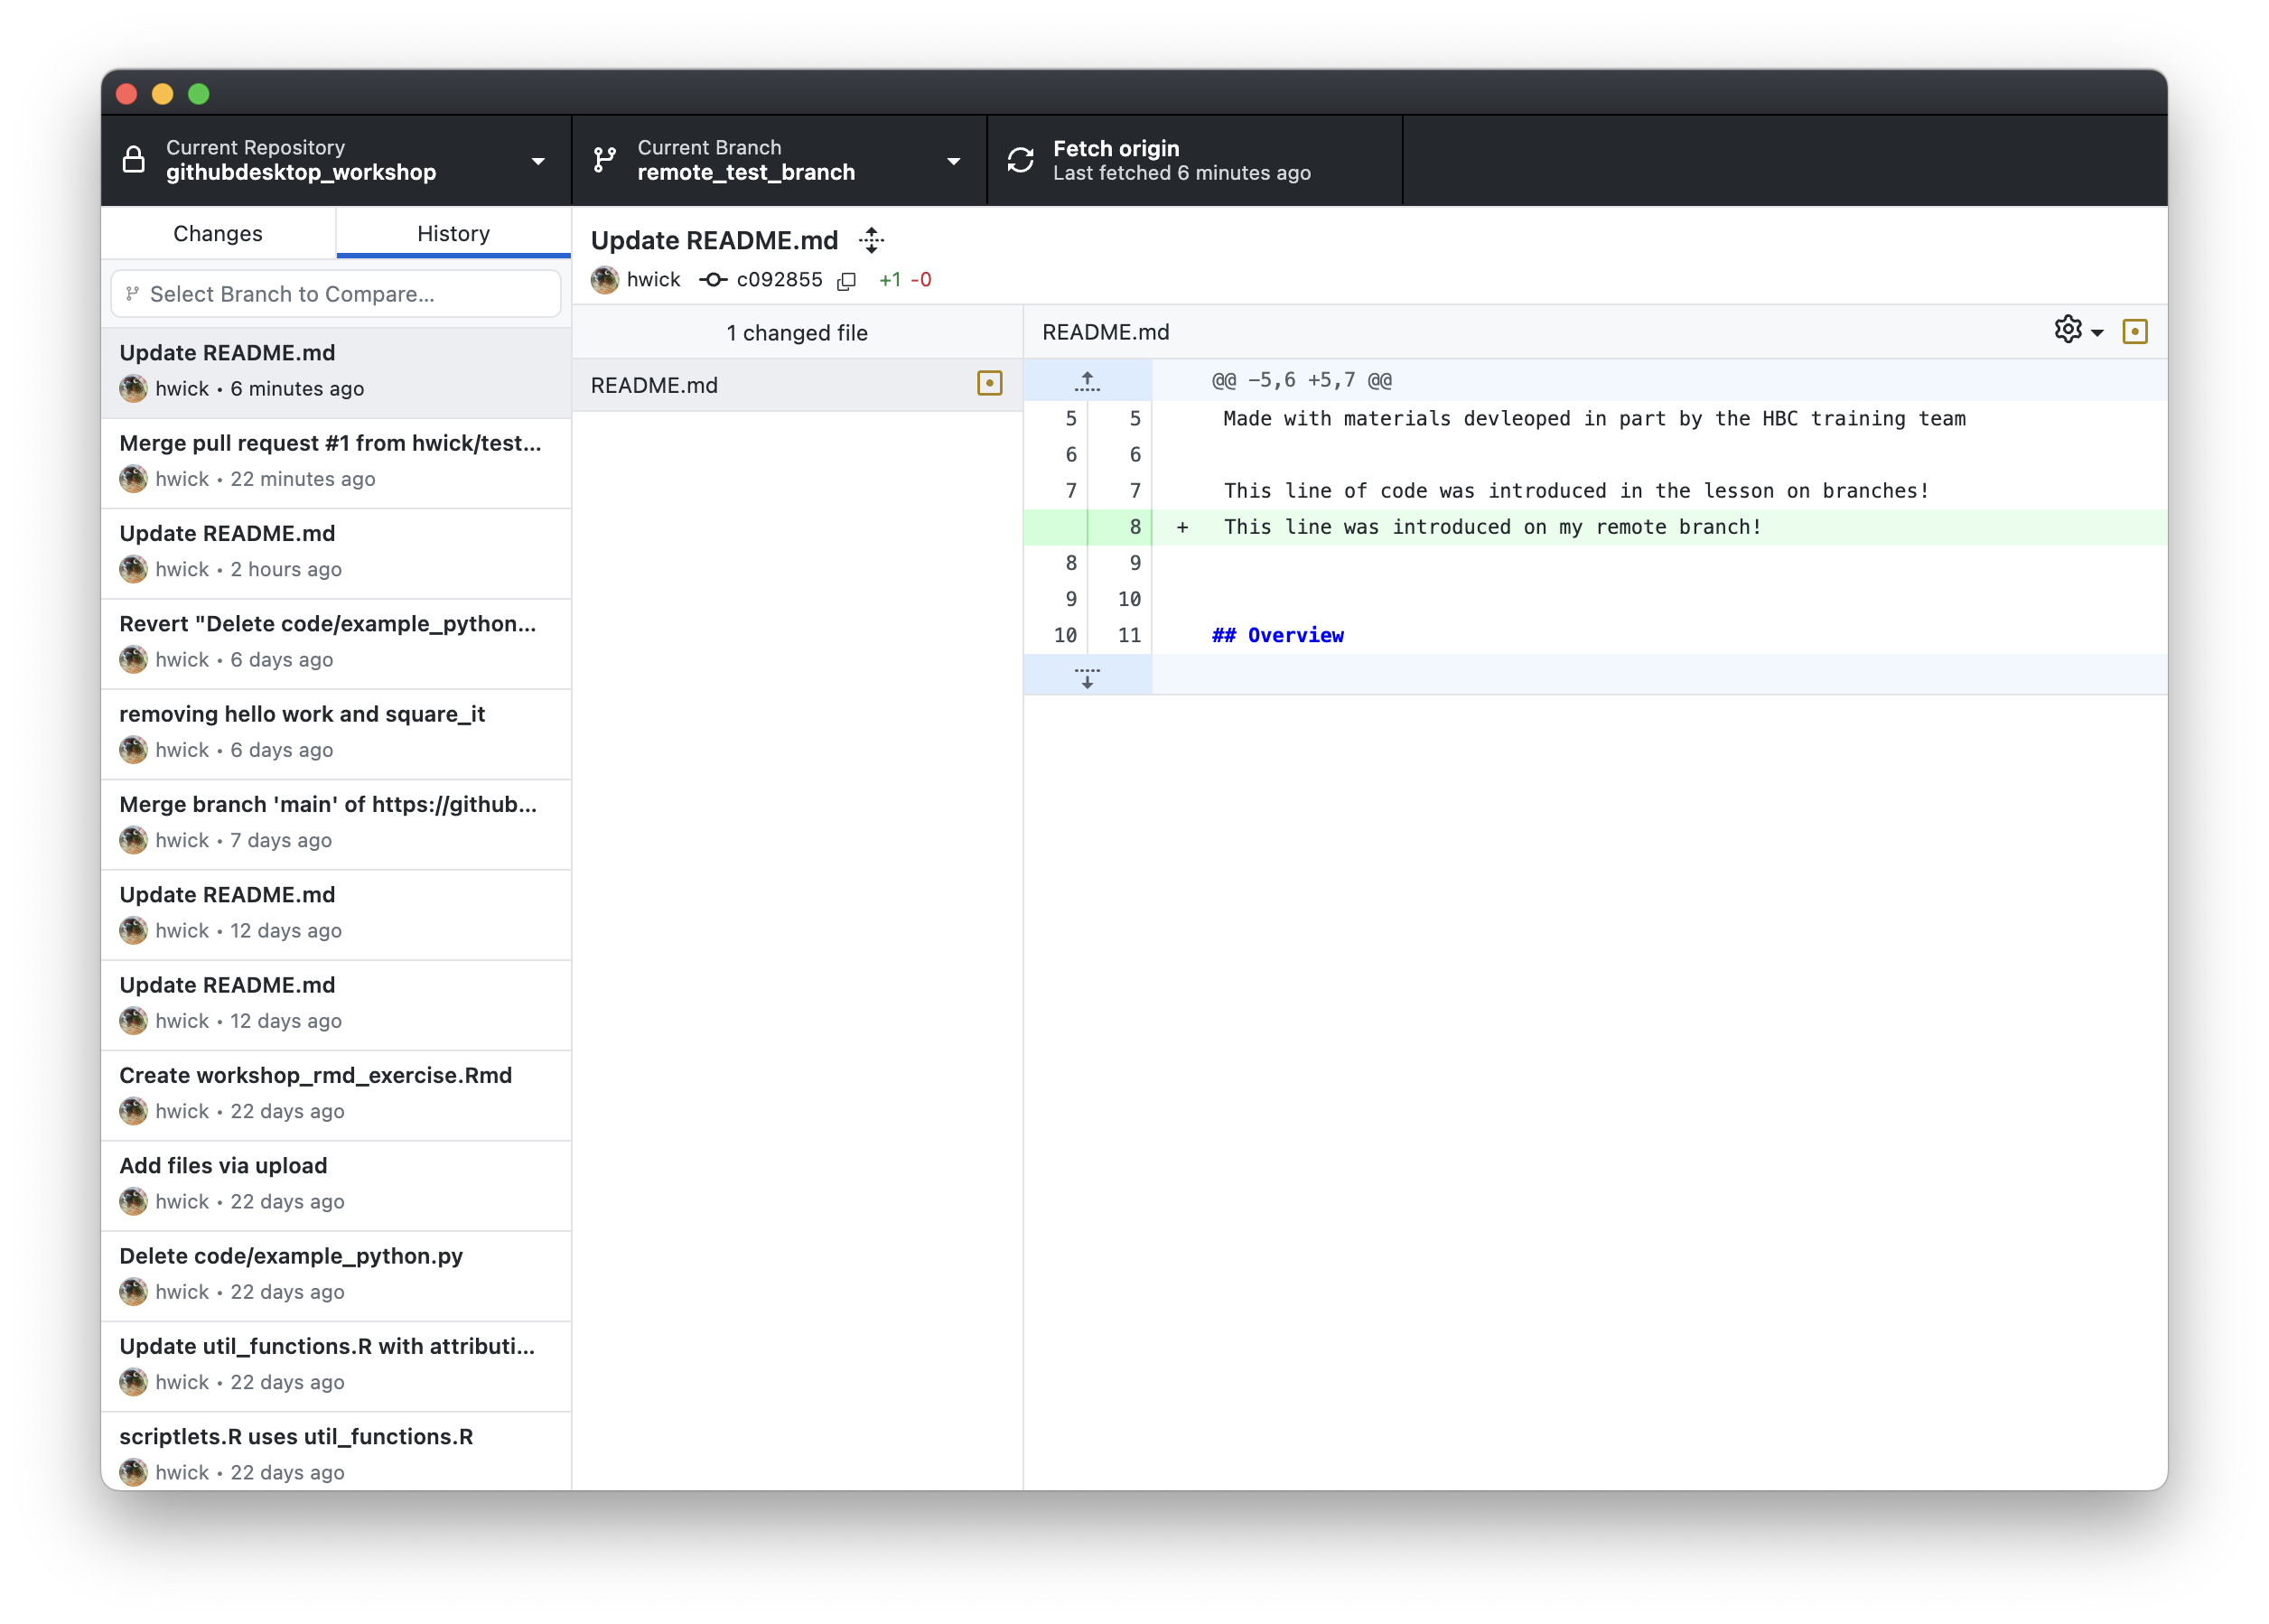
You’ll see these changes are automatically pushed to the your local remote_test_branch and are visble on GitHub.
Merging directly from GitHub.com
If you click on the Pull request button in the upper left, you’ll be brought to a new screen and see an option to Compare & pull request changes that GitHub has noticed in your new test branch:
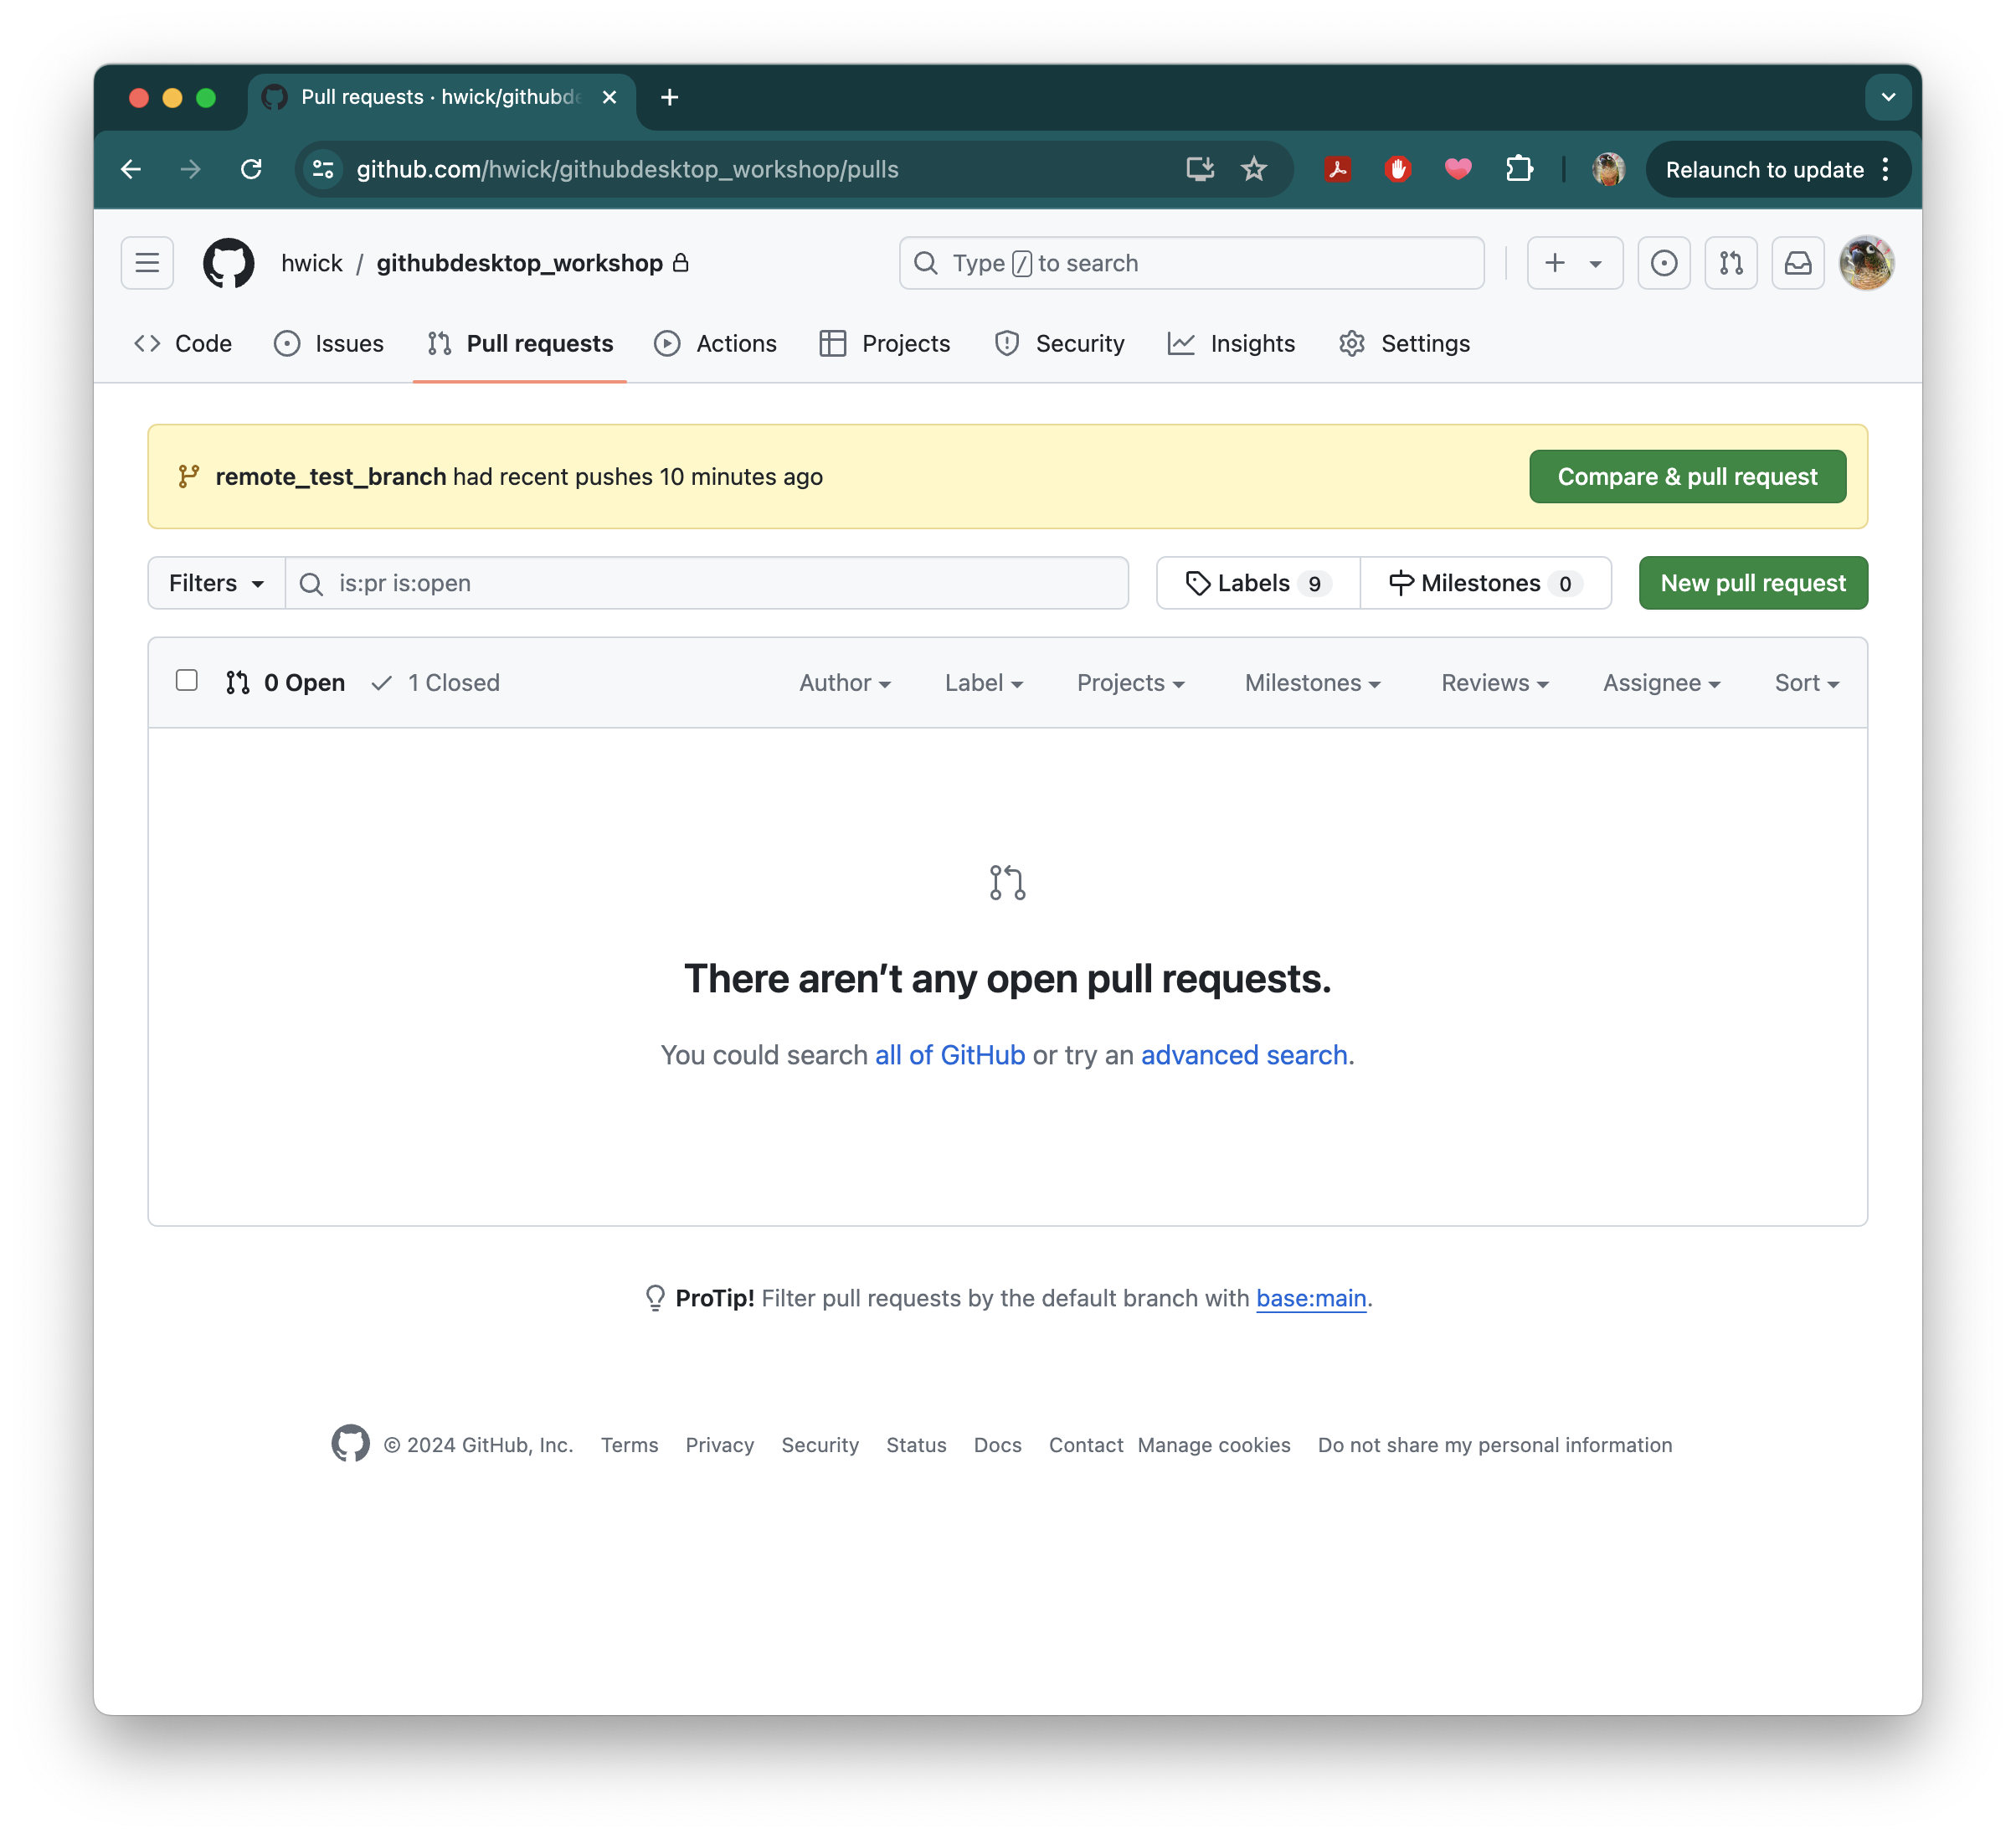
Clicking this button will bring you to a similar screen we saw before when initiating a pull from GitHub Dekstop. Go ahead and create the pull request, then confirm the pull request, just as before. Once you have confirmation that it’s been synced, you can Pull origin to see that GitHub Desktop will have the merge incorporated to main.
- Information in these materials derived from docs.github.com and https://www.atlassian.com/git/tutorials/using-branches