Learning Objectives
- Make changes to git repository on GitHub (editing, adding files, deleting files)
- Sync local and remote versions of a Git repository
- Access version history of a given file or repository
Making Changes Remotely
We now have our work both locally on our computers and online in the GitHub web interface. So far any edits we have made to our files have been directly on the local versions and then we pushed the changes to the online repository. It is also possible to make a change to your repository on the web interface.
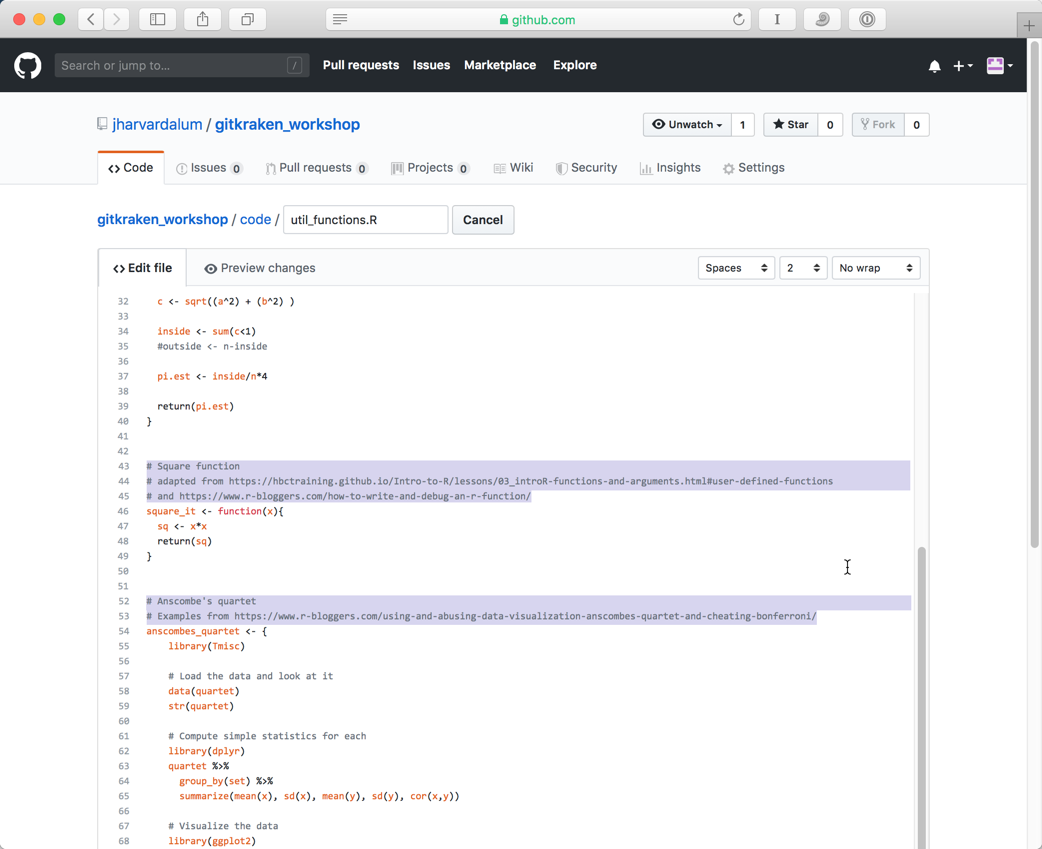
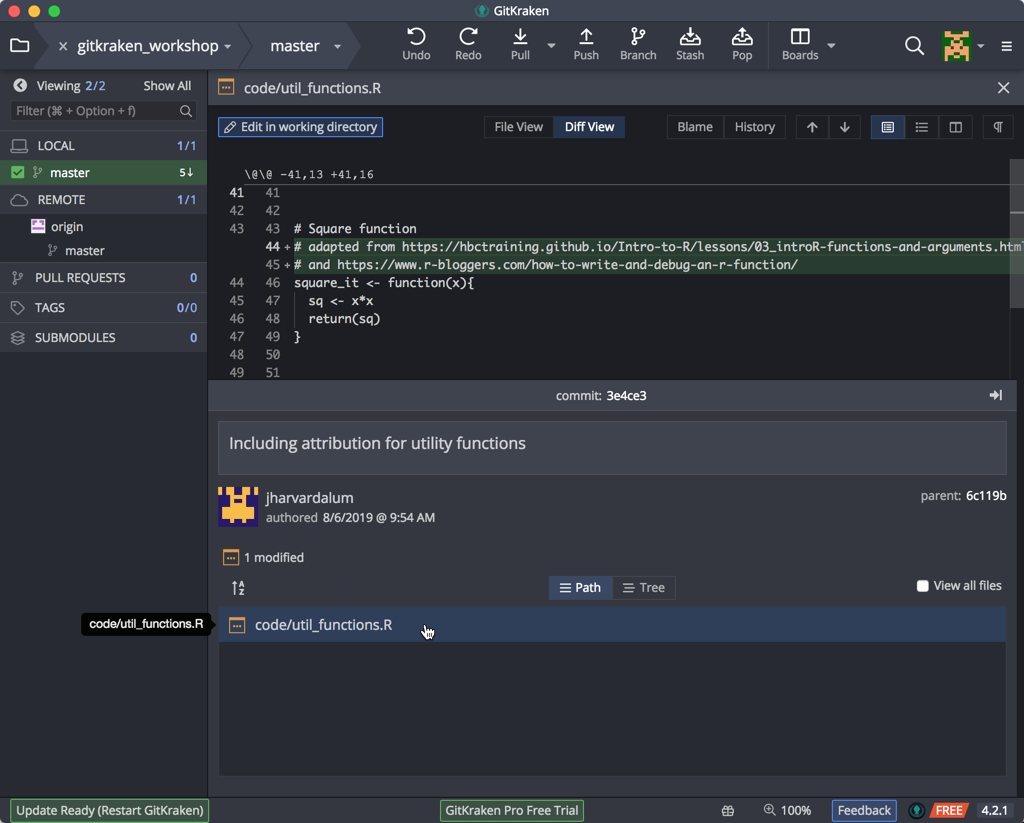
To demonstrate how to do this, we will edit one of the files in our code folder. Inside this folder we have several scripts and we realized that we forgot to give attribution to our functions in the util_functions.R file.
Navigate to the gitkraken_workshop repository online in GitHub.
Go into the code directory, and click on the name of the file (util_functions.R) in the title area. This will take you to a new page showing your document.
Click on the ‘Edit’ option or the pencil icon in the top right-hand corner of the document. You will now be able to edit the file and add some new text. We are going to make two edits to this file!
- We want to add some comments above the “Square function”. This comment provides the resources from which we obtained and adapted this code. You can copy the text provided below and paste it into your document.
# Square function
# adapted from https://hbctraining.github.io/Intro-to-R/lessons/03_introR-functions-and-arguments.html#user-defined-functions
# and https://www.r-bloggers.com/how-to-write-and-debug-an-r-function/
- Next, we will do a similar thing for the and the “Anscombe’s quartet function”. The text you need to add is provided below.
# Anscombe's quartet
# Examples from https://www.r-bloggers.com/using-and-abusing-data-visualization-anscombes-quartet-and-cheating-bonferroni/
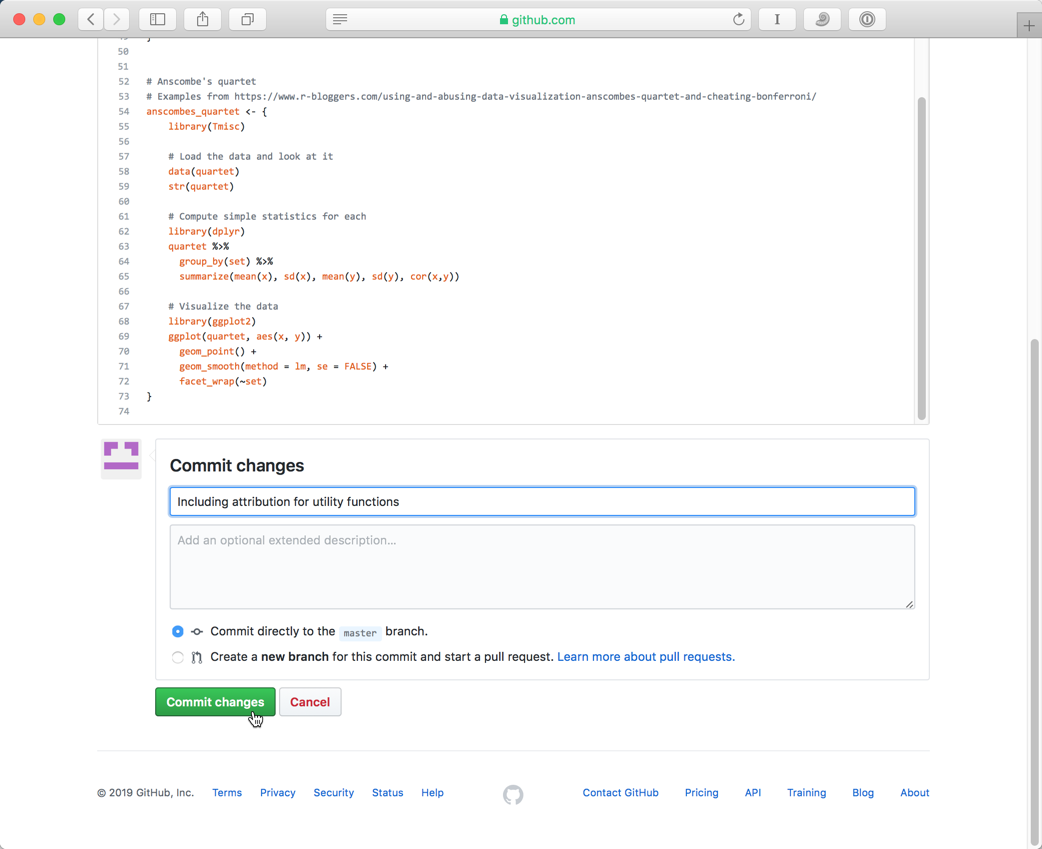
Once you have made some changes to your file, scroll to the bottom of the window. You will see the option to commit changes, and two associated text entry boxes. The first box is to give your commit a short description of the changes you made. The second box allows you to provide more detailed text about the commit, which is optional.
Provide an informative description for your commit and then press “Commit”.
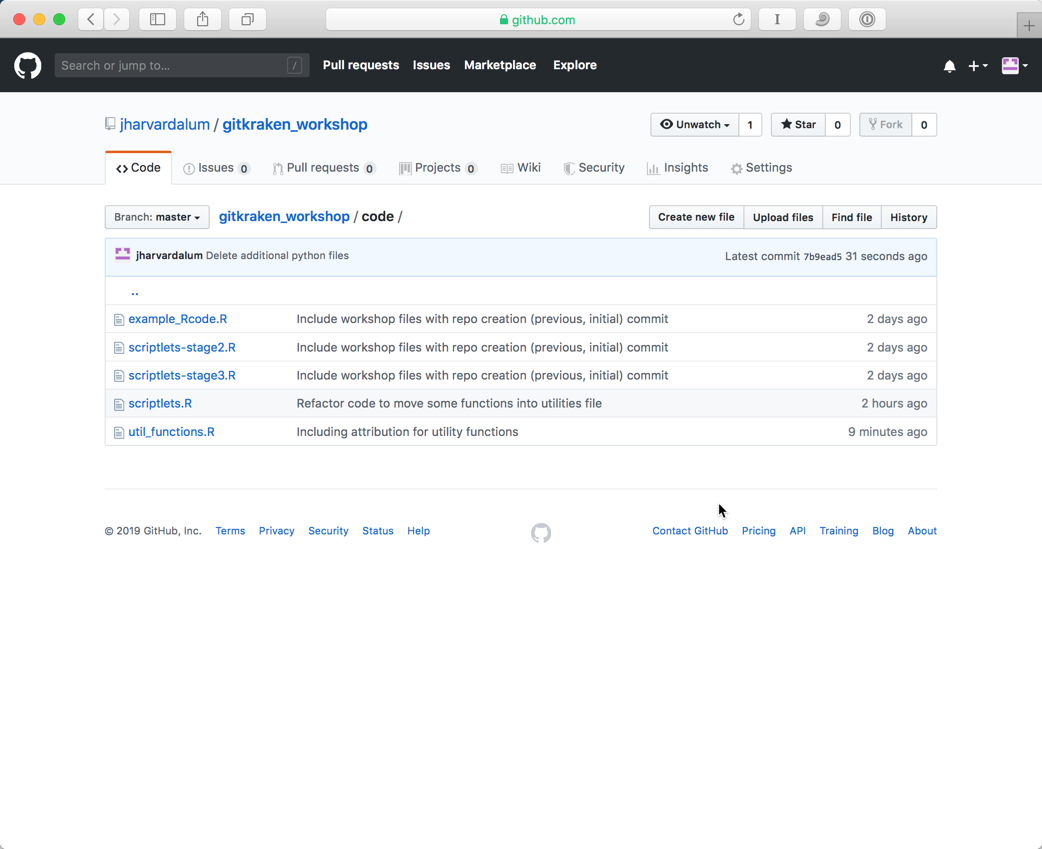
Deleting files online
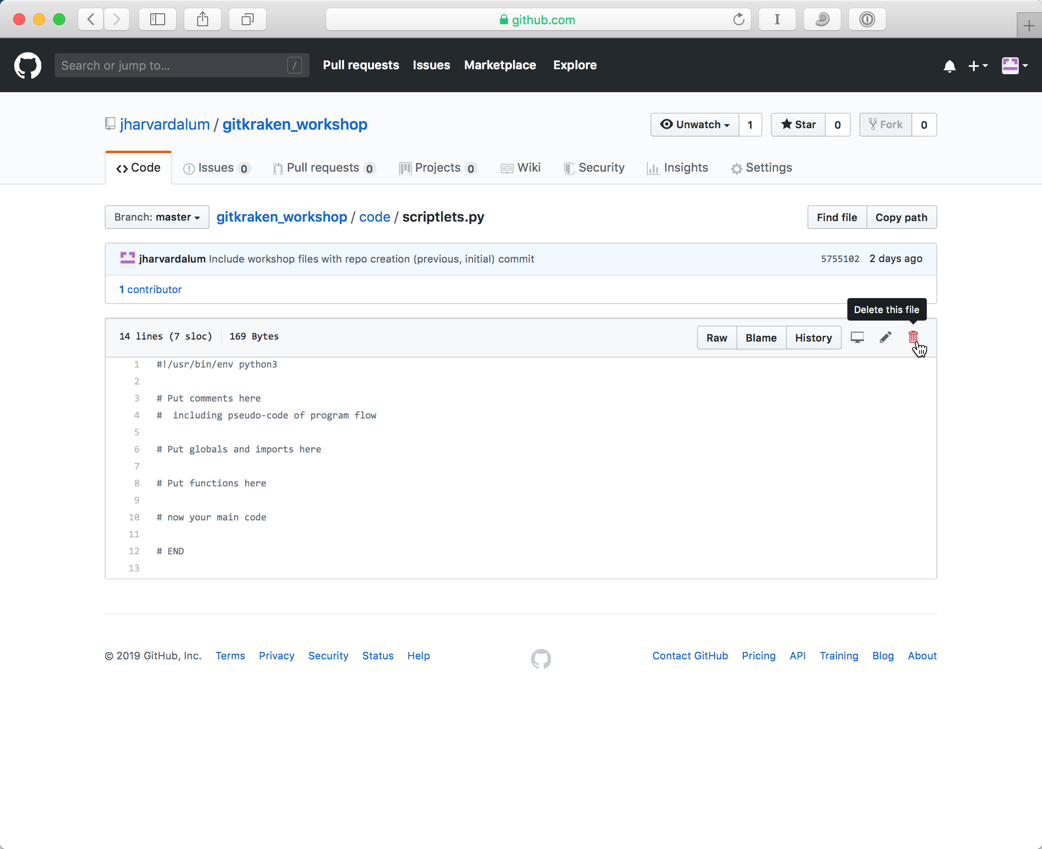
One can also add and delete files from the repositiory online. To do this, you will first need to view the file itself (by clicking on the file’s name). Once you are viewing your file you will see a trash can icon at the top right-hand side, located to the right of the edit/pencil icon.
Let’s delete one of the files in our code folder. Since we’re working in R, we will remove the python code files. Click on the file and find the trash can icon and click on it:
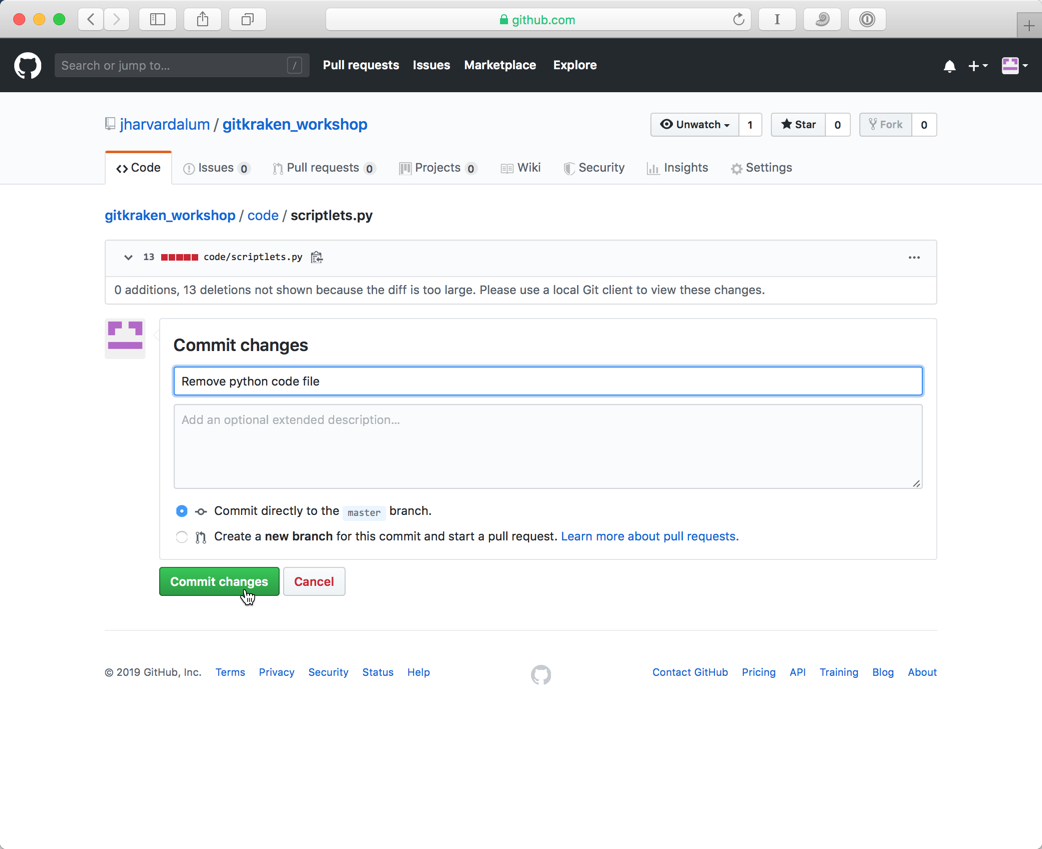
You will see that this solitary action is not complete until you provide a description and a subsequent Commit. Deleting a document is a change, and is therefore tracked like any other change you make to your repository. Provide a description and commit this change.
Excercise
In your code folder, you will find that there are two more Python files (.py). Identify those files and delete them using the method described above. Once complete, the code folder in your repository should look like the following:
Adding files to a repository online
We can also add files and folders to the repository via the web interface. There are two ways to do this, by uploading existing files or create new files directly in the interface.
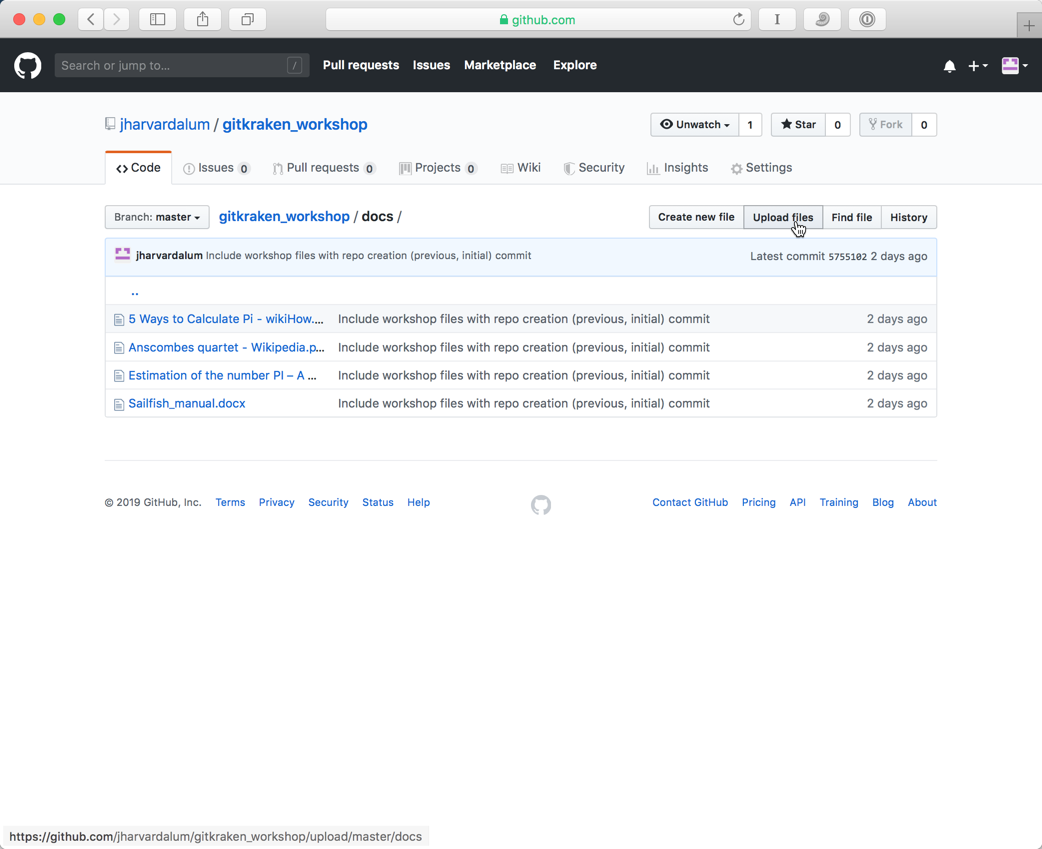
Uploading files
We’ll start with adding files through upload. In your gitkraken_workshop repository, navigate to the docs folder. On this page you will see all of its contents listed, and at the top there is an “Add File” button. If you click on this, you will see two dropdown options appear: “Create new files” and “Upload files”. Select “Upload files”. This will take you to a new page.
NOTE: The screenshot below is slightly outdated and does not accurately reflect the dropdown options described above. Please refer to the text above for the actual options.
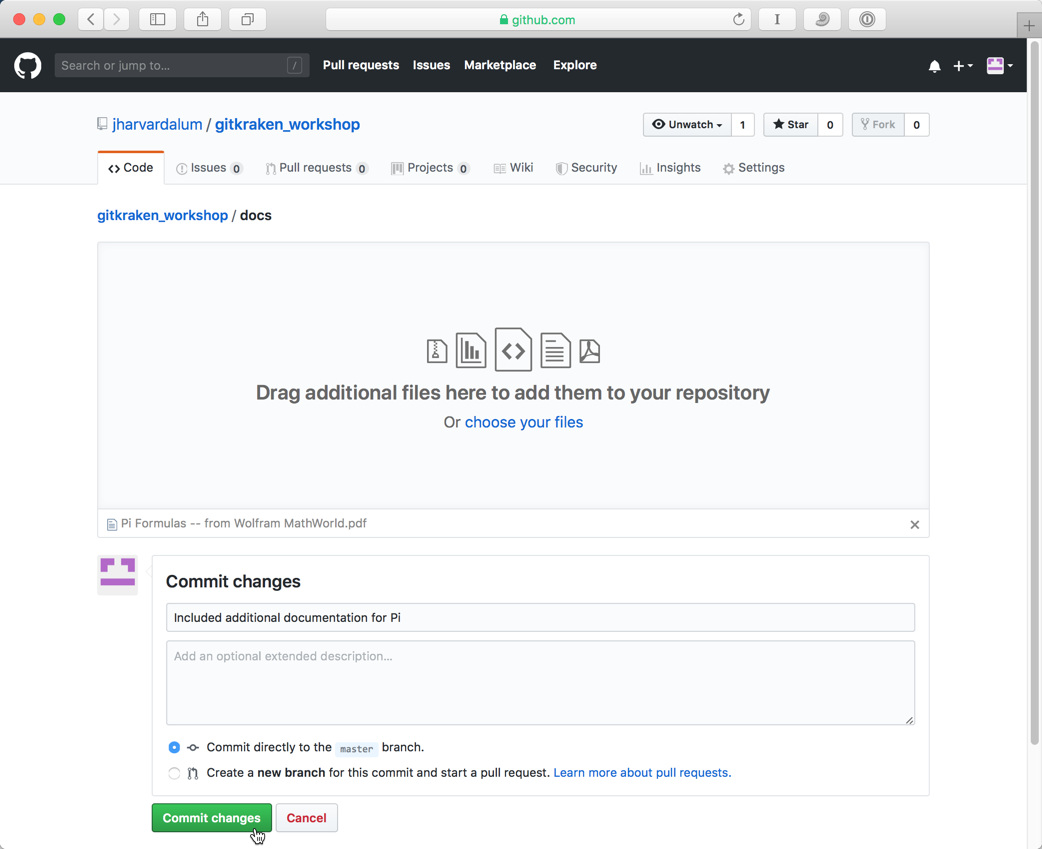
The file that we would like to add to this folder is called “Pi Formulas – from Wolfram MathWorld.pdf”. The document is located in our workshop downloads folder. To add it to the repo using the web interface, you can do one of two things:
- Find the file in a File Explorer window on your computer, and then drag and drop it on to this page.
- Click on the “choose your files” and find/select the file in the window that pops up.
Once the file is selected, the Upload will require a Description and subsequent Commit:
After committing, you should now see the Pi Formulas... document in your docs folder.
Exercise: Creating a new file
- Navigate to the
codefolder. We are going to create an Rmarkdown file in this directory. - Click on the “Add File” button and choose “Create new file” from the drop-down button.
- You will now find yourself on a new page, with your cursor flashing in a text box at the top of the page. Give your new file the name
workshop_rmd_exercise.Rmd. - In the space below, you can add the contents of your file. Locate the .Rmd file you created in Day 1 self-learning. Copy and paste the code into the browser space labeled “< > Edit new file”.
- Scroll down to the Commit box at the bottom and give your commit a descriptive title. Then click “Commit new file”.
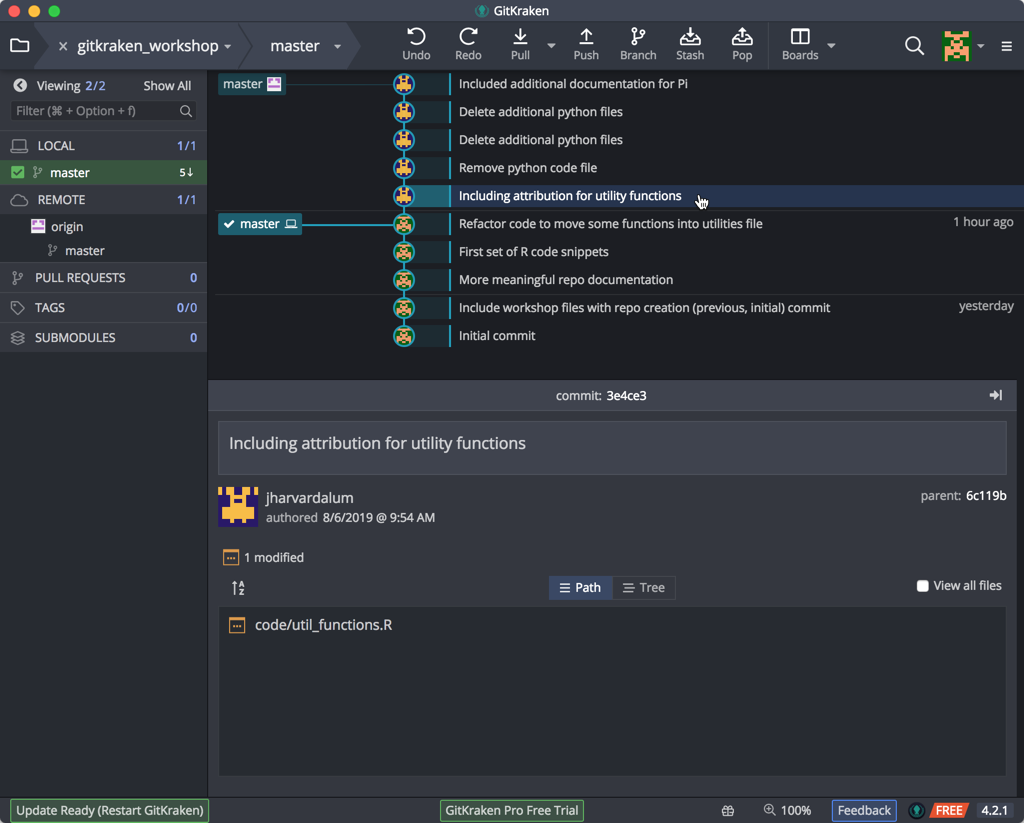
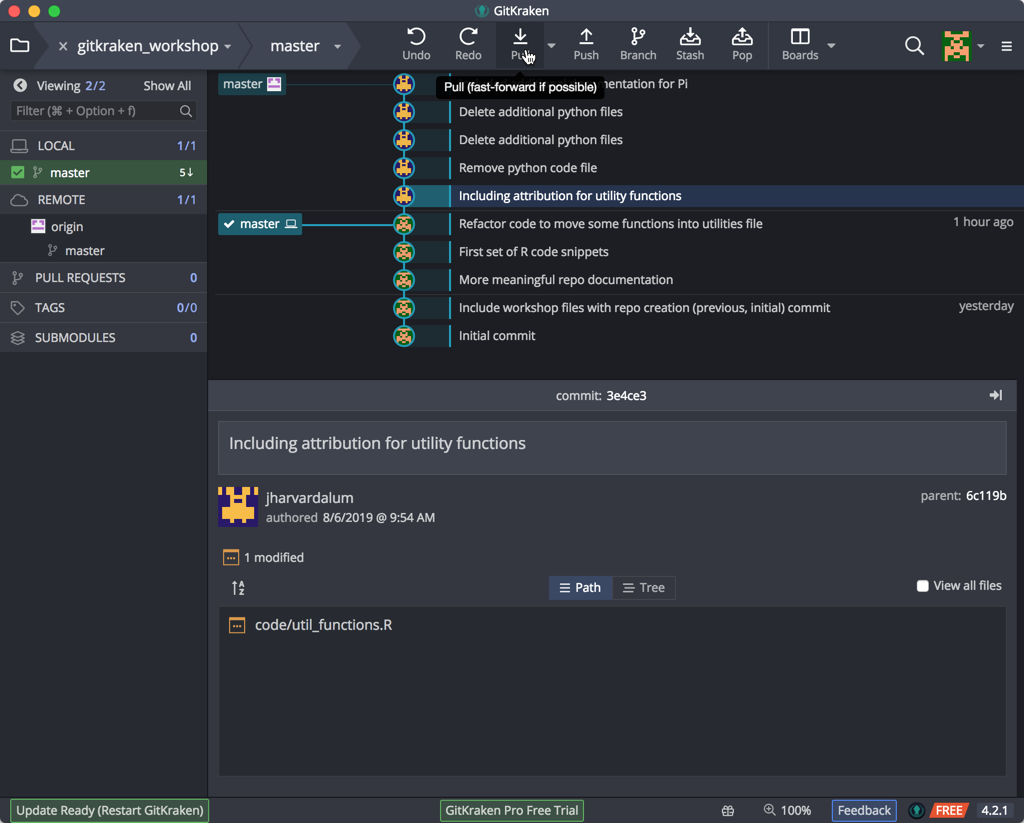
Syncing remote changes to your local repository
Let’s return to our local machine and apply the changes we made online to our local repo. GitKraken has already noticed that our remote repo has changed, and the markers for the two repos (local and remote) have diverged:

Click on the timeline entry to view the file changes:
And click on the filename itself to see the changes made within each file:
You can see from this view that we now have the text with changes highlighted in green and red.
- Red indicates where things have been removed
- Green indicates addition of text
Click on the filename again to return to our commit timeline.
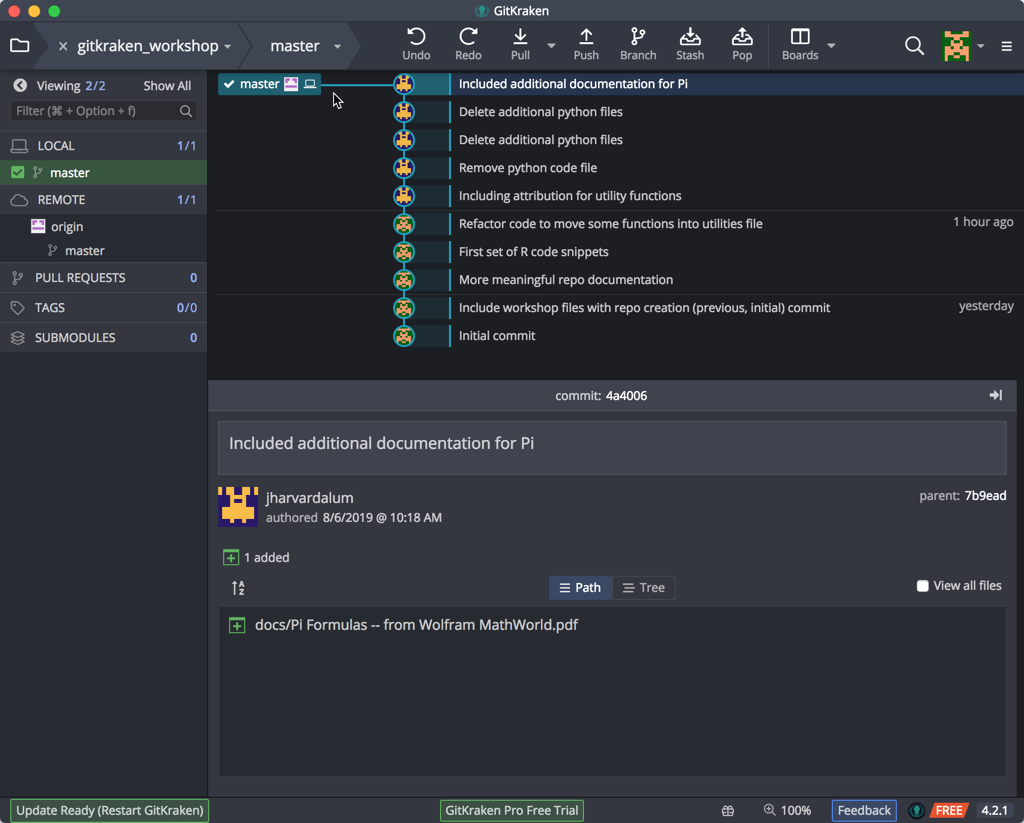
To get all these changes back onto our own (local) computer, we need to Pull these changes back to our local repo, using the Pull button in the GitKraken toolbar towards the top of the screen:
If all goes well, you should see a brief ‘Success’ message, and your repos should be in sync again.
NOTE: Two important things to keep in mind when making changes on the web interface:
- On GitHub.com file changes are done serially, so commits with modifications to multiple files cannot be done here.
- All of these changes in the web browser are realtime on the GitHub remote, i.e. the commits take effect immediately without an intermediate add or stage step.
Exercise
Take a screenshot of your GitKraken window, which shows the changes that you have synced to your local repo. Upload this image to the Dropbox link on the schedule page.
Viewing File Histories
One very useful feature of this and other Git clients is looking at how a file has changed over time.
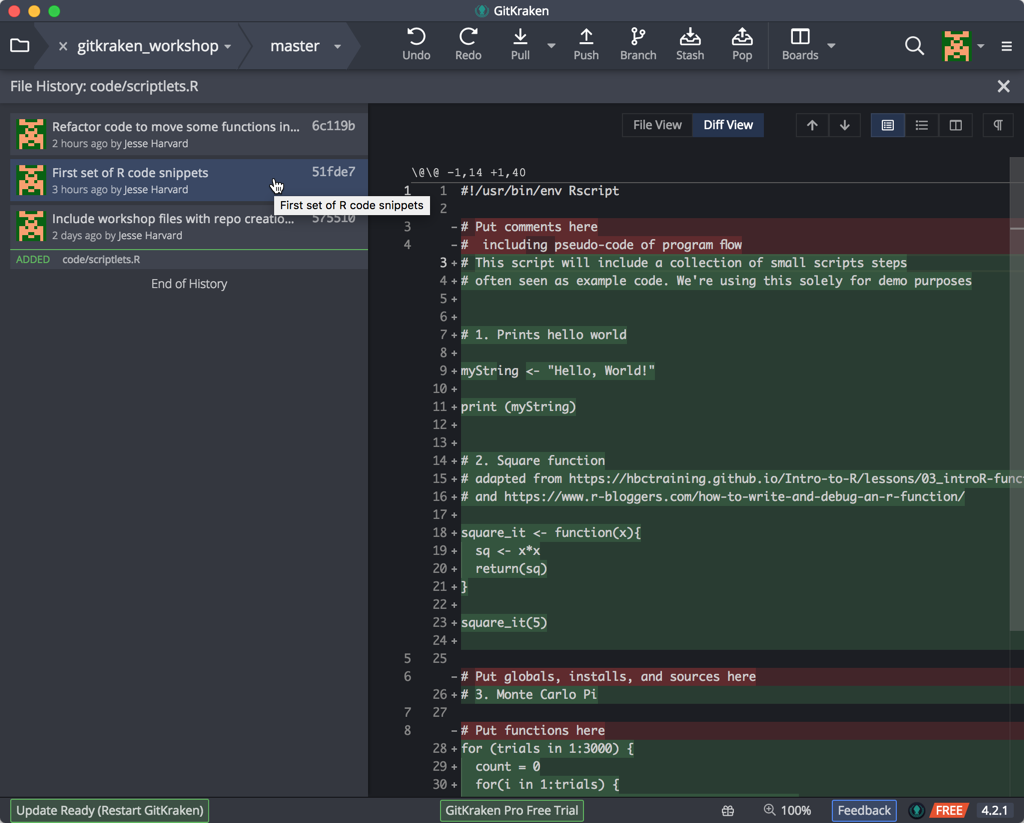
In GitKraken, select the timeline entry ‘Refactor code…’, and in the section below, right-mouse click on the scriptlets.R file and select “File History”.

You should now see the history of the scriptlets.R file. Our code file is displayed with comments on the left and differences between the (left) selected and previous versions:
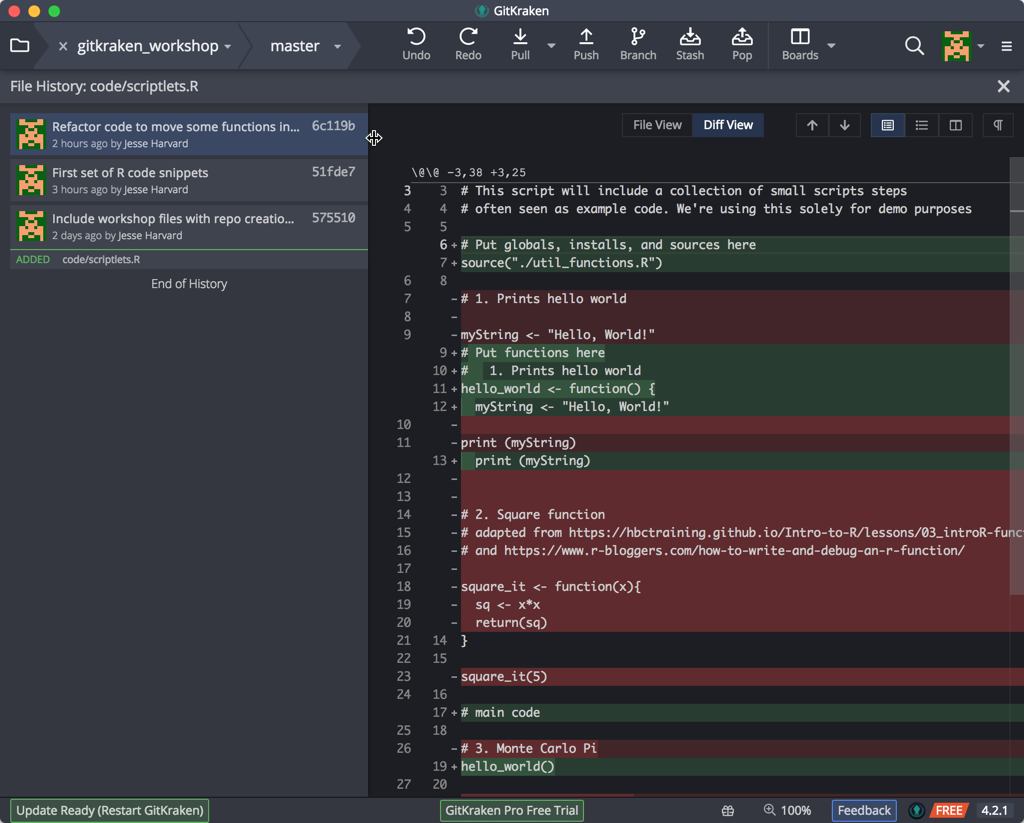
Clicking on the previous comment shows the next level of changes:
And finally, clicking on the File View button shows all the changes together, with the log (legend) of changes being indicated with color coding:
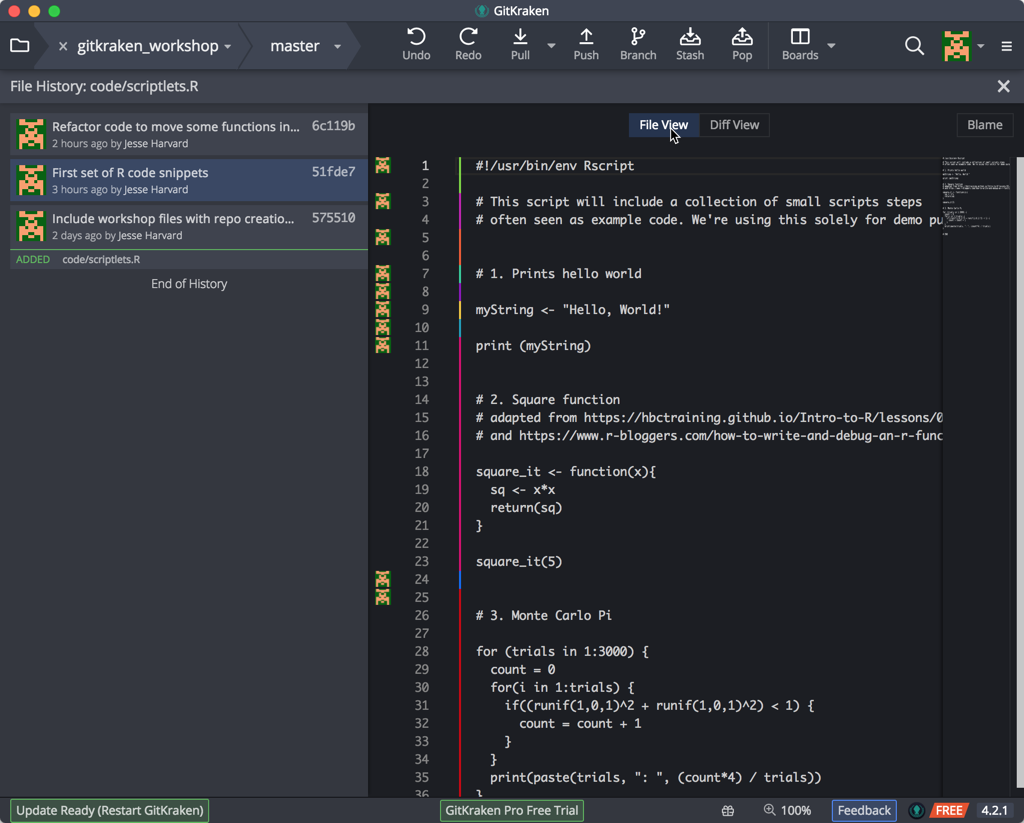
To close this window and return to the commit timeline, click on the X at the upper right.
-
Materials used in these lessons are derived from Daniel van Strien’s “An Introduction to Version Control Using GitHub Desktop,”, Programming Historian, (17 June 2016). The Programming Historian ISSN 2397-2068, is released under the Creative Commons Attribution license (CC BY 4.0).*
-
Materials are also derived from Software Carpentry instructional material. These materials are also licensed under the Creative Commons Attribution license (CC BY 4.0).*