Creating GitHub Pages
Learning Objectives
In this lesson we will discuss:
- Development of a custom GitHub Pages HTML
Create a new repository
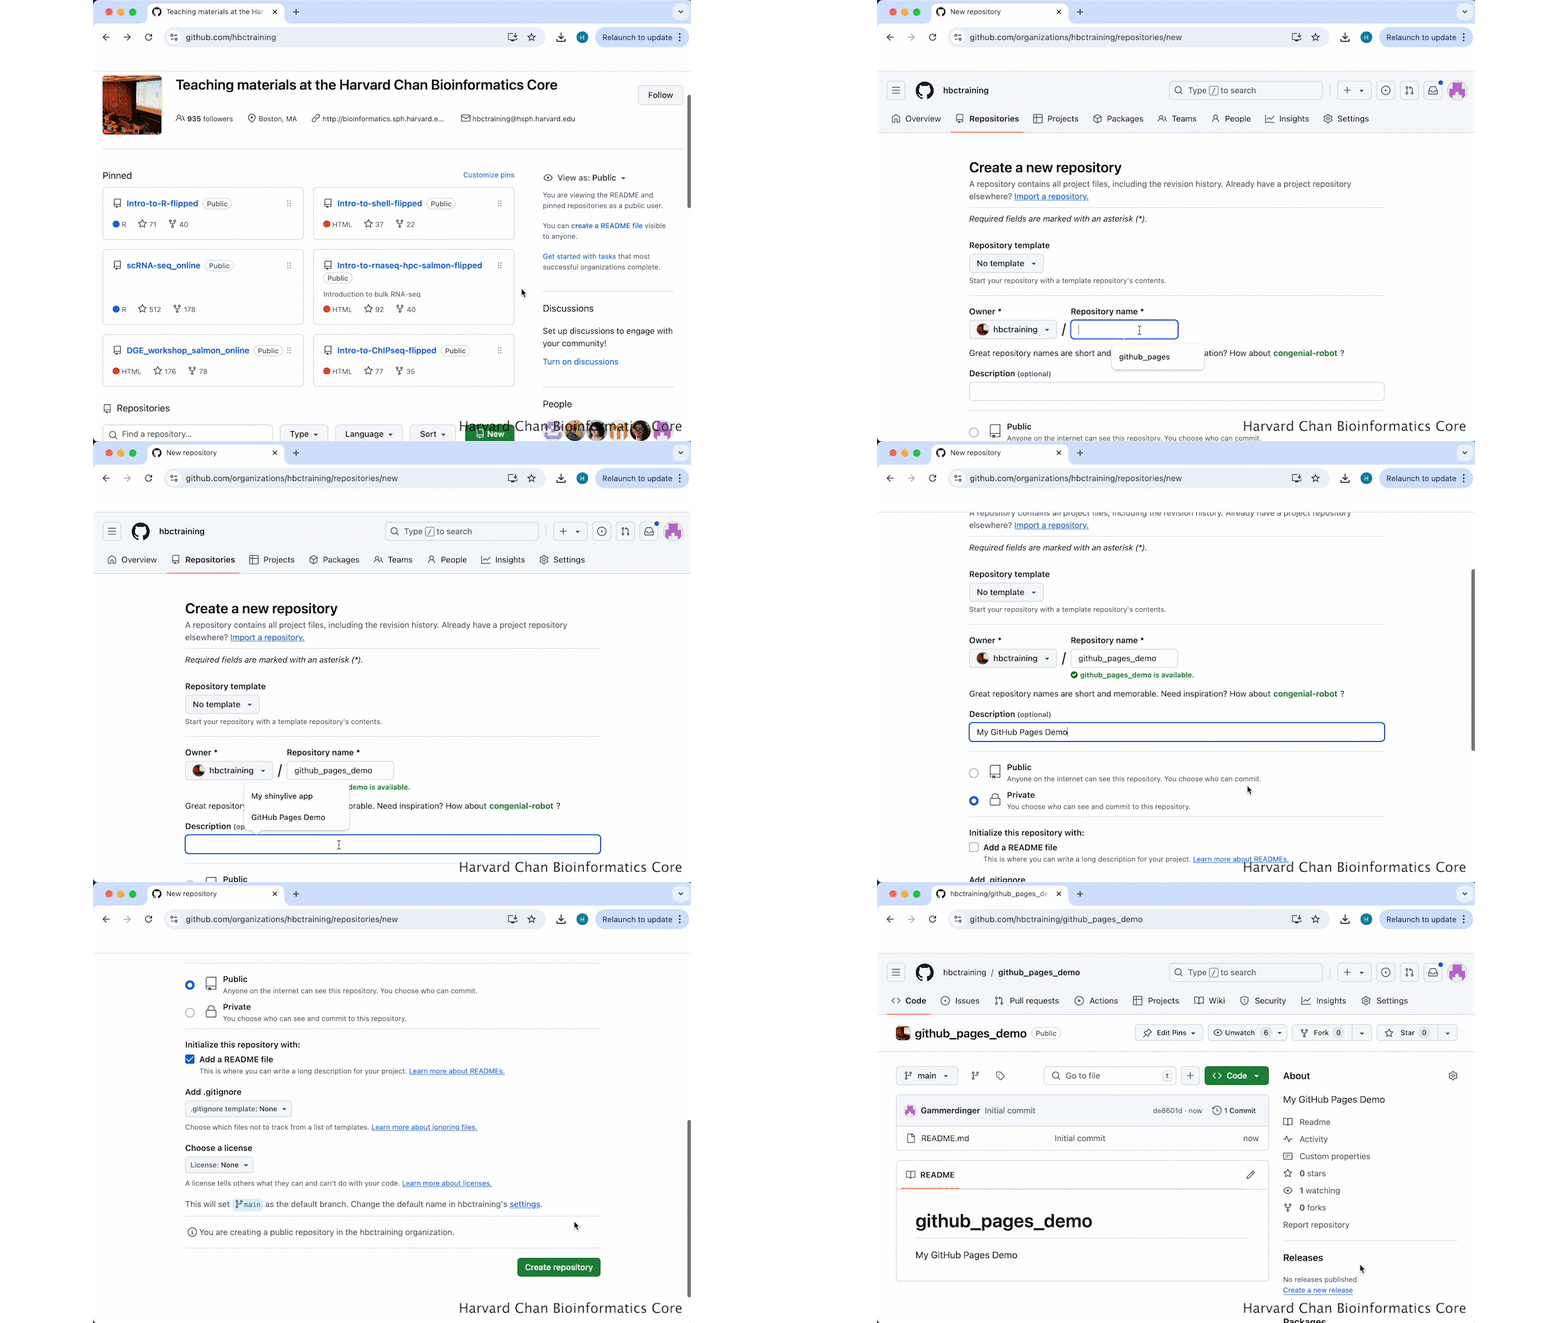
1. Go to your GitHub account and click on “New” to create a new repository
2. Create a name for your repository
3. Click “Public” to make your repository Public. You won’t be able to make a GitHub Pages for a Private Repository
4. Underneath “Initialize this repository with:”, check the box for “Add a README file”
5. Then click “Create Repository”
These steps are illustrated in the GIF below:
Edit Pages Settings
-
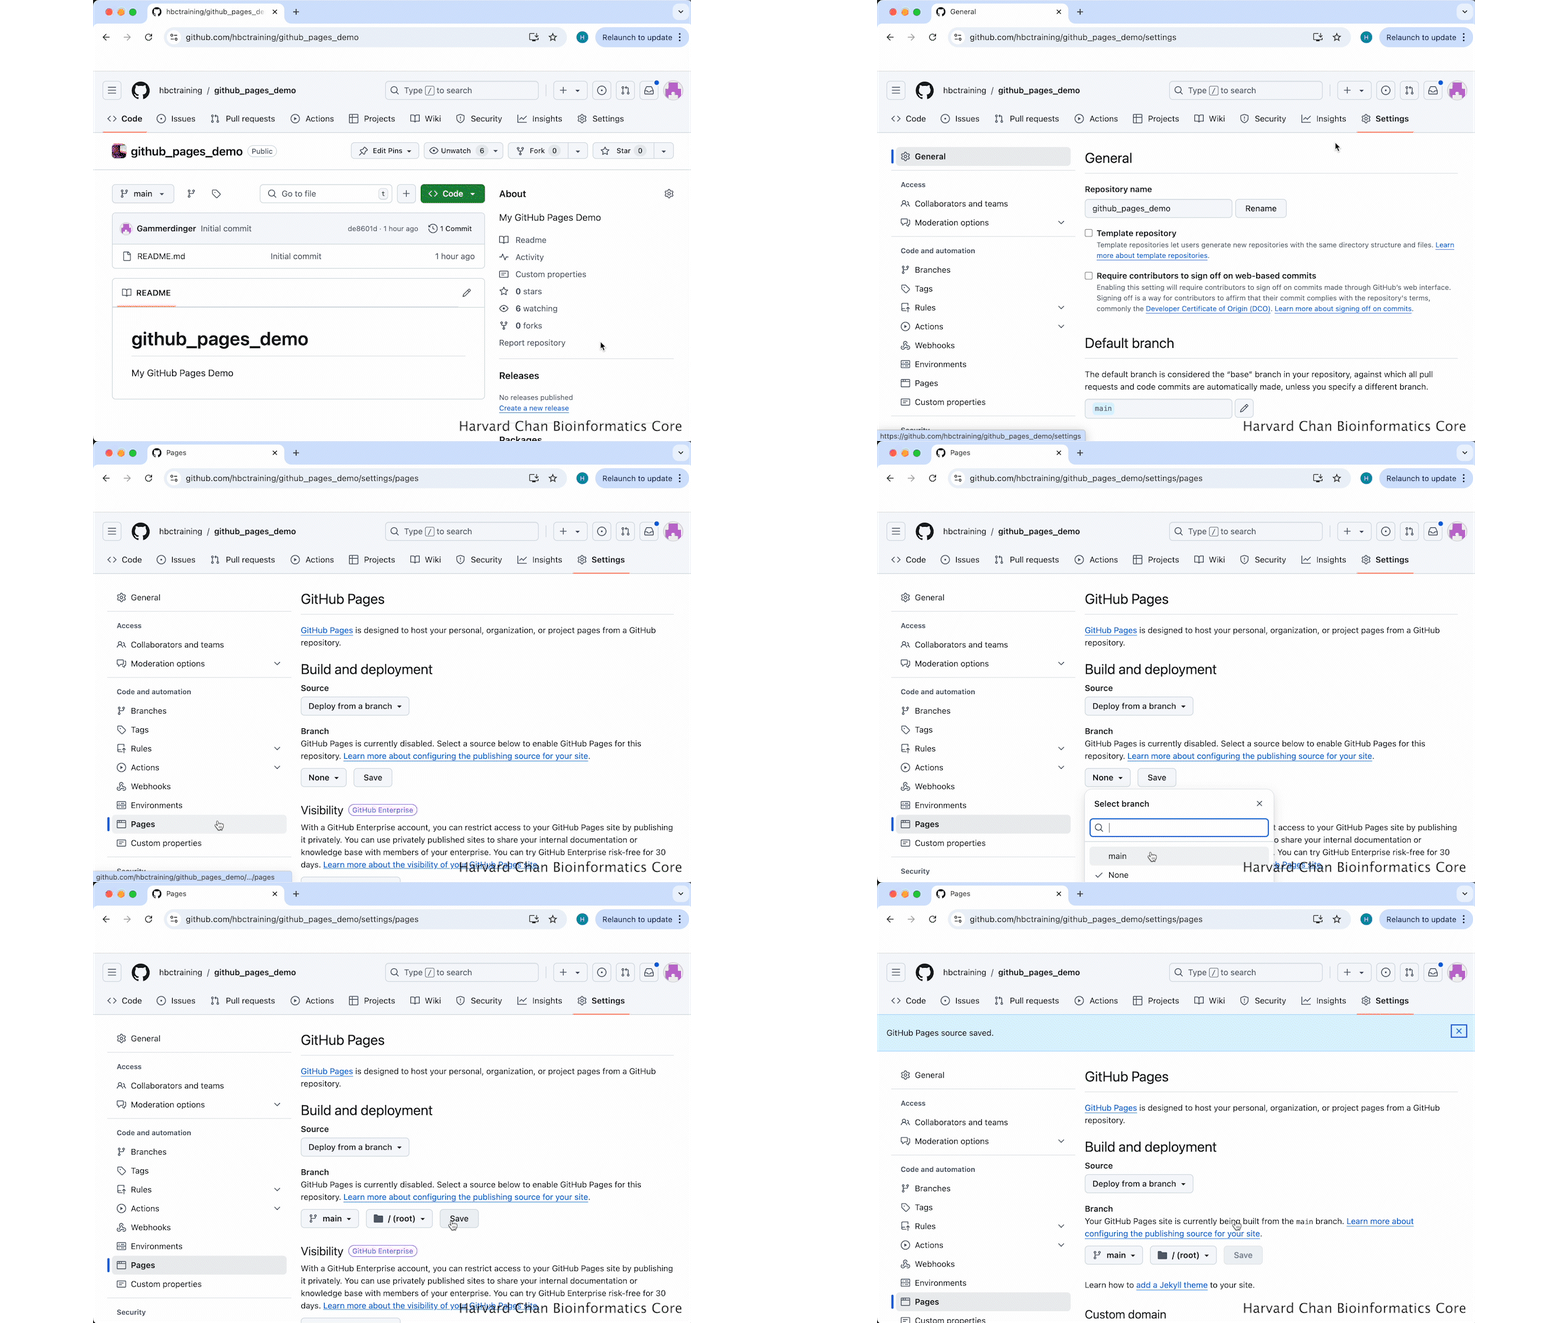
On the main GitHub for your Repository, click on “Settings”
-
On the sidebar, select “Pages”
-
Underneath “Branch”, change the dropdown menu from “None” to “main”
-
Click the “Save” button
These steps are illustrated in the GIF below:
Inspecting the GitHub page
You should now be able to navigate to https://<your_github_user_or_group>.github.io/<your_repo_name>/. In this case, we will navigate to https://hbctraining.github.io/github_pages_demo/. At this point this page should look like:

Note: If you go to https://hbctraining.github.io/github_pages_demo/ it will show after later formatting has been added.
Adding formatting
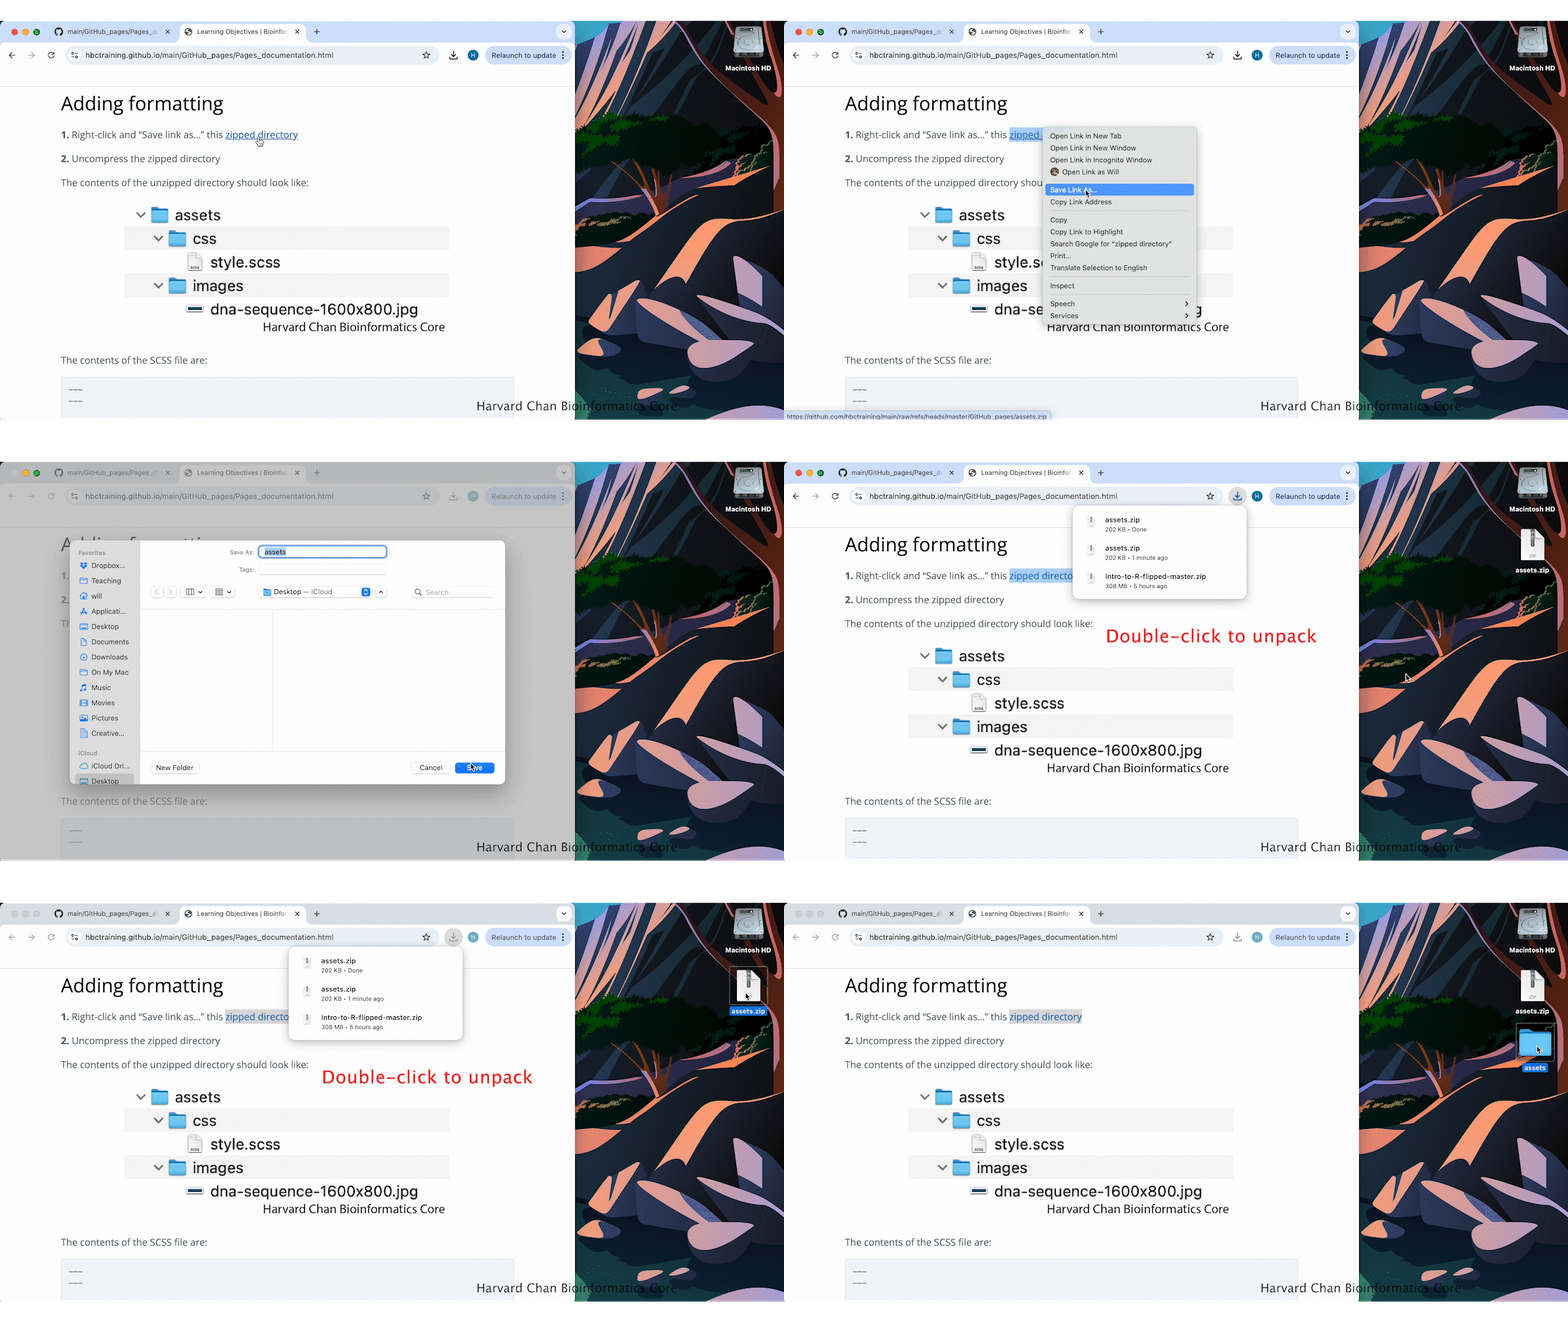
1. Right-click and “Save link as…” this zipped directory
2. Uncompress the zipped directory
These steps are illustrated in the GIF below:
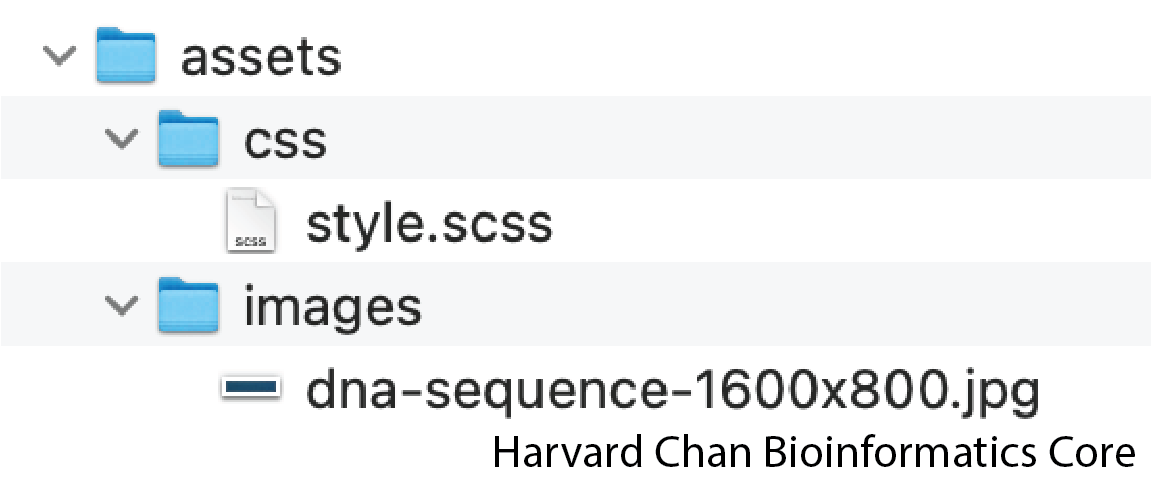
The contents of the unzipped directory should look like:
The contents of the SCSS file are:
---
---

@import "jekyll-theme-cayman";

.page-header { color: #fff; text-align: center; background-image: url("../images/dna-sequence-1600x800.jpg"); }

.main-content h1, .main-content h2, .main-content h3, .main-content h4, .main-content h5, .main-content h6 { margin-top: 2rem; margin-bottom: 1rem; font-weight: normal; color: #000000; }
And the dna-sequence-1600x800.jpg will be the banner that we will add to the top of the webpage.

3. Right-click and “Save link as…” this YAML file
The contents of the YAML file are:
theme: jekyll-theme-cayman
title: Enter your title here
There are more things you can add to this YAML file, such as Google Analytics and Descriptions, which are outside of the scope of this tutorial.
4. Upload the assets directory and YAML file to your repository
This step is illustrated in the GIF below:
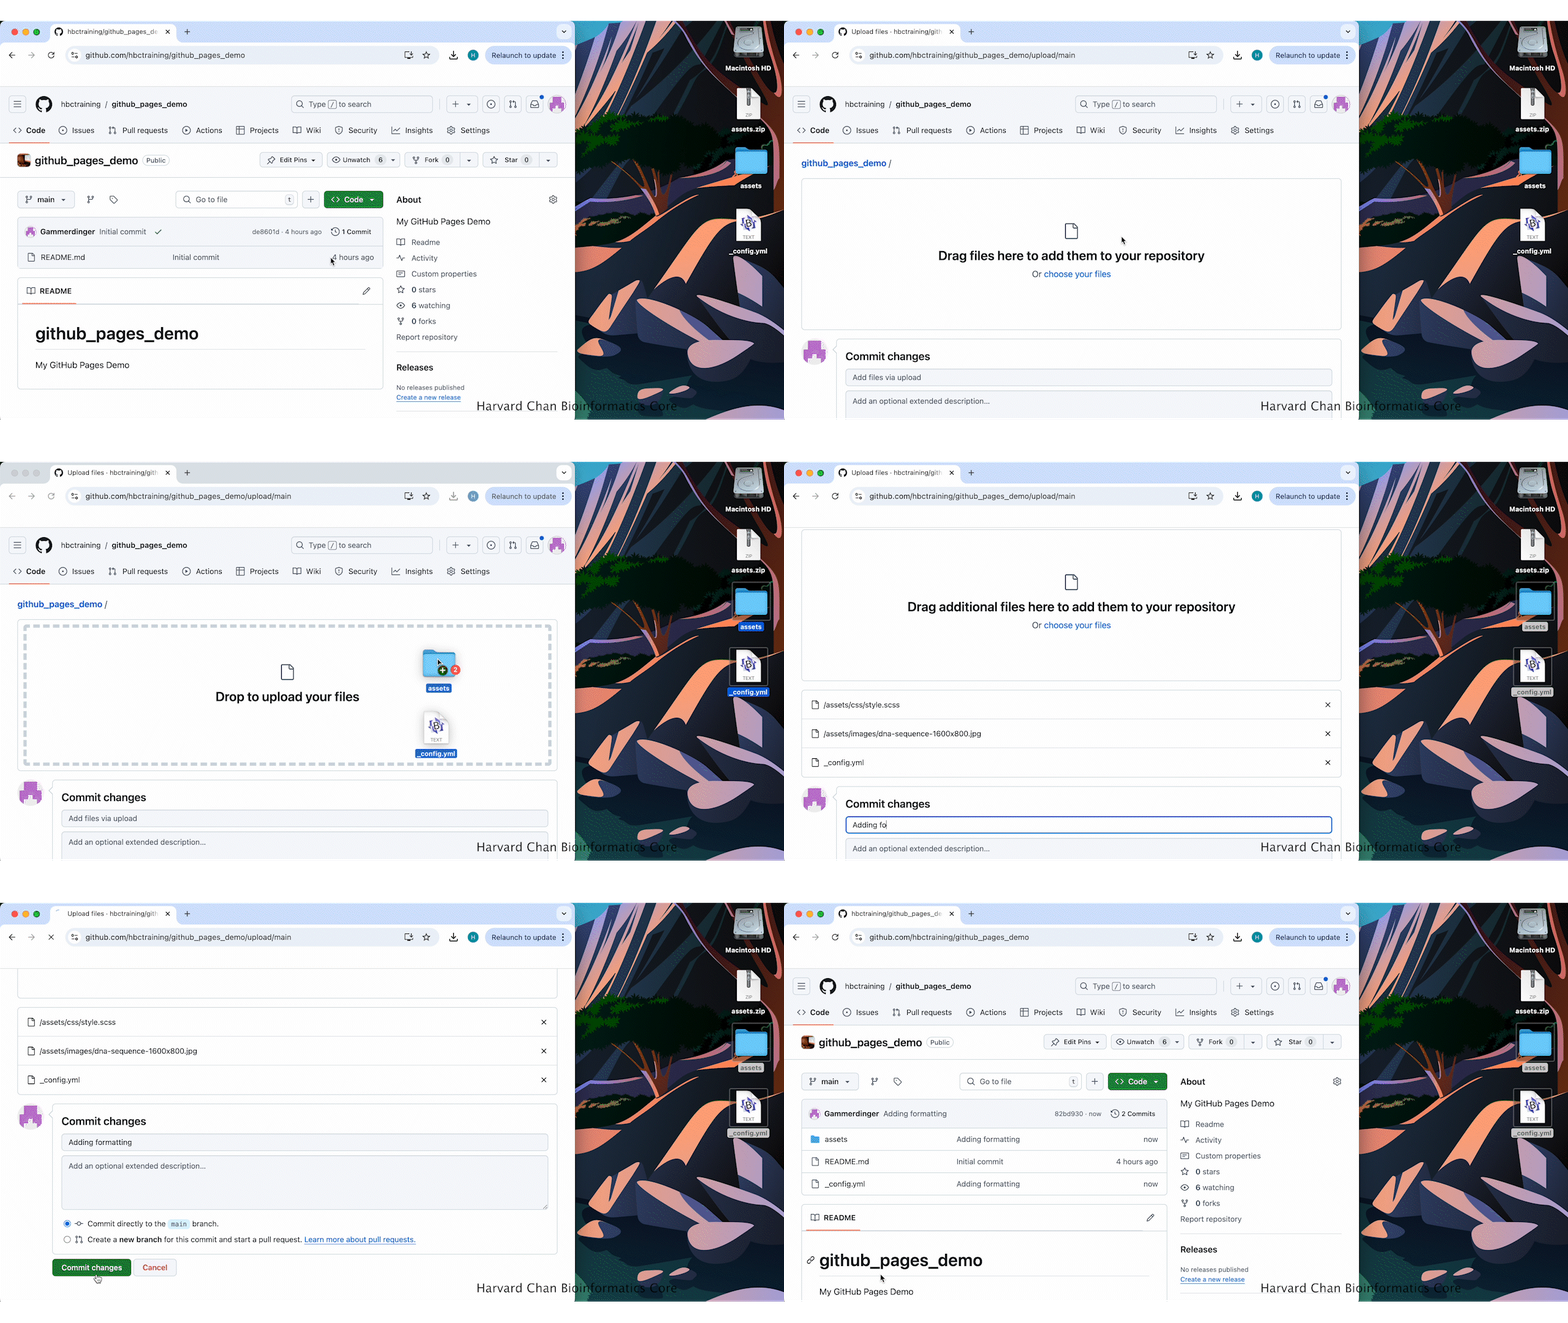
Now, return to your webpage (https://<your_github_user_or_group>.github.io/<your_repo_name>/) and it should have the banner and theme added!

Note: It may take a few minutes to render the updates on the webpage.
The example of this demo can be found here.
Additional Resources
Two webpages where you can find more information on what we’ve demonstrated can be found below: